A step-by-step guide on how you can enable live preview for text field.
From the Optionia dashboard, click Option Sets from the bottom-left corner.
Then, click the Option Set where you want to enable the live preview.

You can add the Text option to either a new option set or an existing one. You can learn to create a new option set in another part. For now, we will discuss how to add a text option to an existing option set.
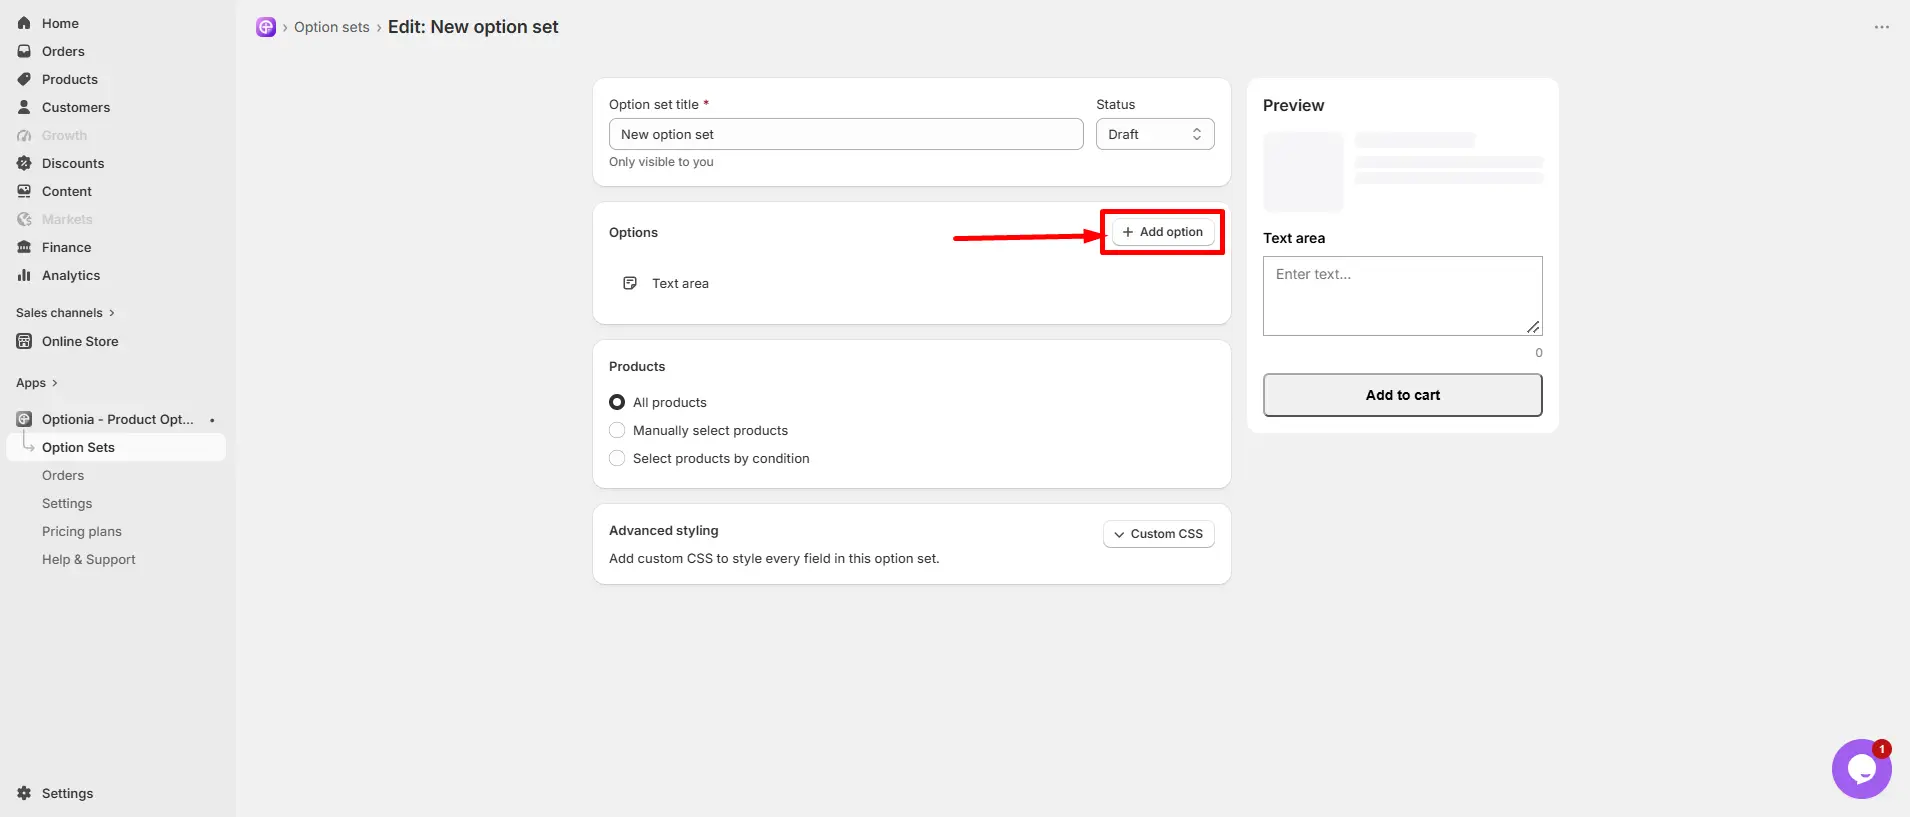
Click the “add options” button in the top right corner.
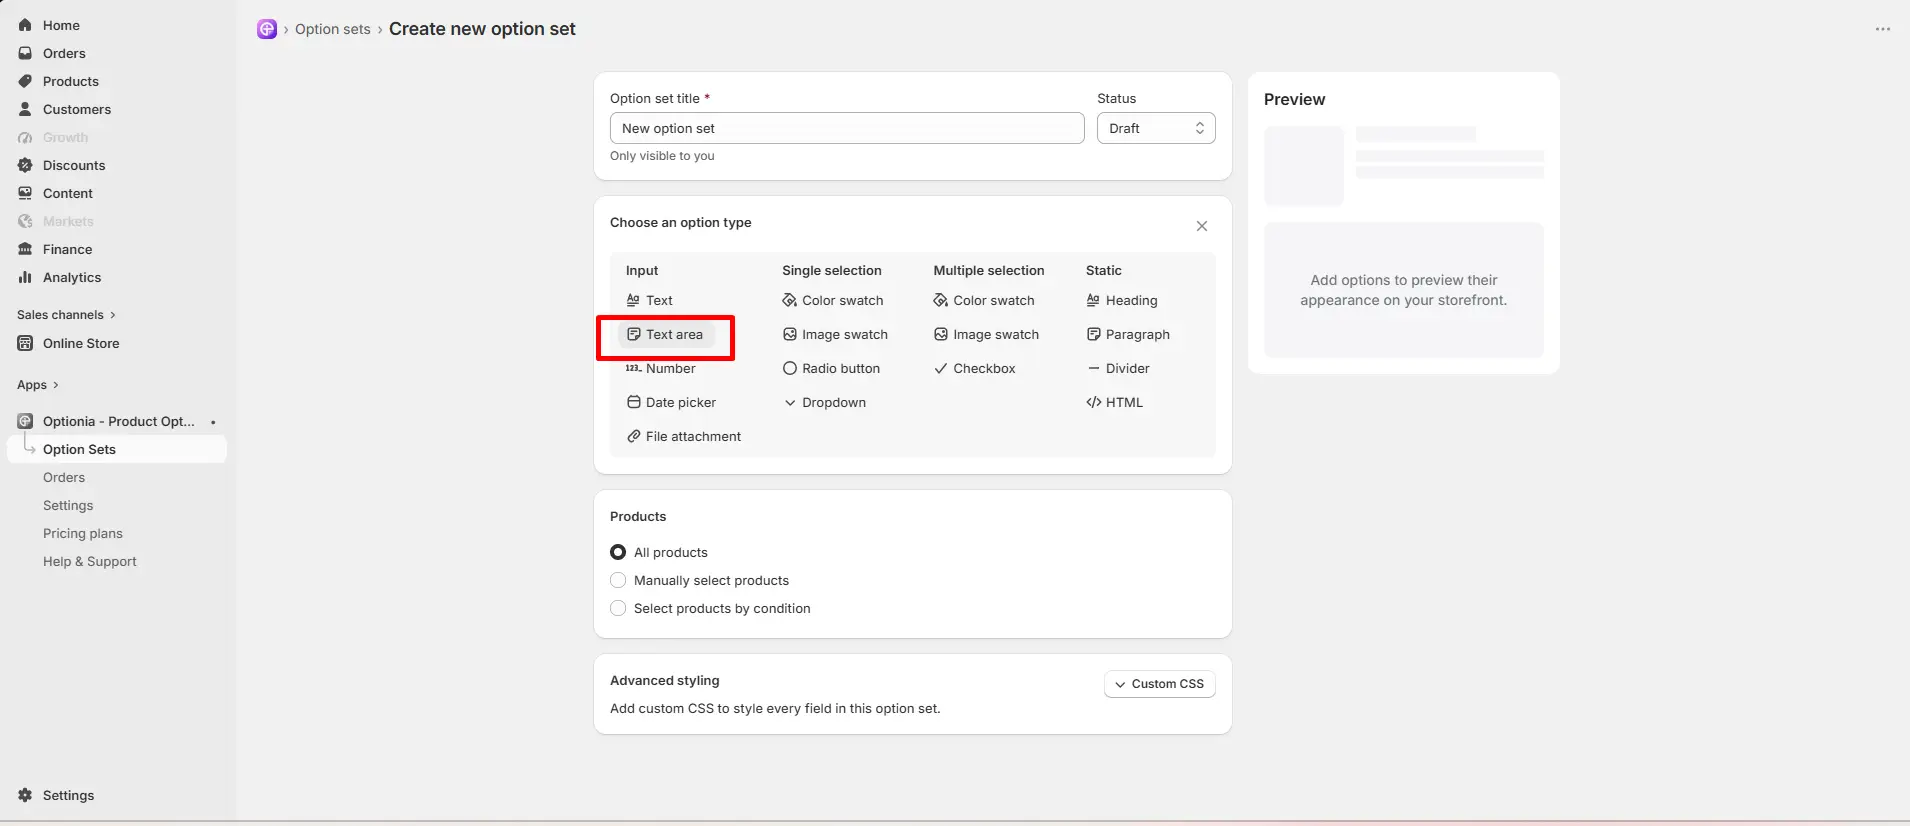
Select the “Text area” option under Input.
Live Preview is available on the Pro plan.
Live Preview allows customers to see the text they enter directly on the product preview. This helps them visualize how their personalized text will appear on the product before adding it to the cart.
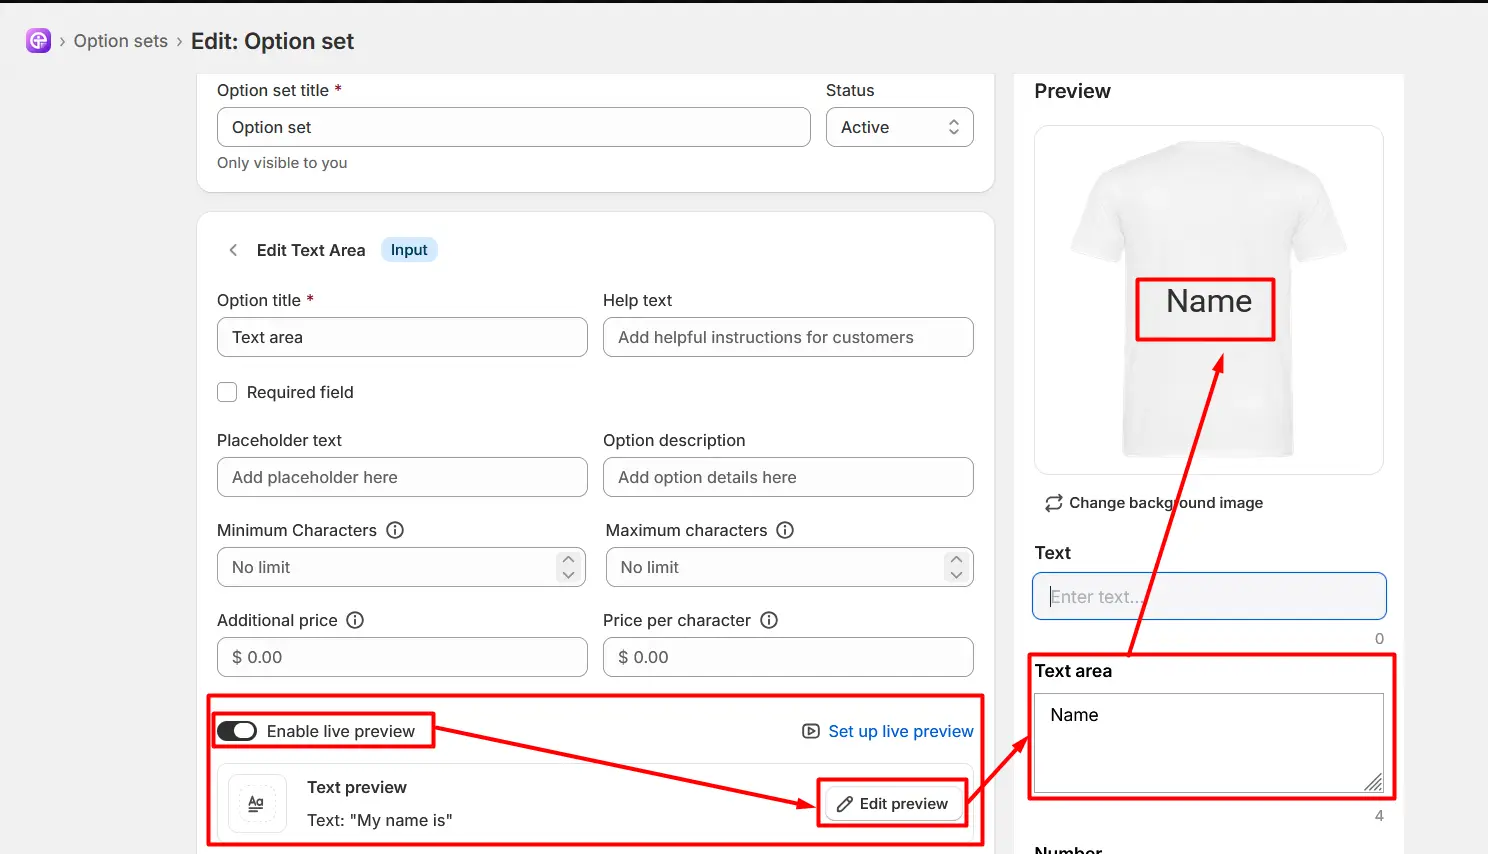
To enable Live Preview:
Open the Text option in your Option Set.
Turn on the Enable live preview toggle.
Click Edit preview to customize the Text Preview settings.
Use the preview editor to configure how and where the entered text appears on the product.
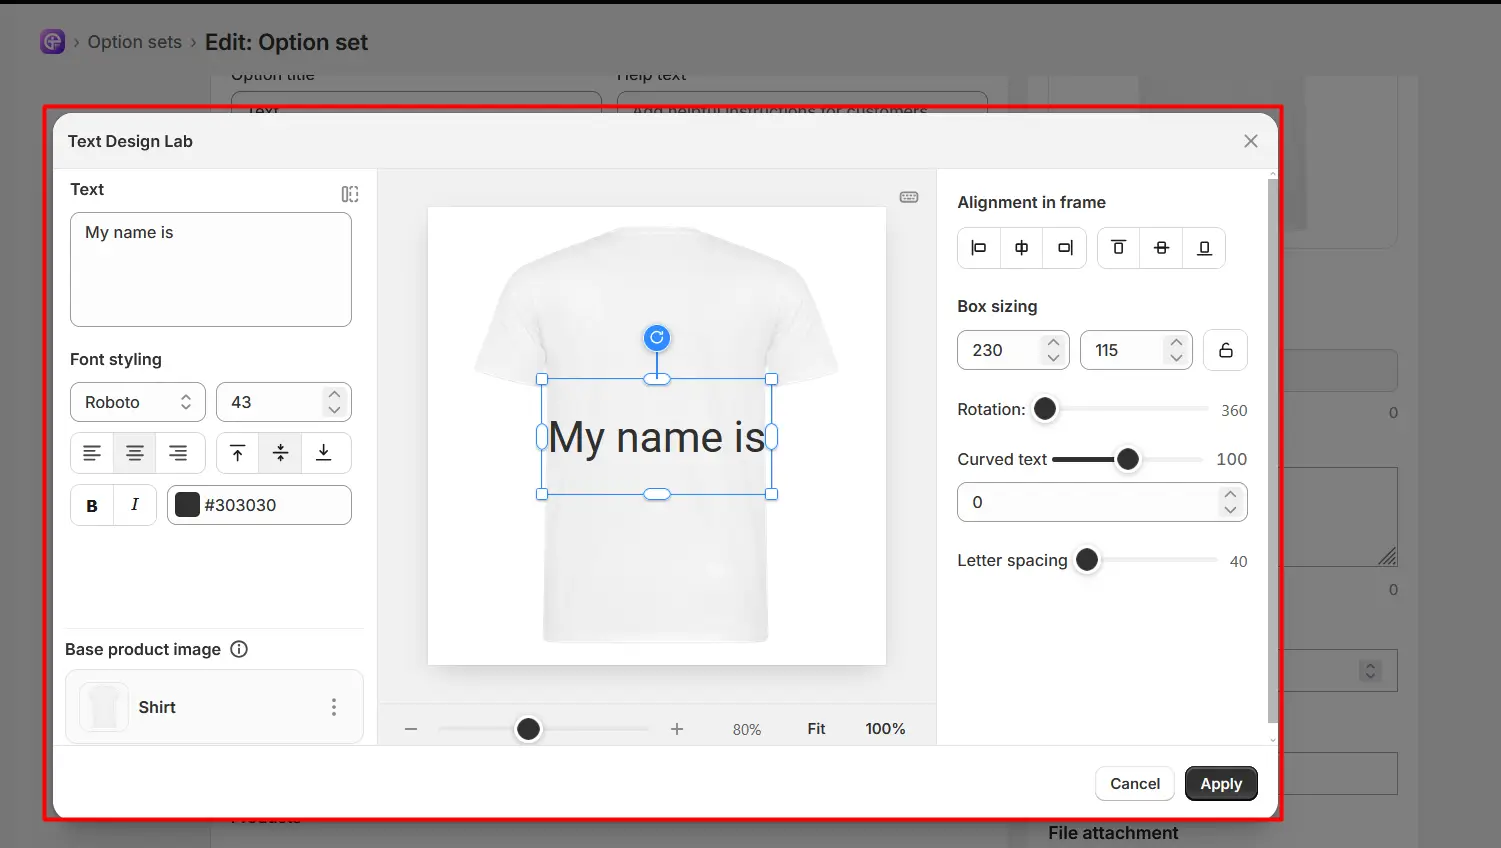
The Preview editor provides several controls to customize the appearance and position of text on the product.
Text: Enter or edit the text you want to display on the product.
Font Styling: Choose the font, font size, text alignment, bold/italic formatting, and text color.
Base Product Image: Displays the product image being used for the design. You can change the background image if you want.
Alignment in Frame: Position the text left, center, right, top, middle, or bottom within its frame.
Box Sizing: Adjust the width and height of the text box. The lock option can maintain the current proportions.
Rotation: Rotate the text to the desired angle.
Curved Text: Adjust the text curvature to create an arched or curved text effect.
Letter Spacing: Increase or decrease the spacing between individual letters.
Zoom Controls: Zoom in or out of the product preview and use Fit or 100% view.
Cancel: Discard the changes and close the Preview editor.
Apply: Save and apply the text customization.
After configuring your Text option, you need to assign the Option Set to the products where you want the text field to appear.
You can find Product Assignment at the bottom of the Option Set.
|
Step: Open the option set > scroll down to find the “Product Assignment” option > select any of the three radio buttons. |
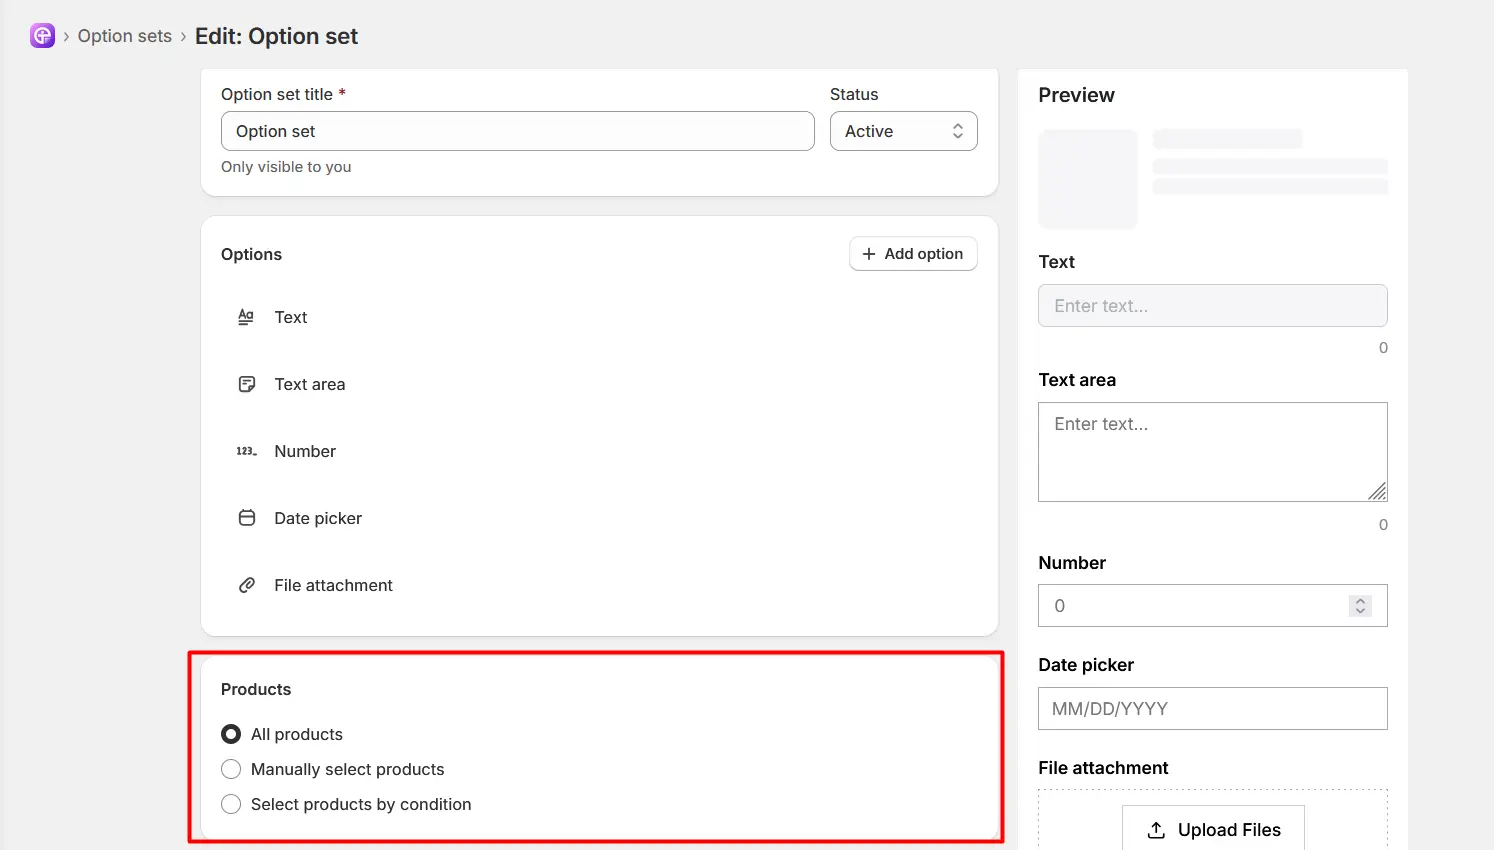
All Products: Select All Products to apply the Option Set to all products in your store.
Manually Select Products: Select Manually Select Products when you want to choose specific products to which the Option Set should be applied.
Select Products by Conditions: Select Select Products by Conditions when you want to apply the Option Set based on specific product conditions automatically.
You can use the available conditions to determine which products should receive the Option Set.
If you have enabled Live Preview, customers can also see their entered text on the product preview before adding the product to their cart.
 Getting Started
 Option Sets
 Orders
 Settings
 Configuration
 Live Preview
 Packages
 Help & Support
 Price Add-Ons
 Conditional Logic
 Design Theme Styling
 Uninstallation