Multi-Level Options allow you to create child options under a specific option value. Child options are displayed based on the customer's selection of the parent option value.
This feature is useful when some options should only be available after a customer makes a particular selection. You can create multiple levels of options and add unlimited child options under a parent option value.
The structure of a multi-level option is:
Parent Option → Parent Value → Child Options
For example, a customer may first select whether they want personalization. If they select Yes, additional personalization options can then be displayed.
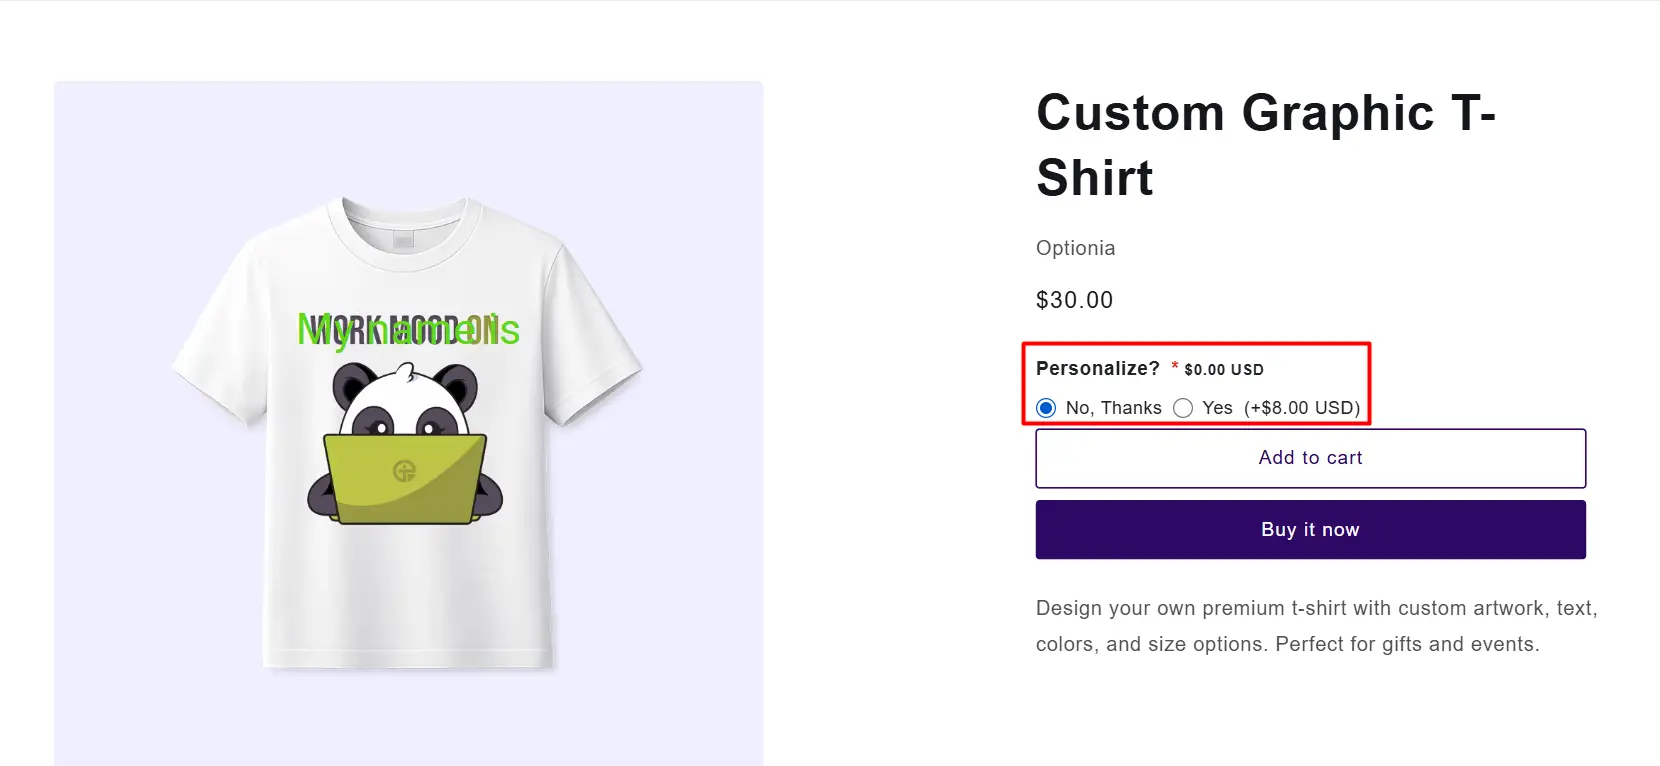
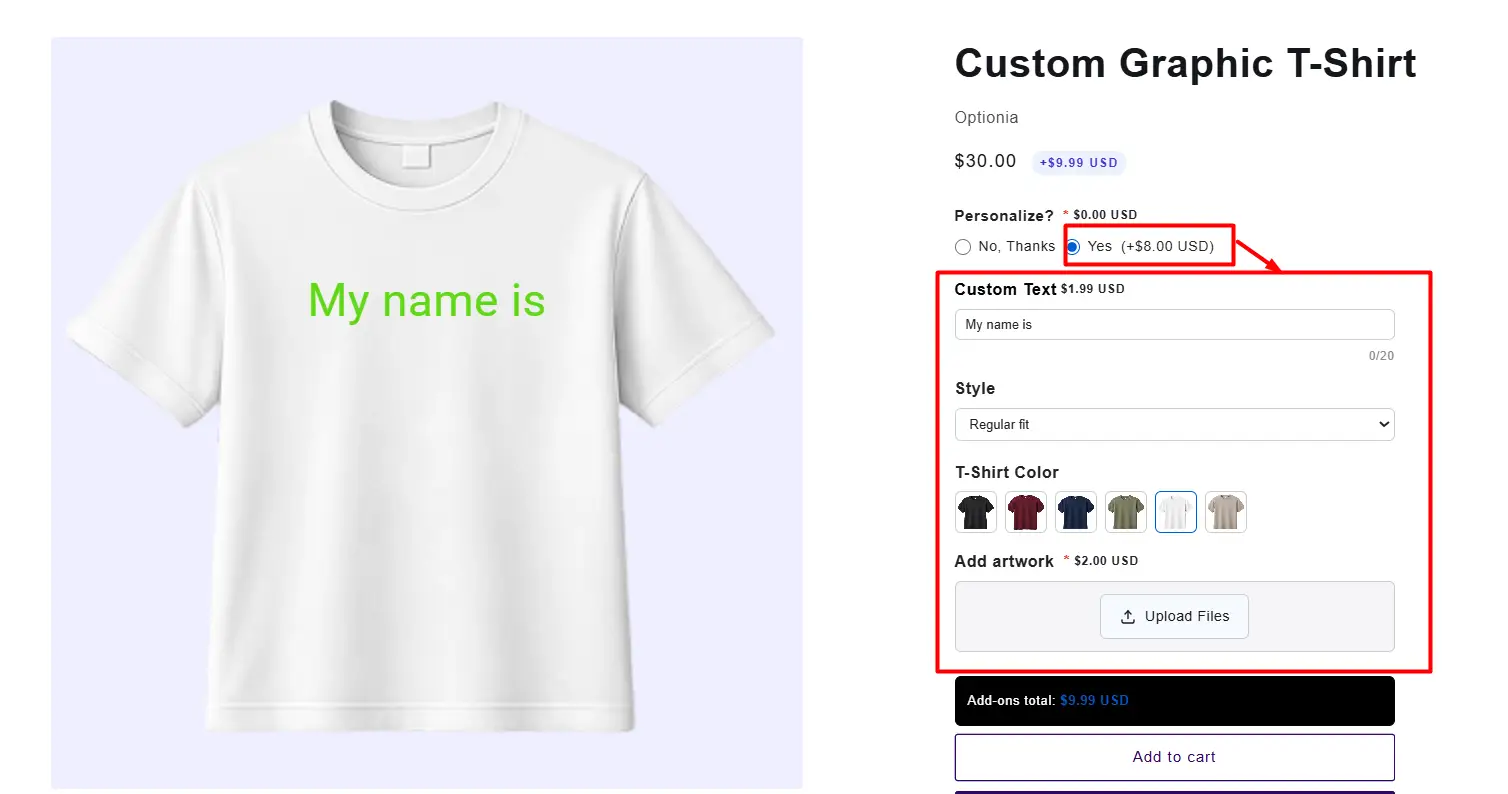
You can add the multi level option to either a completely new option set or an existing one. You can learn to create a new option set in another part. This guide explains how to add it to an existing Option Set.
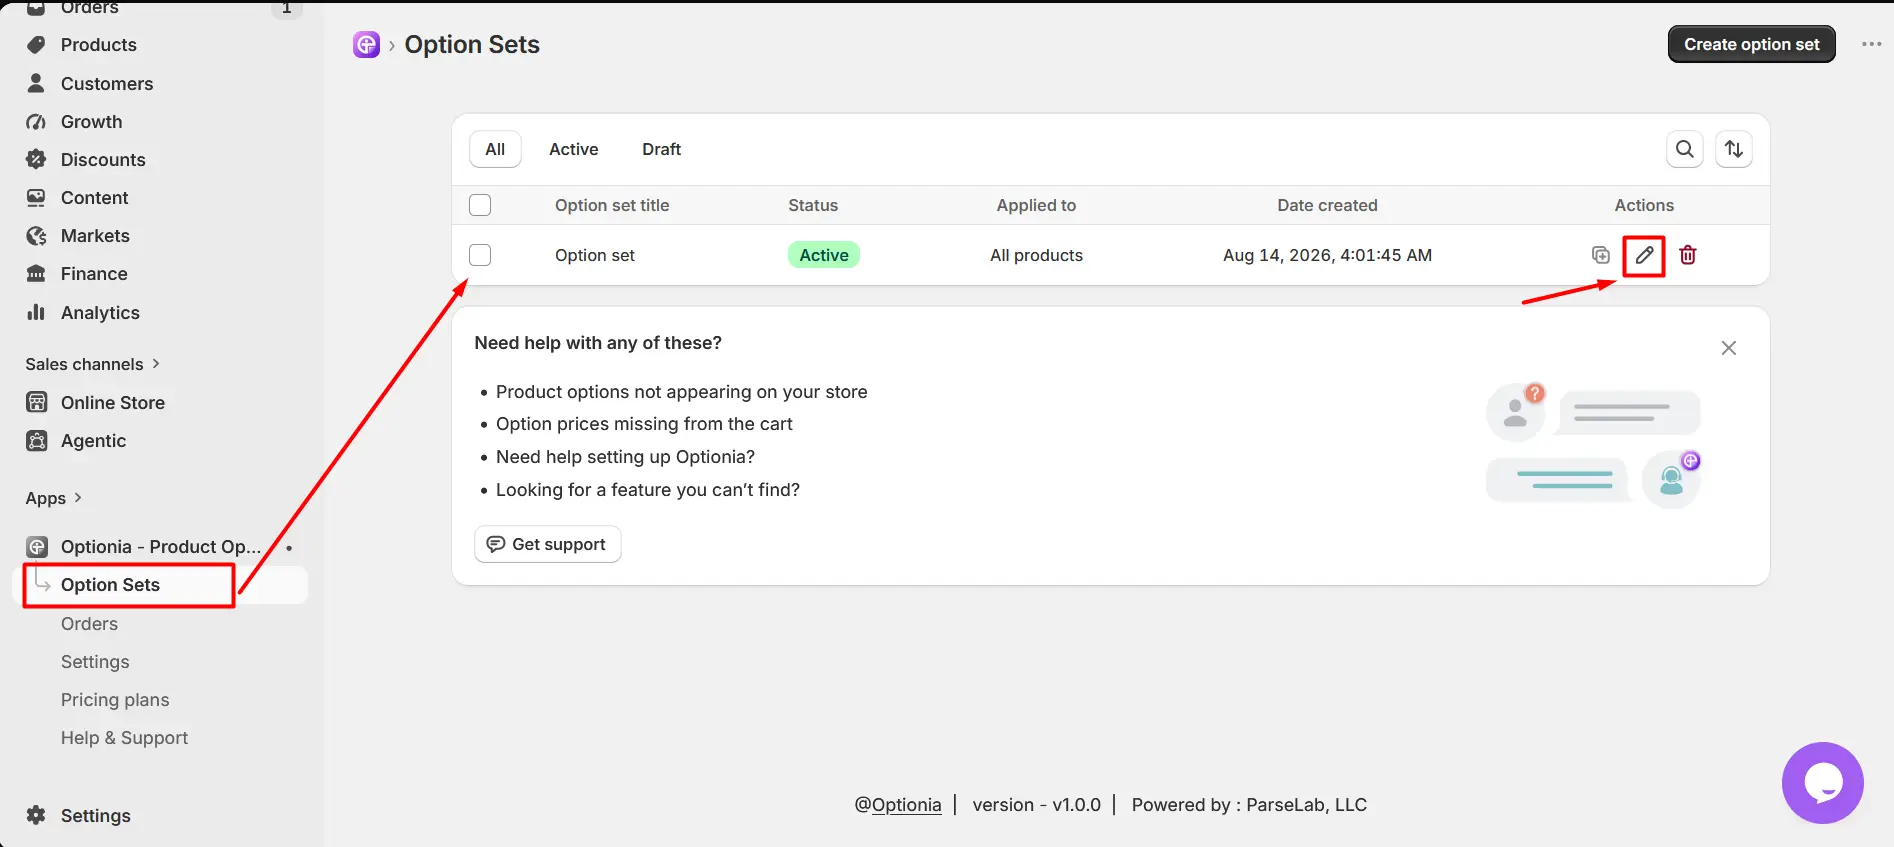
Go to an existing option set.
Click the Edit option to open it.
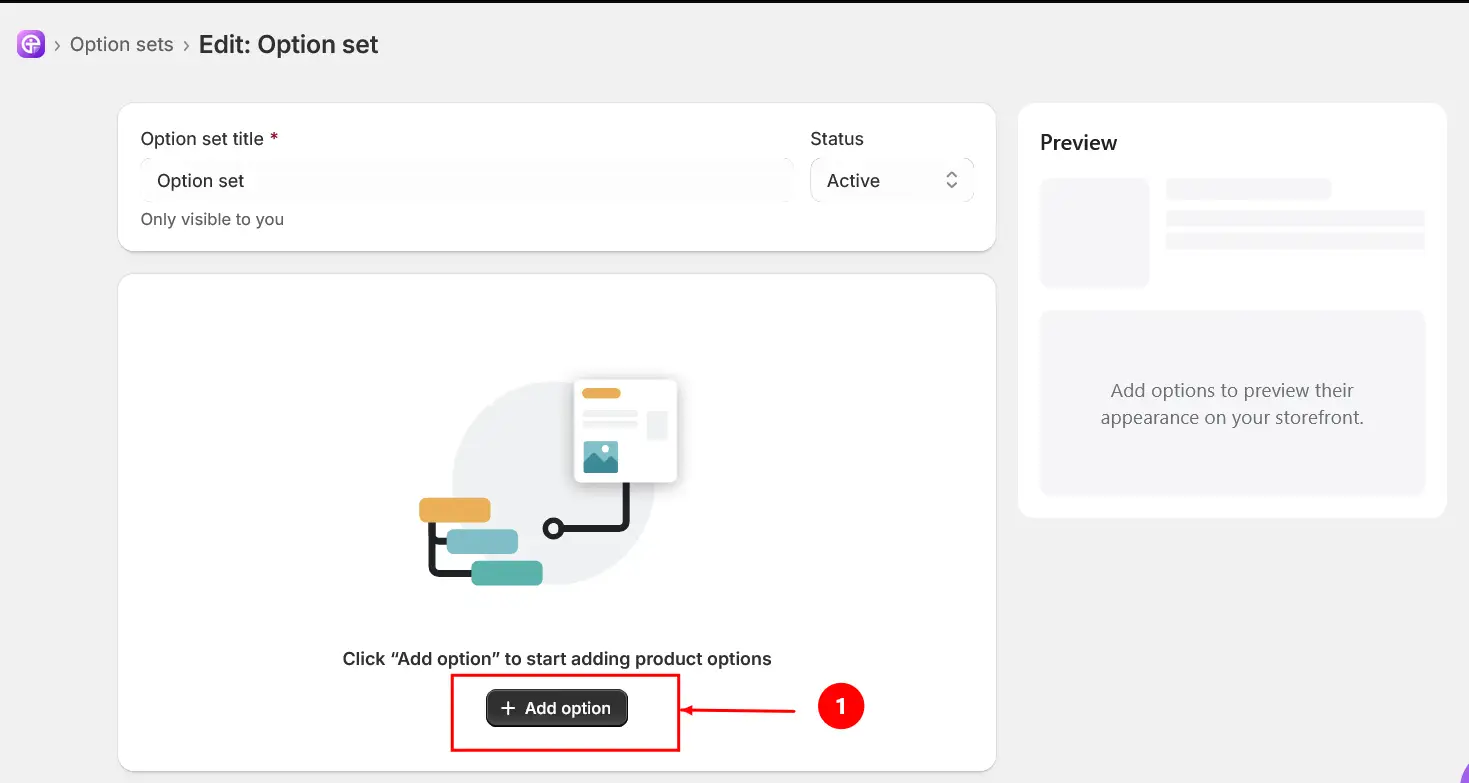
Click the “Add options” button.
Select any of the options under single selection.The following Single Selection option types support creating child options:
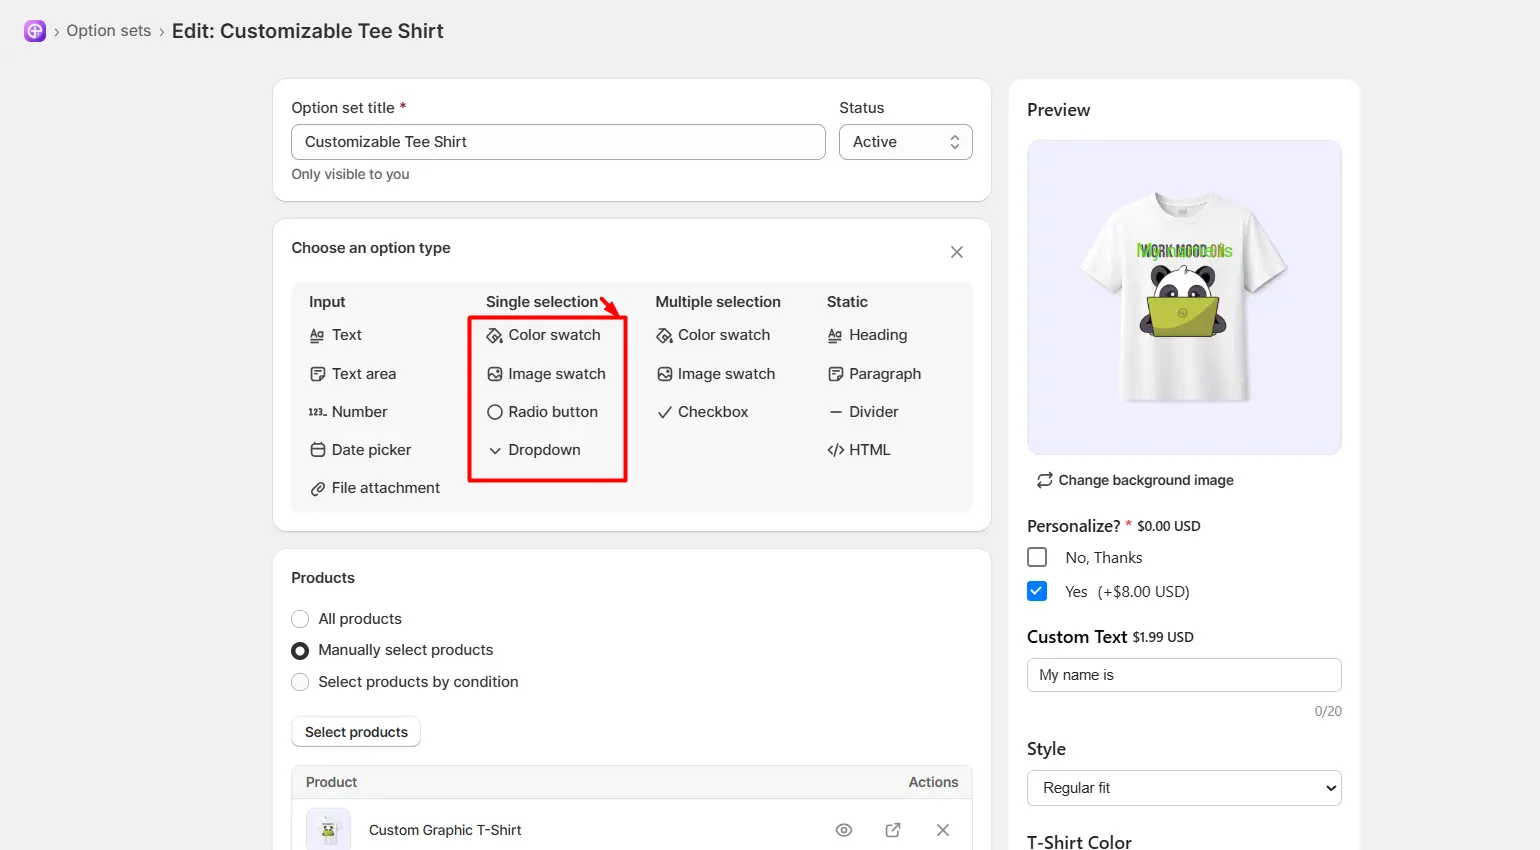
Color Swatch
Image Swatch
Radio Button
Dropdown
If you use any of these option types as the parent option, you can add child options under its individual option values.
The parent option is the main option that controls when child options are displayed.
Select one of the supported Single Selection option types.
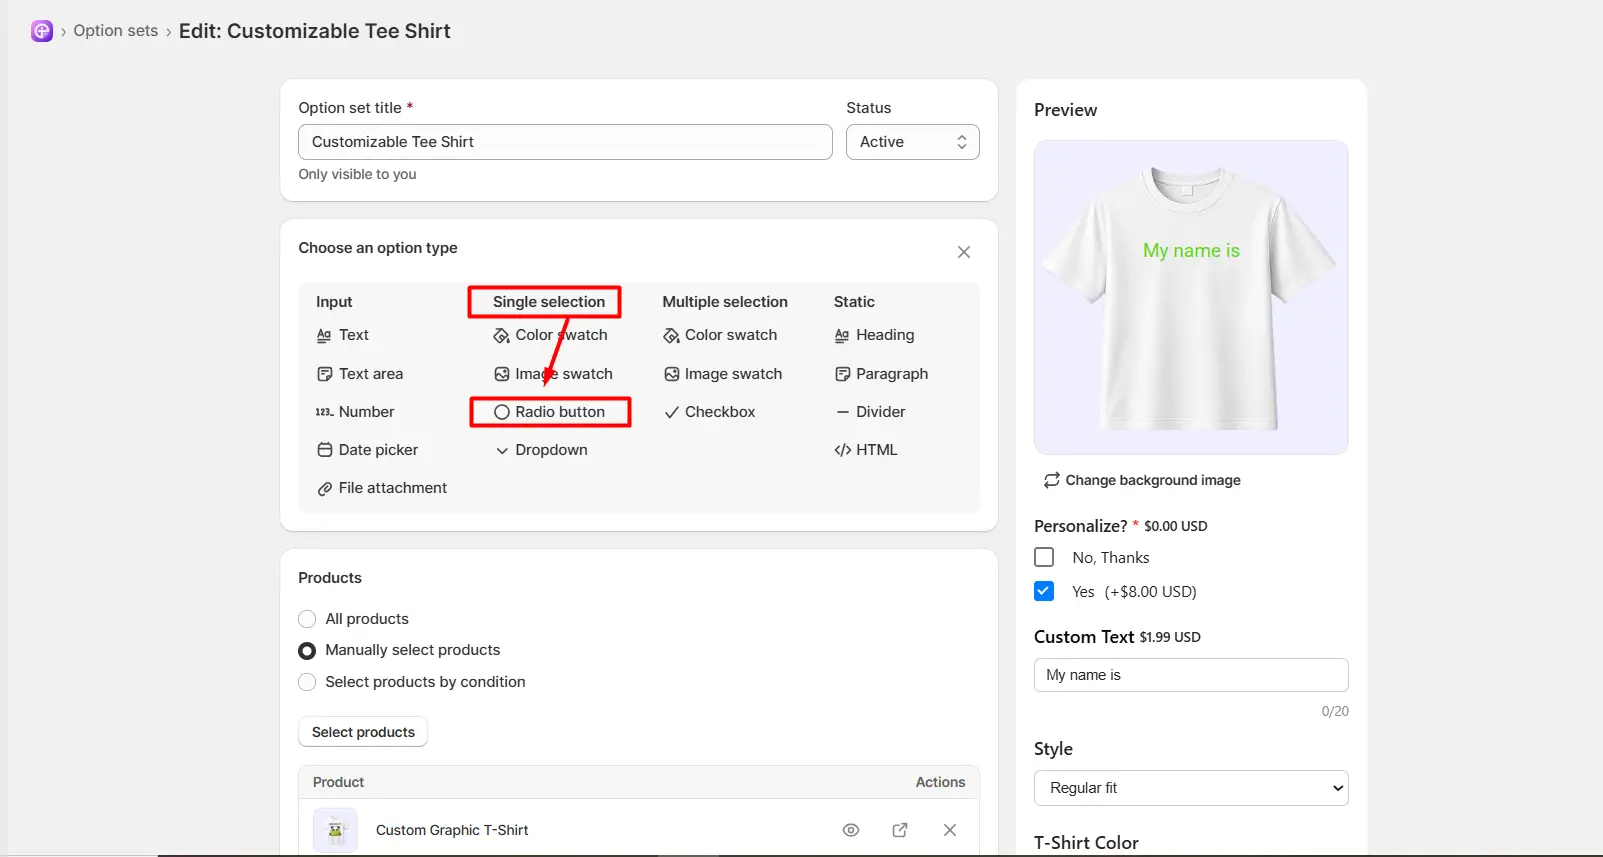
Enter the Option Title.
Add the required option values.
Configure the other available settings for the option.
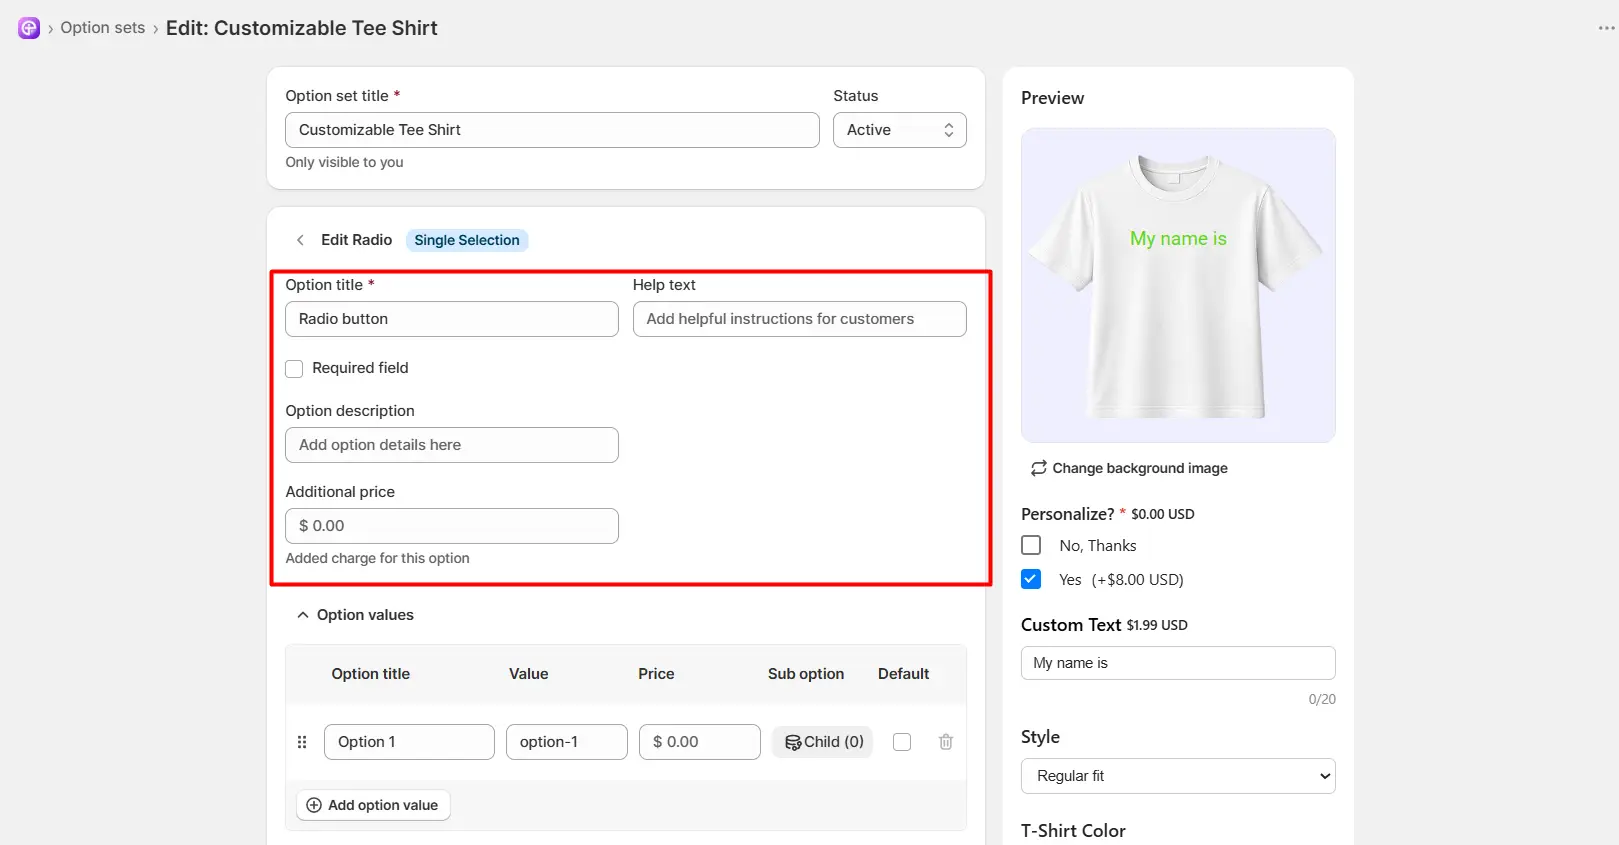
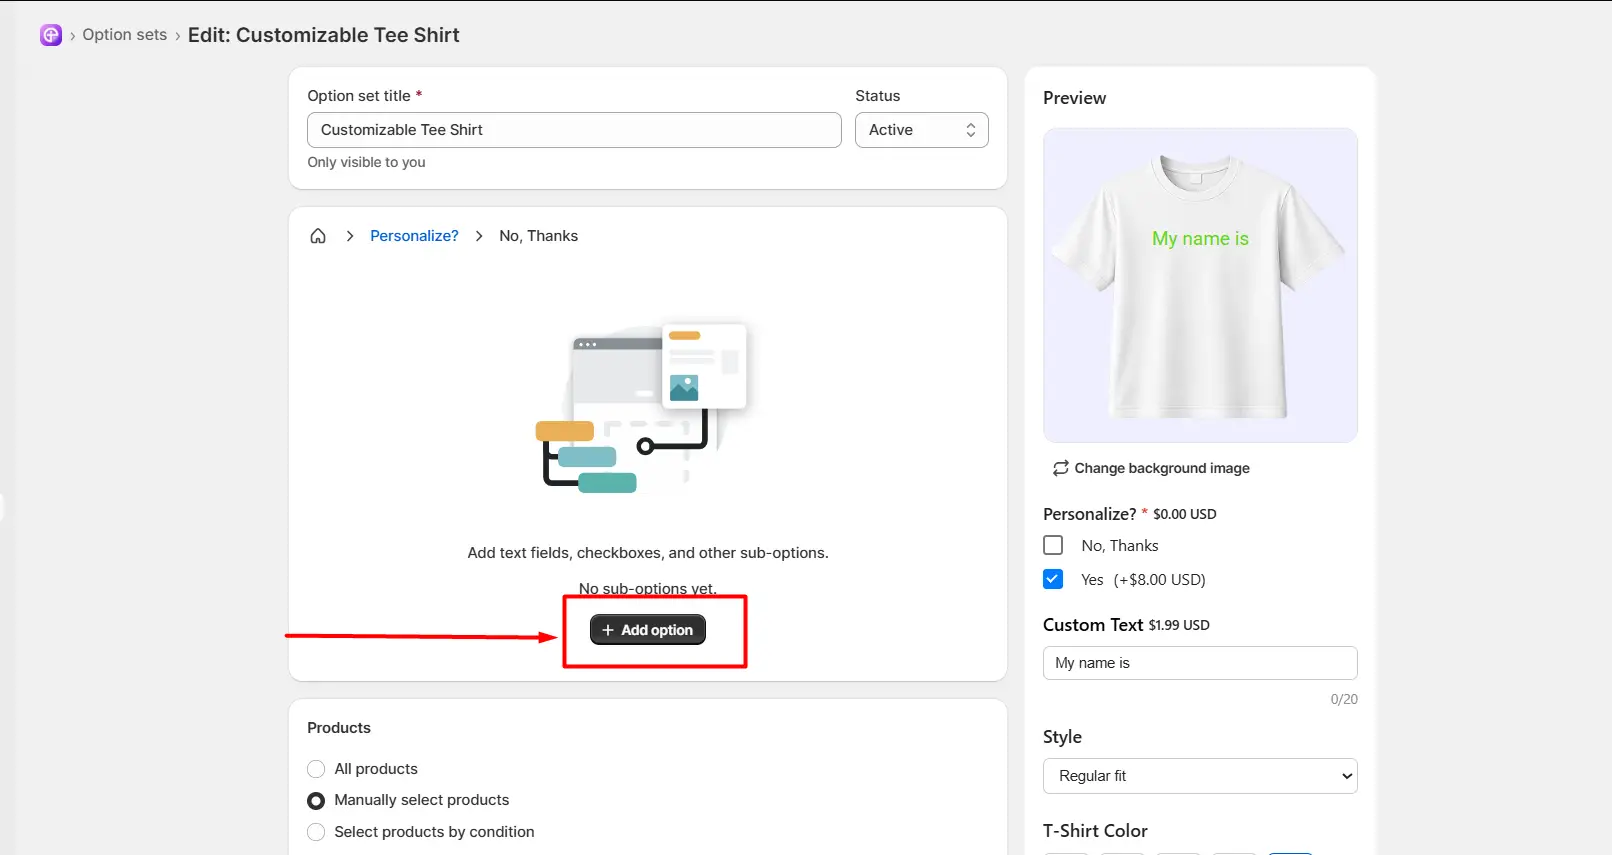
Once you have created the parent option value, you can add a child option.
Click on the child option
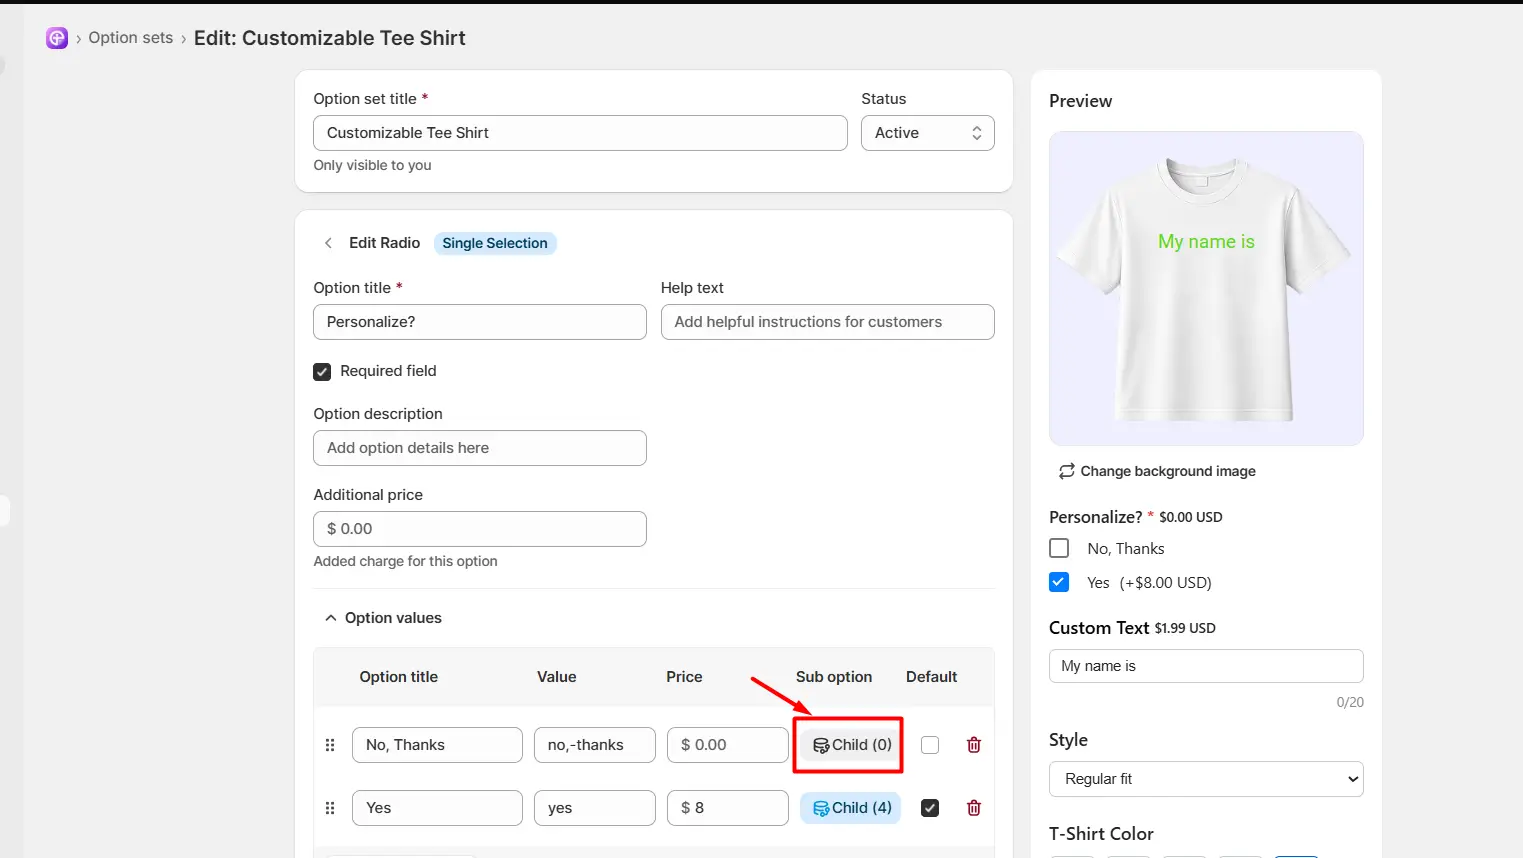
Click Add Option in the child-option section.
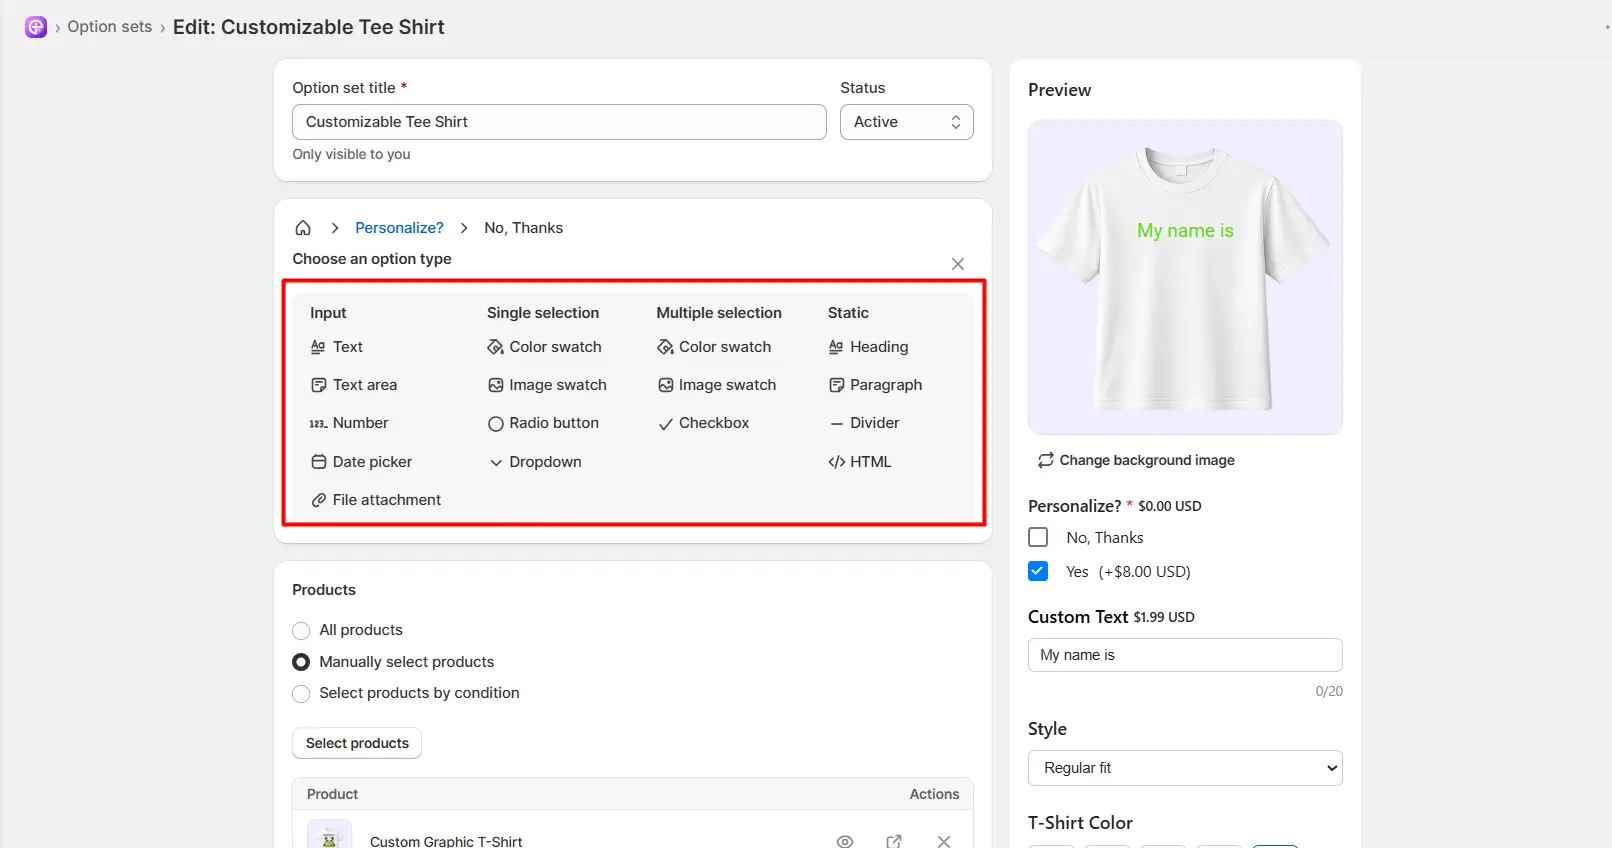
Select the appropriate option type.
 .
.
The child option is now connected to the selected parent value.
You can add multiple child options under the same parent value.
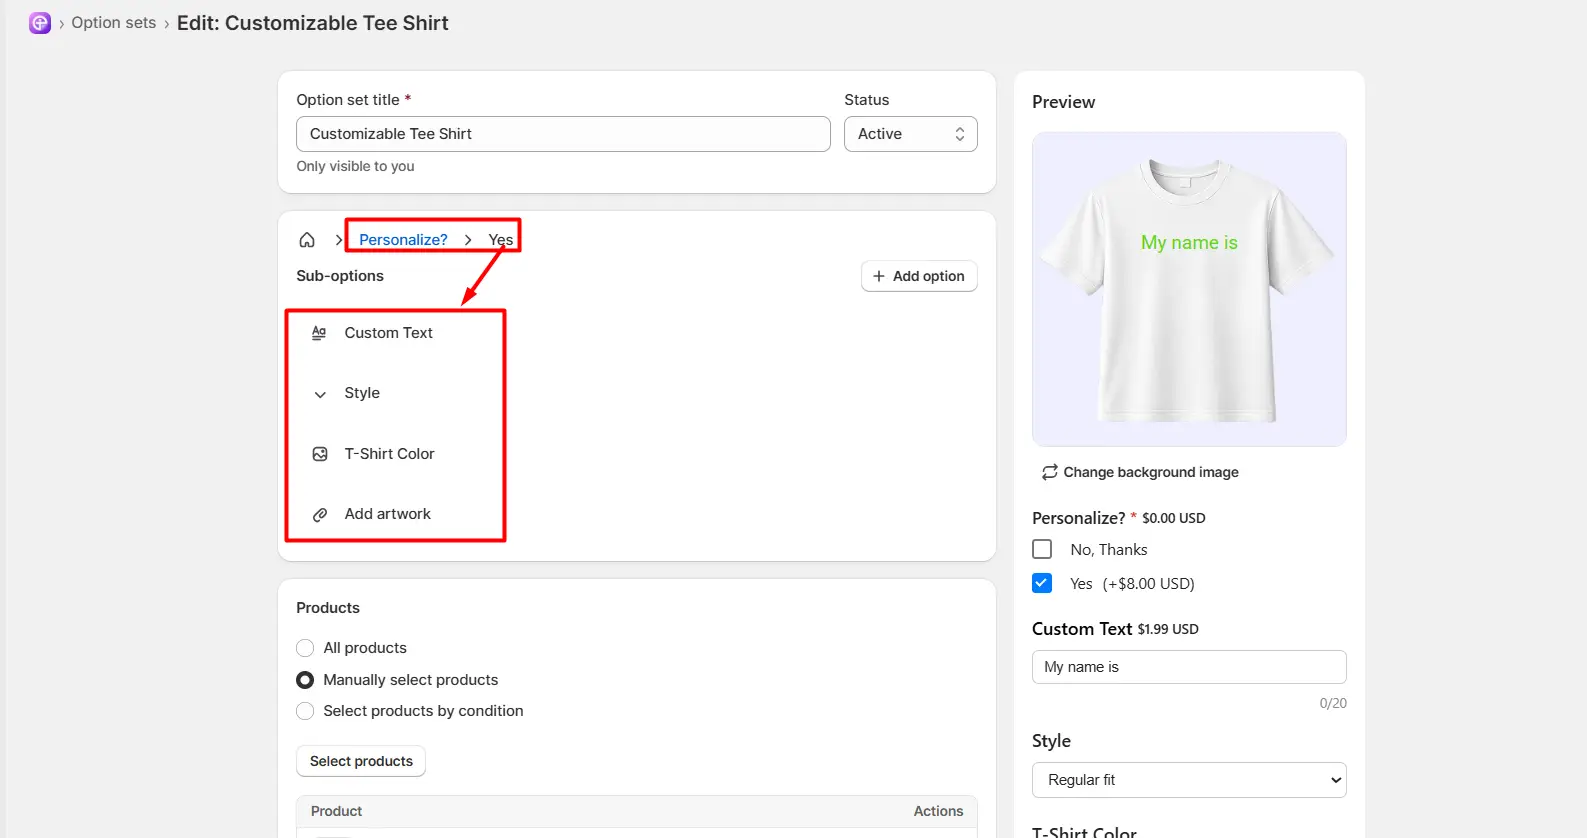
Click on the child option
Click Add Option again.
Select the required option type.
Configure the option.
Save the option.
Repeat the process for additional child options.
There is no fixed limit on the number of child options you can create. You can add unlimited child options under a parent option value according to your customization requirements.
Multi-Level Options can also be used to create further levels of customization where supported.
The relationship follows:
Parent Option → Parent Value → Child Option
If the interface allows a child option to have its own child options, you can continue building the option hierarchy in the same way. Each level is connected to the selection made at the previous level.
Need Help?
 Getting Started
 Option Sets
 Orders
 Settings
 Configuration
 Live Preview
 Packages
 Help & Support
 Price Add-Ons
 Conditional Logic
 Design Theme Styling
 Uninstallation