Optionia DocsOptionia Docs
Submit a Ticket
shopify app store
  • Visit Optionia Website
  • Privacy Policy
  • Terms of Service
  • FAQs
  • Tutorials

© 2026 Optionia. All rights reserved.

Powered by

ParseLab, LLC
  • category-iconGetting Started
  • category-iconOption Sets
  • category-iconOrders
  • category-iconSettings
  • category-iconConfiguration
  • category-iconLive Preview
  • category-iconPackages
  • category-iconHelp & Support
  • category-iconPrice Add-Ons
  • category-iconConditional Logic
  • category-iconDesign Theme Styling
  • category-iconUninstallation
Category
  • category-iconGetting Started
  • category-iconOption Sets
  • category-iconOrders
  • category-iconSettings
  • category-iconConfiguration
  • category-iconLive Preview
  • category-iconPackages
  • category-iconHelp & Support
  • category-iconPrice Add-Ons
  • category-iconConditional Logic
  • category-iconDesign Theme Styling
  • category-iconUninstallation
Configuration-icon Configuration
3 min to read
Last Update on 05 September 2026

Assign Option Sets to Products with Conditions

Follow this step-by-step guide to dynamically assign custom options to your products using conditional rules in Optionia:

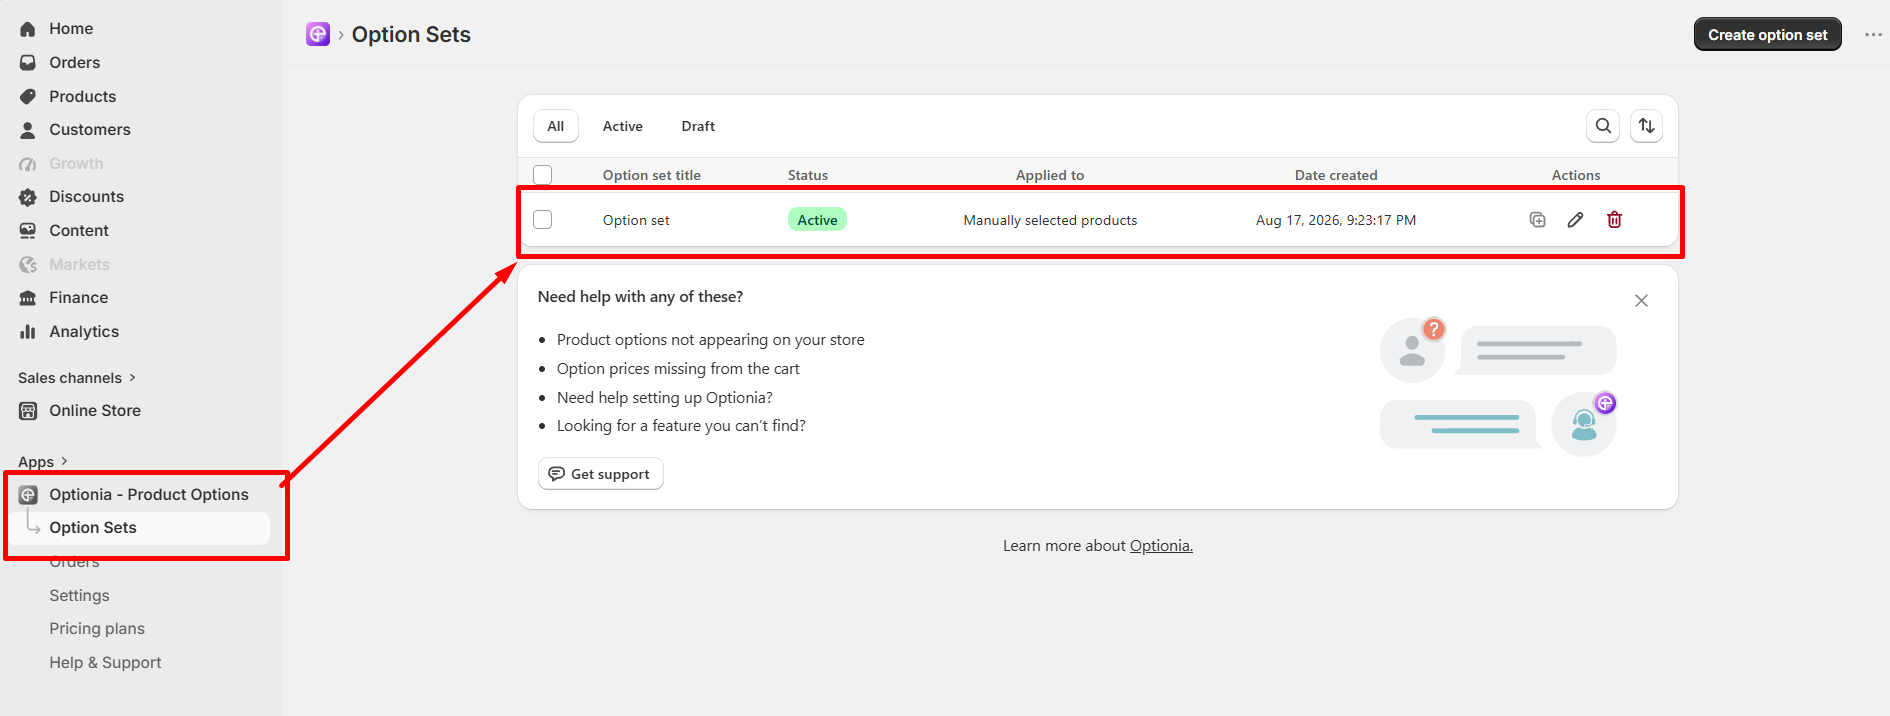
Step 1: Open the Optionia App & Go to Option Sets

From your Shopify Admin panel, go to Apps > Optionia - Product Options and click on Option Sets


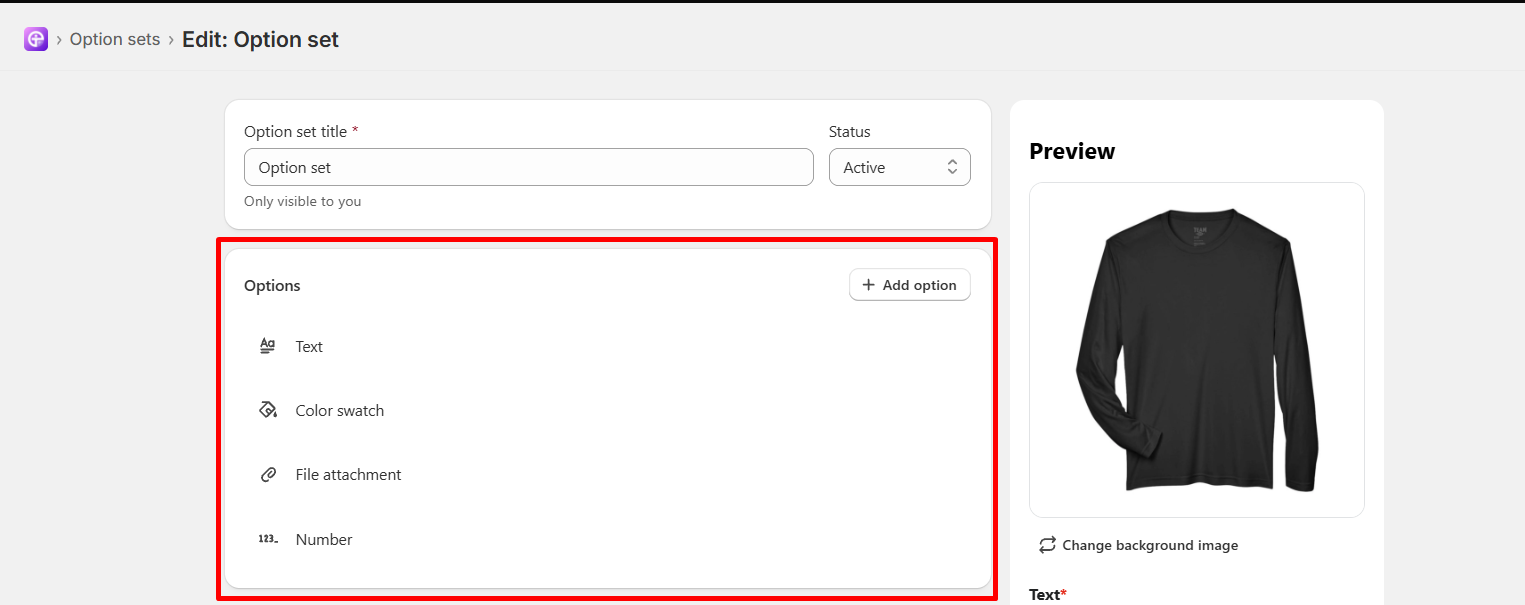
Step 2: Create or Select an Option Set

Click Create option set to start fresh, or select an existing Option set from the list to edit it

Step 3: Choose Conditional Product Assignment

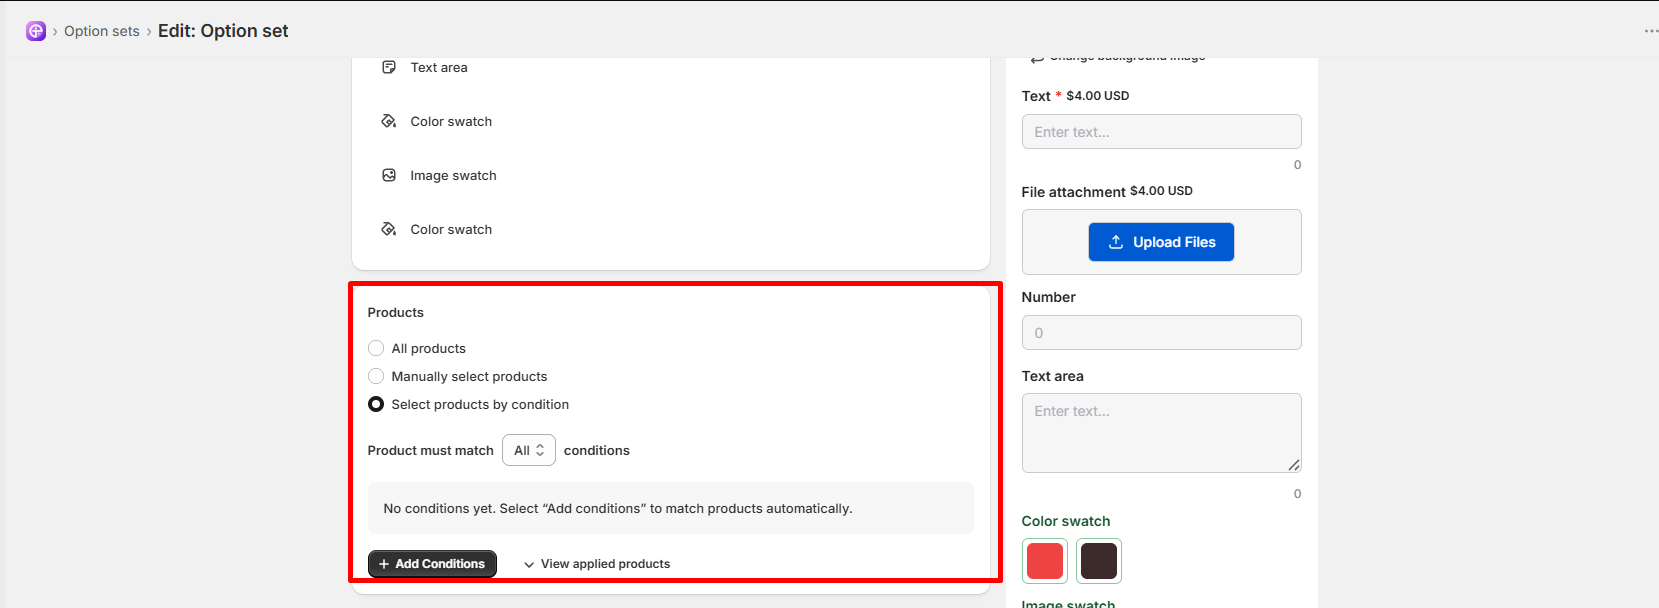
Scroll down to the Product assignment section and select Select products by condition. 

Step 4: Choose Rule Matching Criteria

In the Product must match dropdown, choose how your rules should apply:
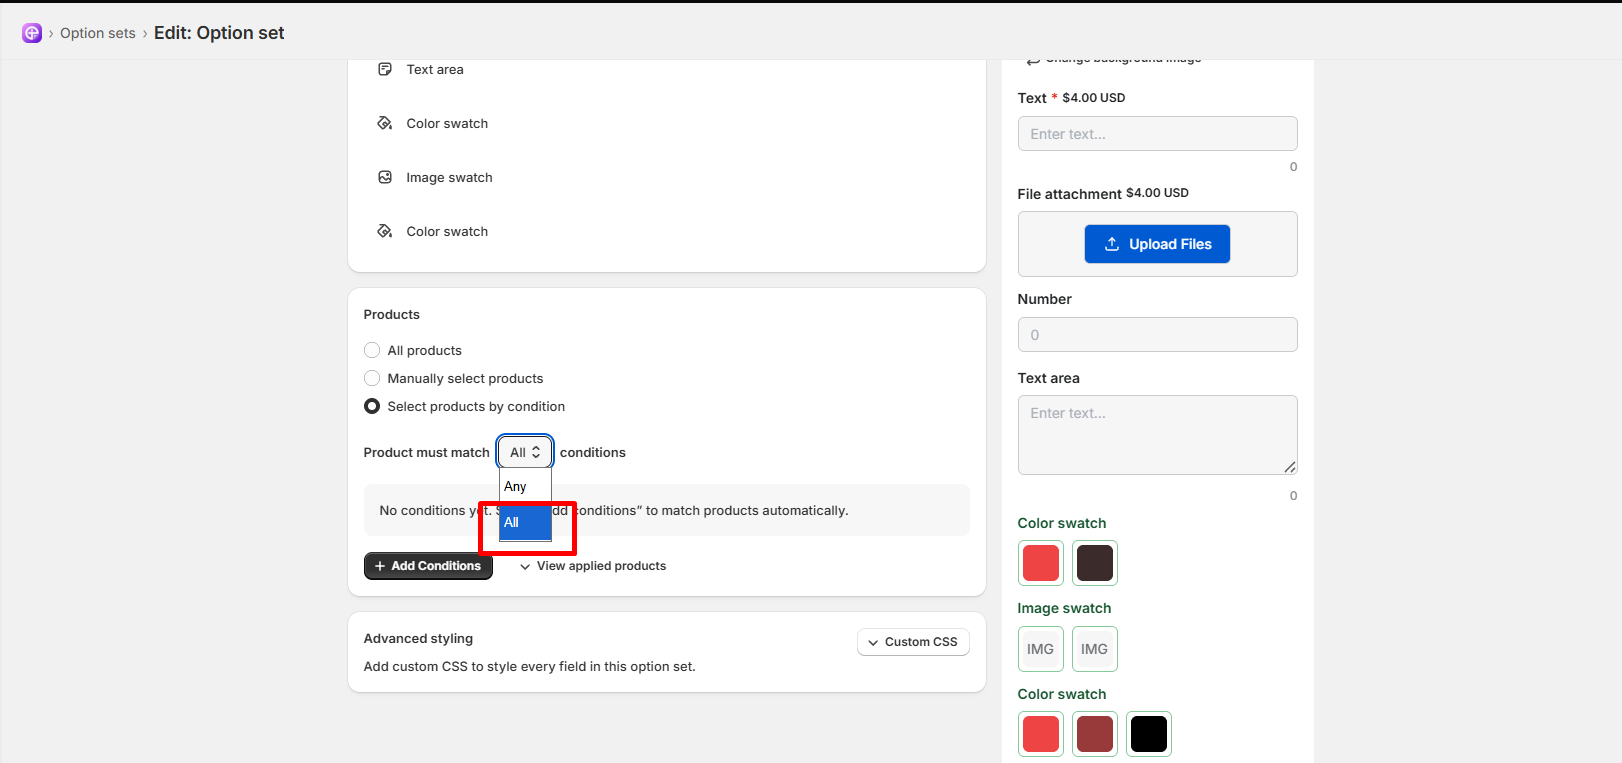
  • All conditions: A product must match every single rule you create to receive the options.
  • Any condition: A product only needs to match at least one rule to receive the options


Step 5: Add and Configure Your Conditions


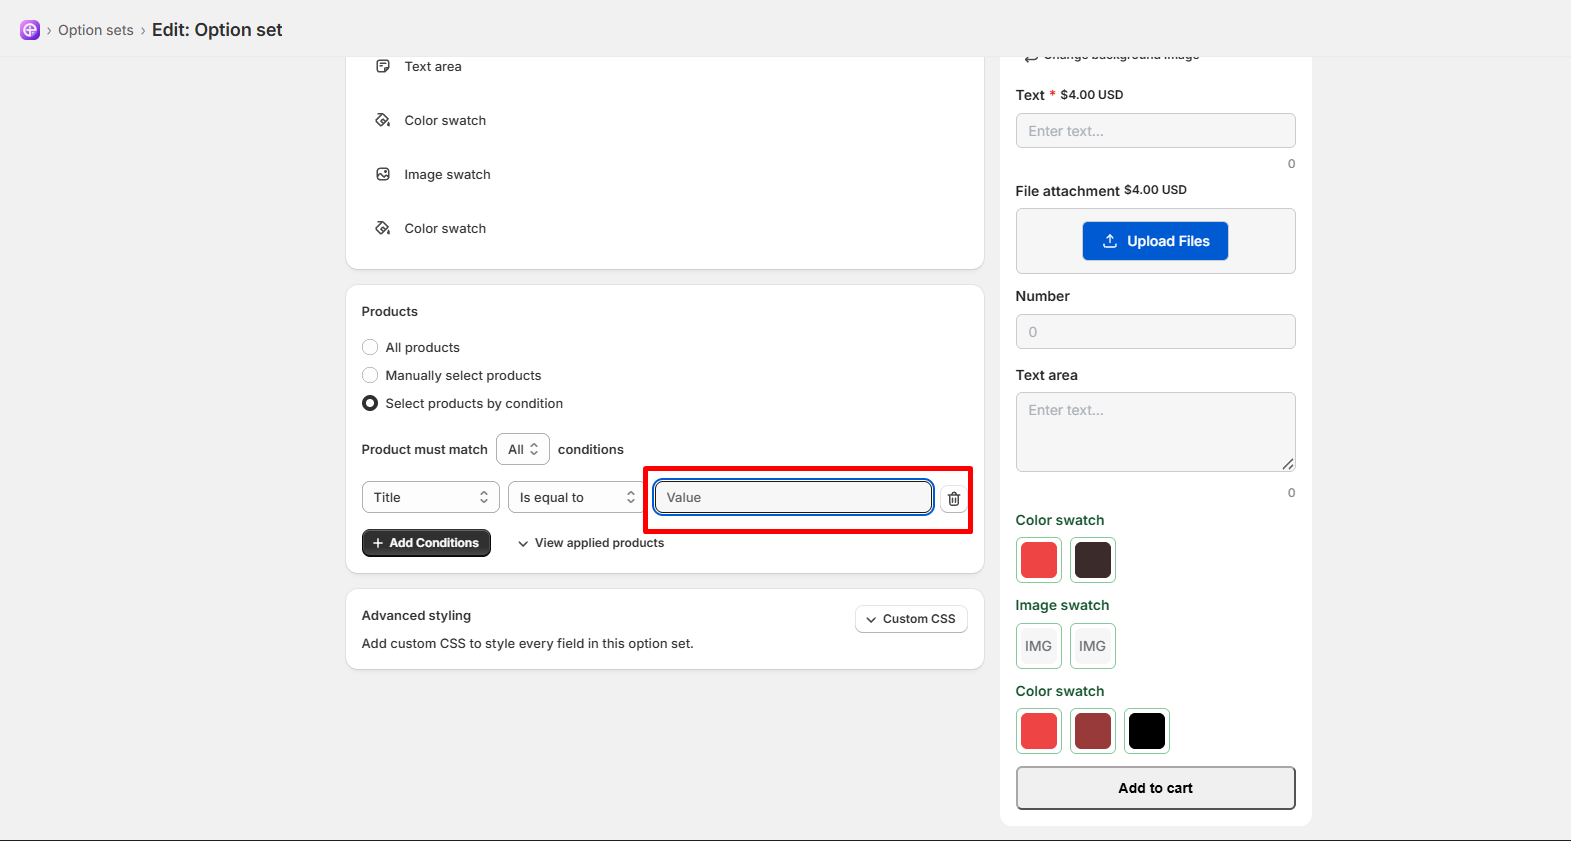
Click + Add Conditions and set up your targeting rules using the three fields: 
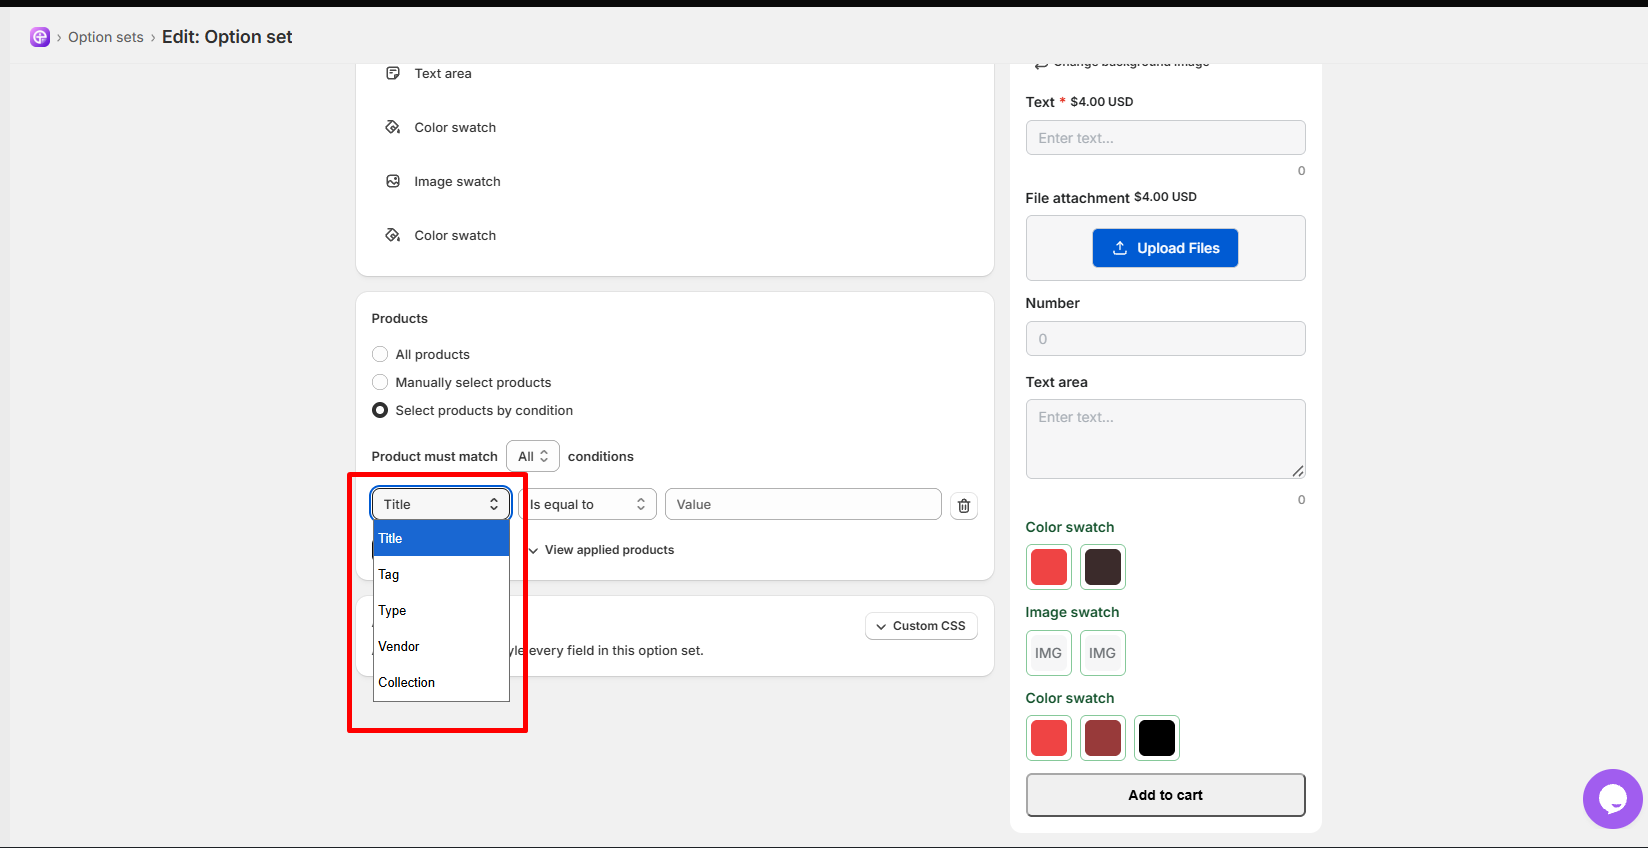


  • Field 1 (Product Attribute): Select the attribute you want to target:

    • Title: Target products by their exact name or parts of their name.

    • Tag: Target products based on assigned Shopify product tags.

    • Type: Target products by their assigned product type.

    • Vendor: Target products by manufacturer, brand, or vendor name.

    • Collection: Target products that belong to a specific collection.

  • Field 2 (Condition Operator): Select how the attribute rule evaluates your store's data:
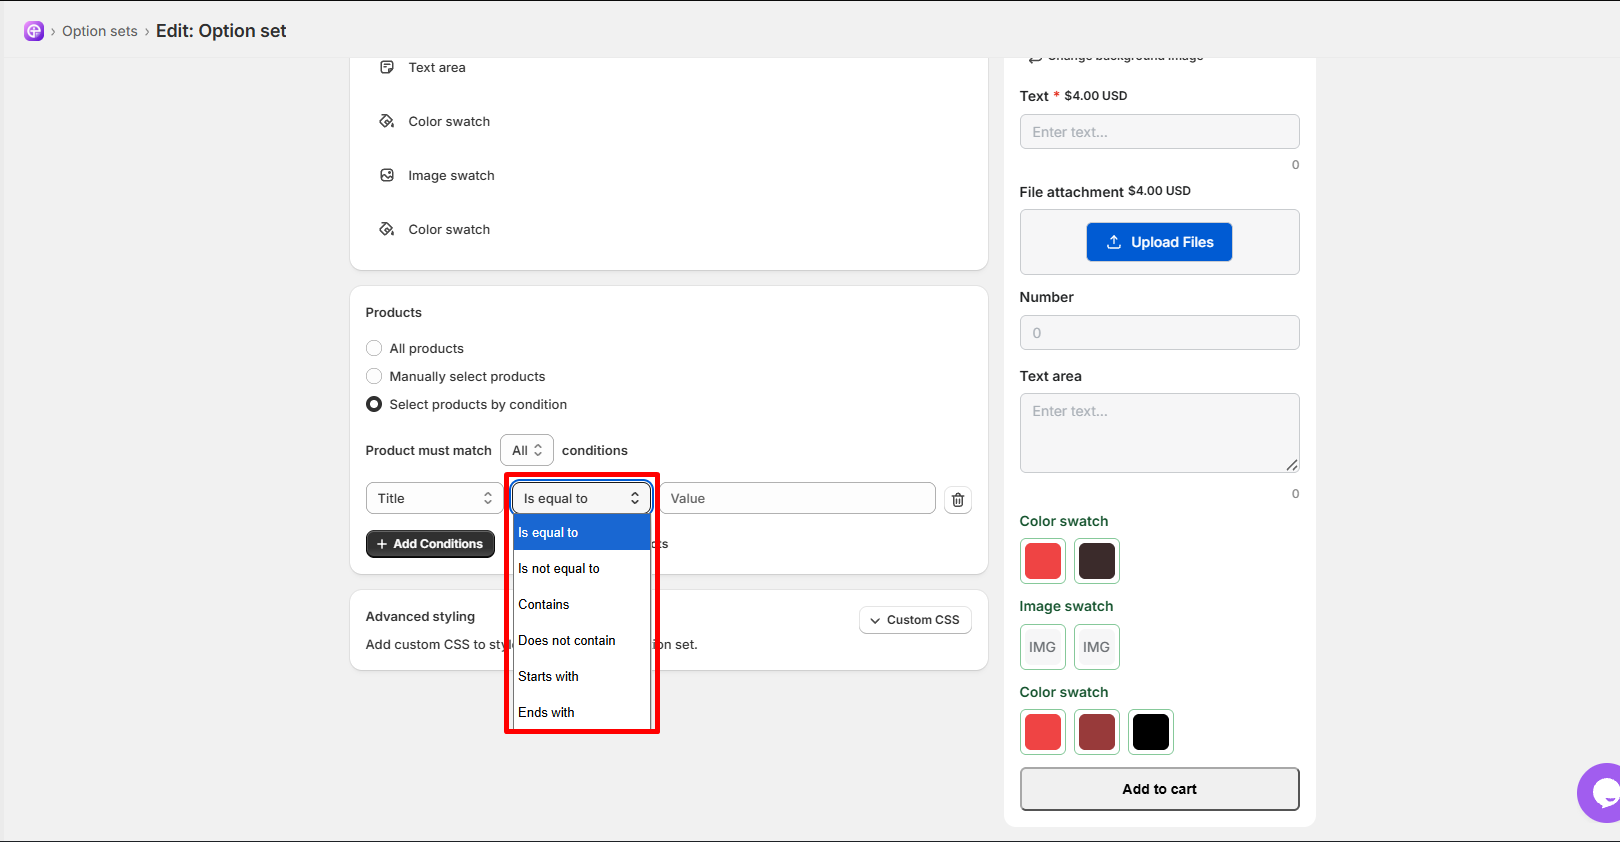
  • Is equal to: Matches the exact value specified.

  • Is not equal to: Applies to all products except those with the specified value.

  • Contains: Matches any product containing the specified text.

  • Does not contain: Excludes any product containing the specified text.

  • Starts with: Matches products where the attribute begins with your text.

  • Ends with: Matches products where the attribute ends with your text.

  • Field 3 (Value): Enter the specific word, title, tag name, type, vendor, or collection name you wish to target.
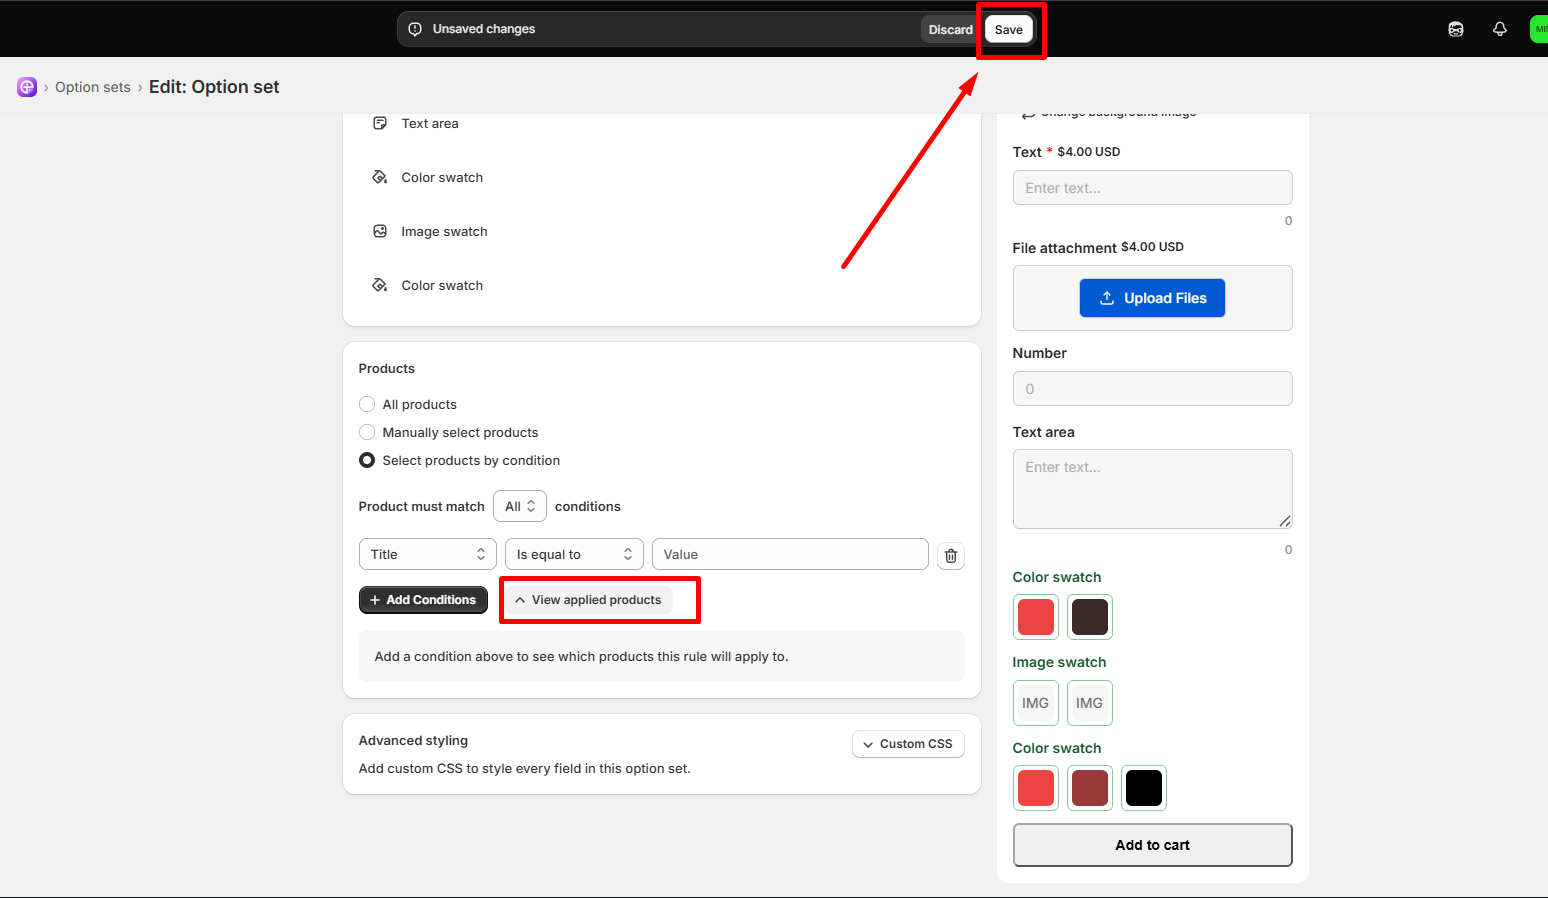
Step 6: Preview and Save


Click View applied products to review the list of matching items across your store. Once confirmed, save your option set.


Note: Whenever you add a new product to your Shopify store in the future that meets these conditions, Optionia will automatically assign the custom options to it no manual update required! 


Need Help?

If you have any questions or need assistance, We will be happy to help.
  • Live Chat for quick assistance.
  • Submit a Support Ticket for detailed questions or issues.
  • Email: support@optionia.com

Did this post help you?
Next article

Add Multi-Level Options

Related Articles

  • Add Multi-Level Options
  • Enable Live Preview for Image Swatch
  • Enable Live Preview for Color Swatch
  • Enable Live Preview for Text Field

Related Articles

  • Add Multi-Level Options
  • Enable Live Preview for Image Swatch
  • Enable Live Preview for Color Swatch
  • Enable Live Preview for Text Field