A step-by-step guide on how you can enable live preview for an image swatch.
From the Optionia dashboard, click Option Sets from the left navigation menu.
Then, click the Option Set where you want to add the image swatch option.
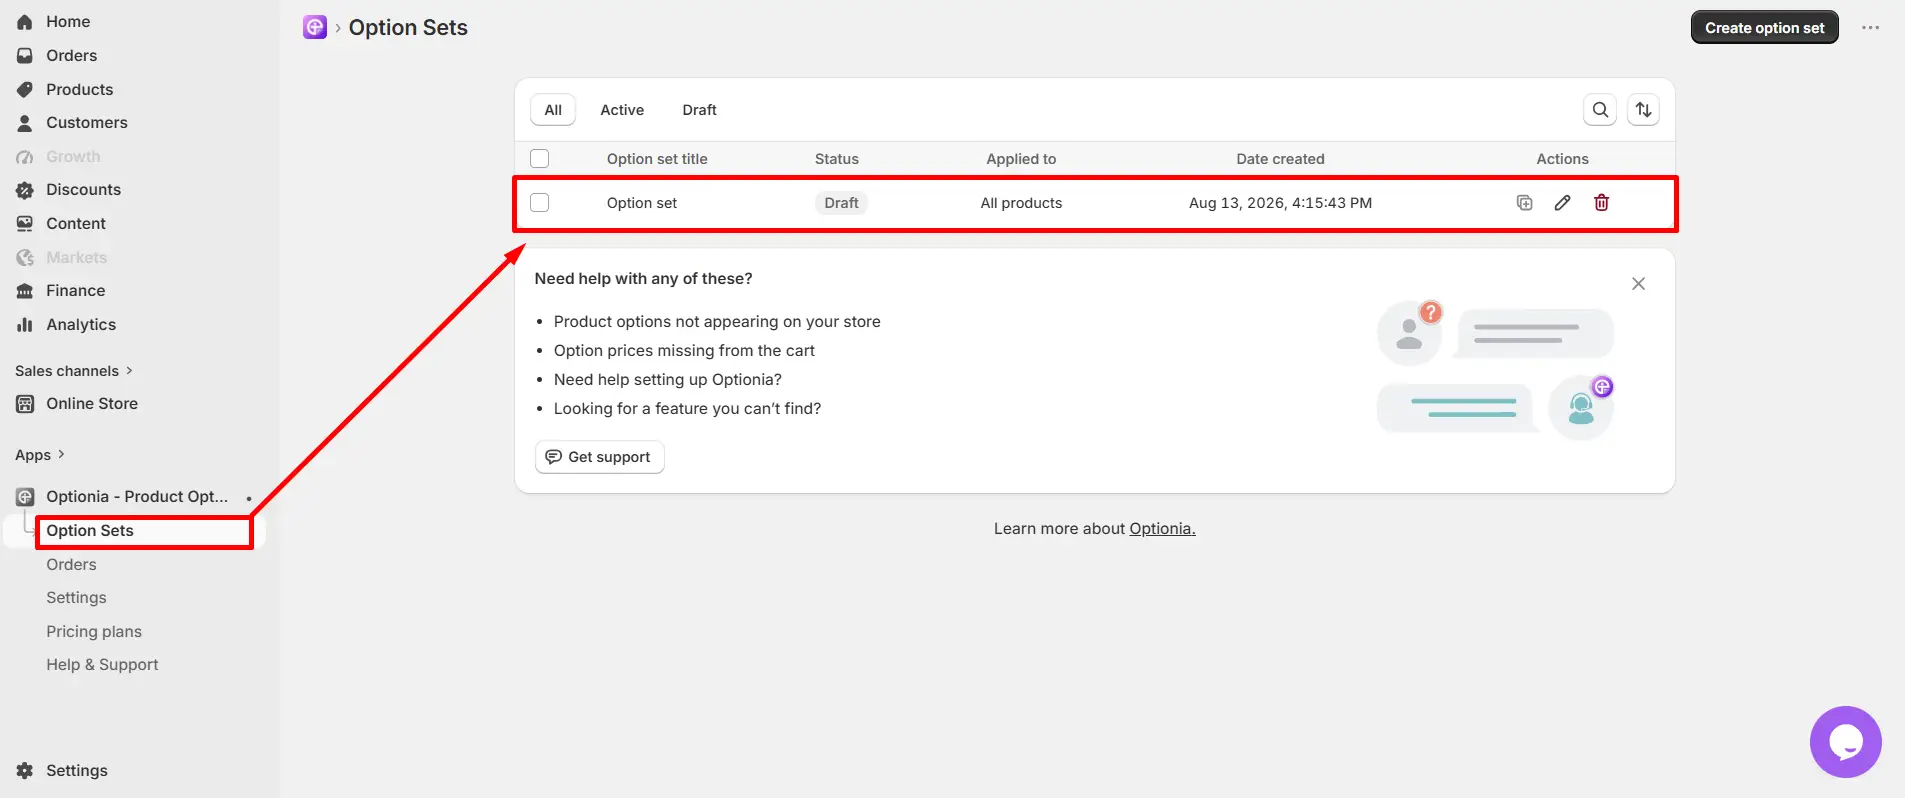
You can add the Image swatch option to either a new option set or an existing one. You can learn to create a new option set in another part. For now, we will discuss how to add an Image swatch option to an existing option set.
Click the “Add Options” button in the top right corner.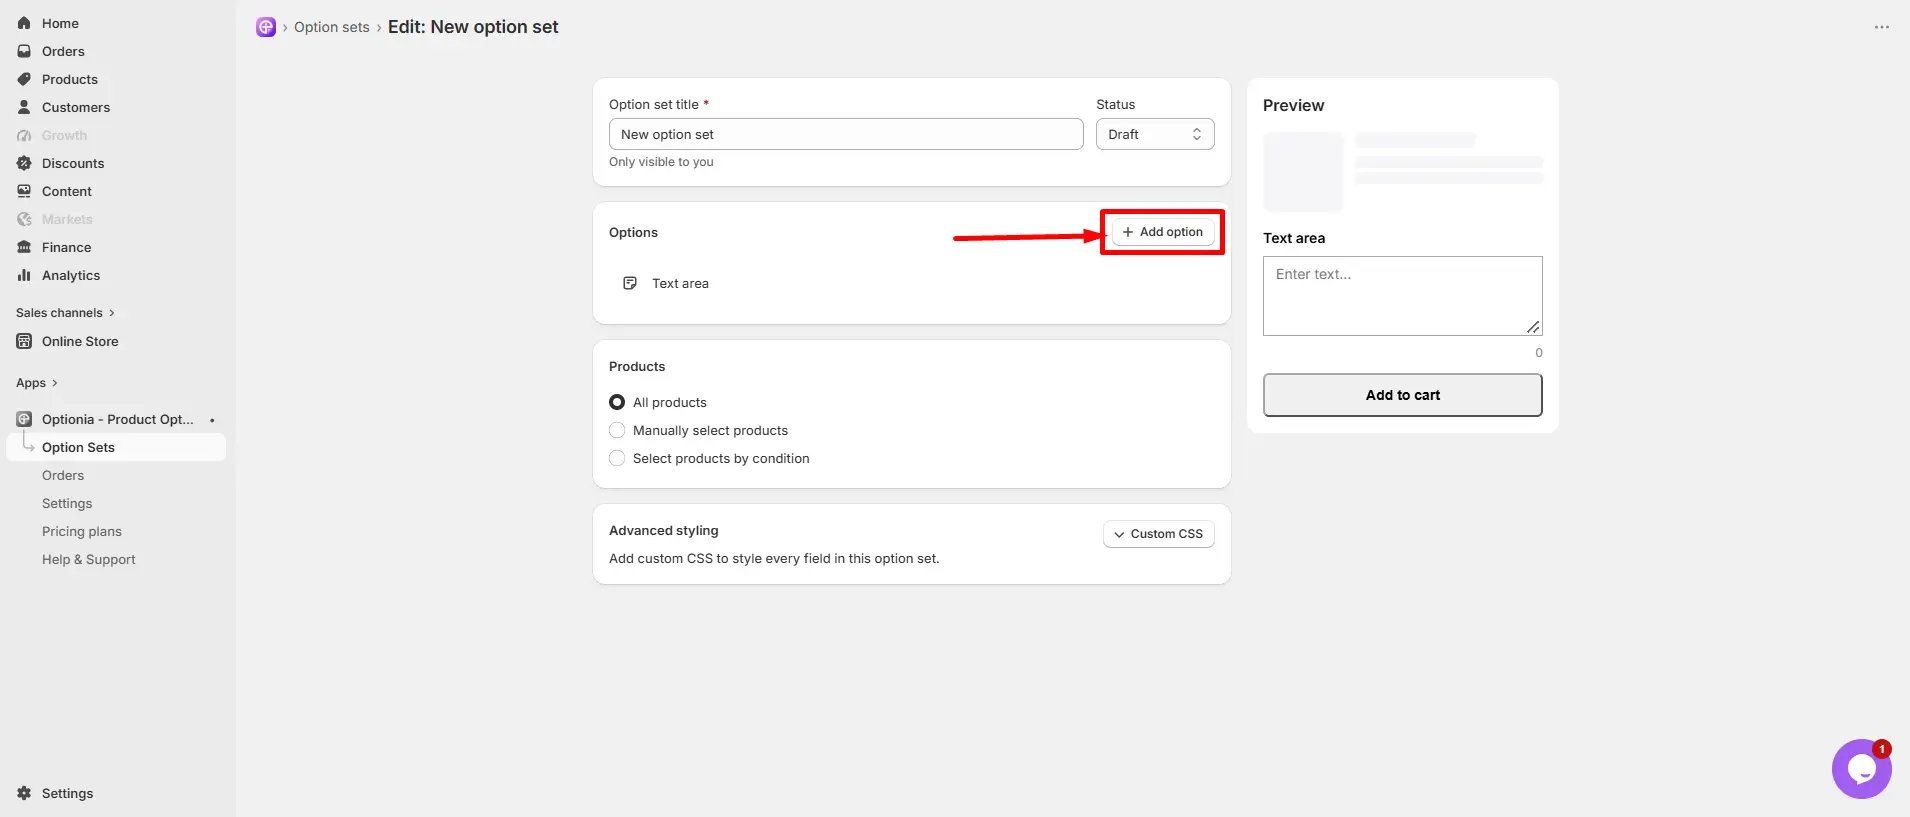
Select the “Image swatch” option under Single Selection.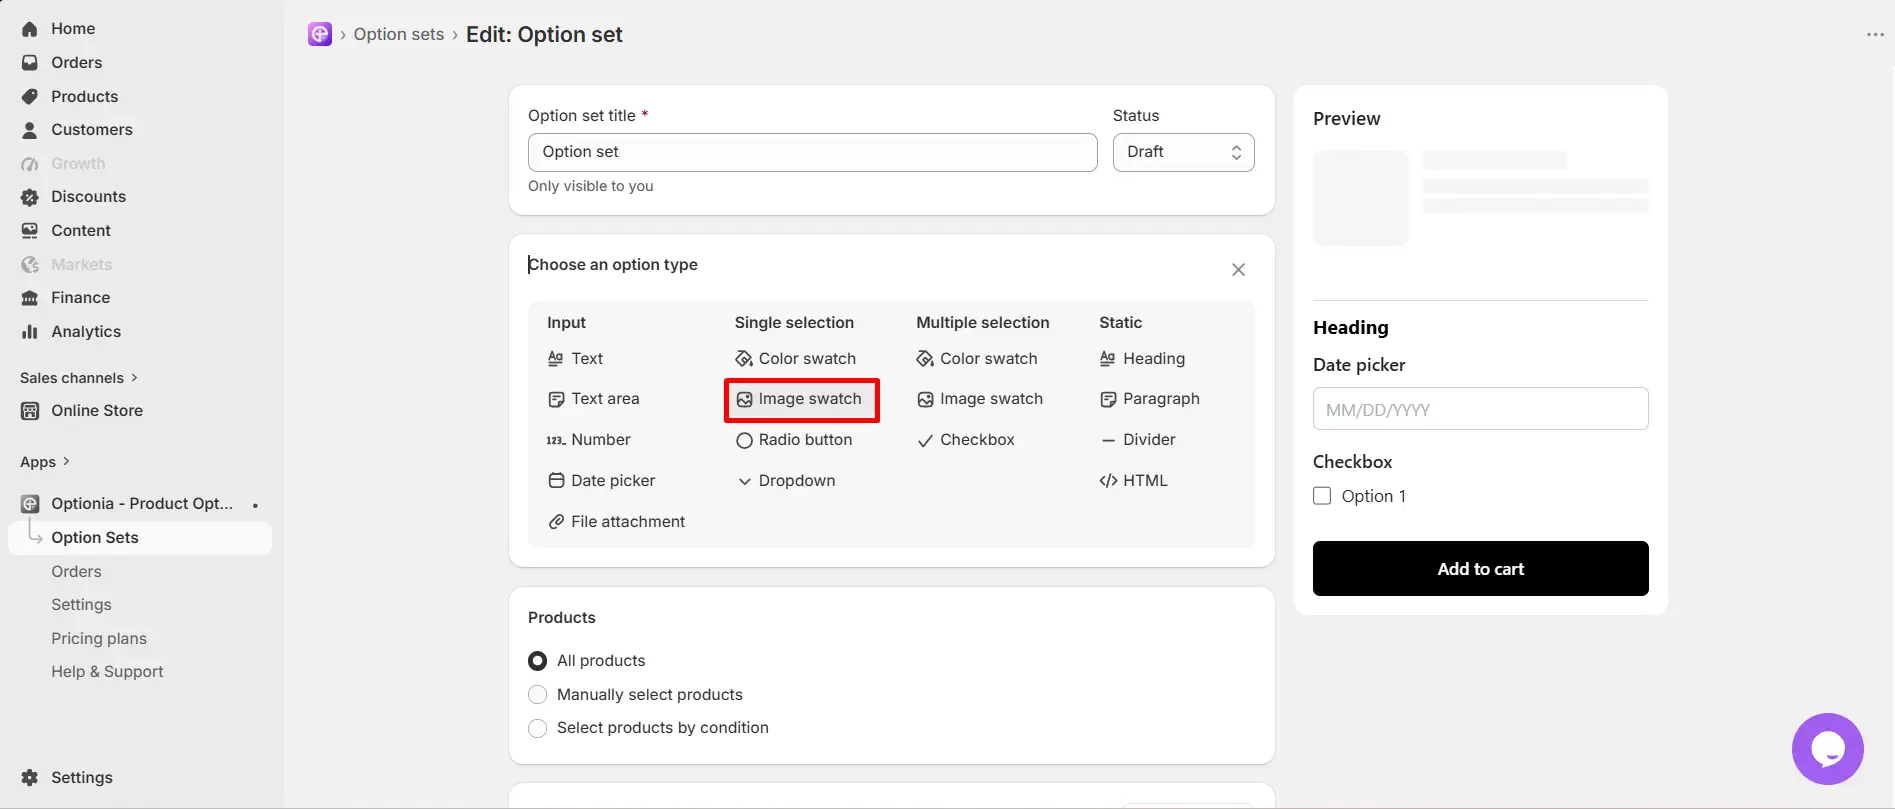
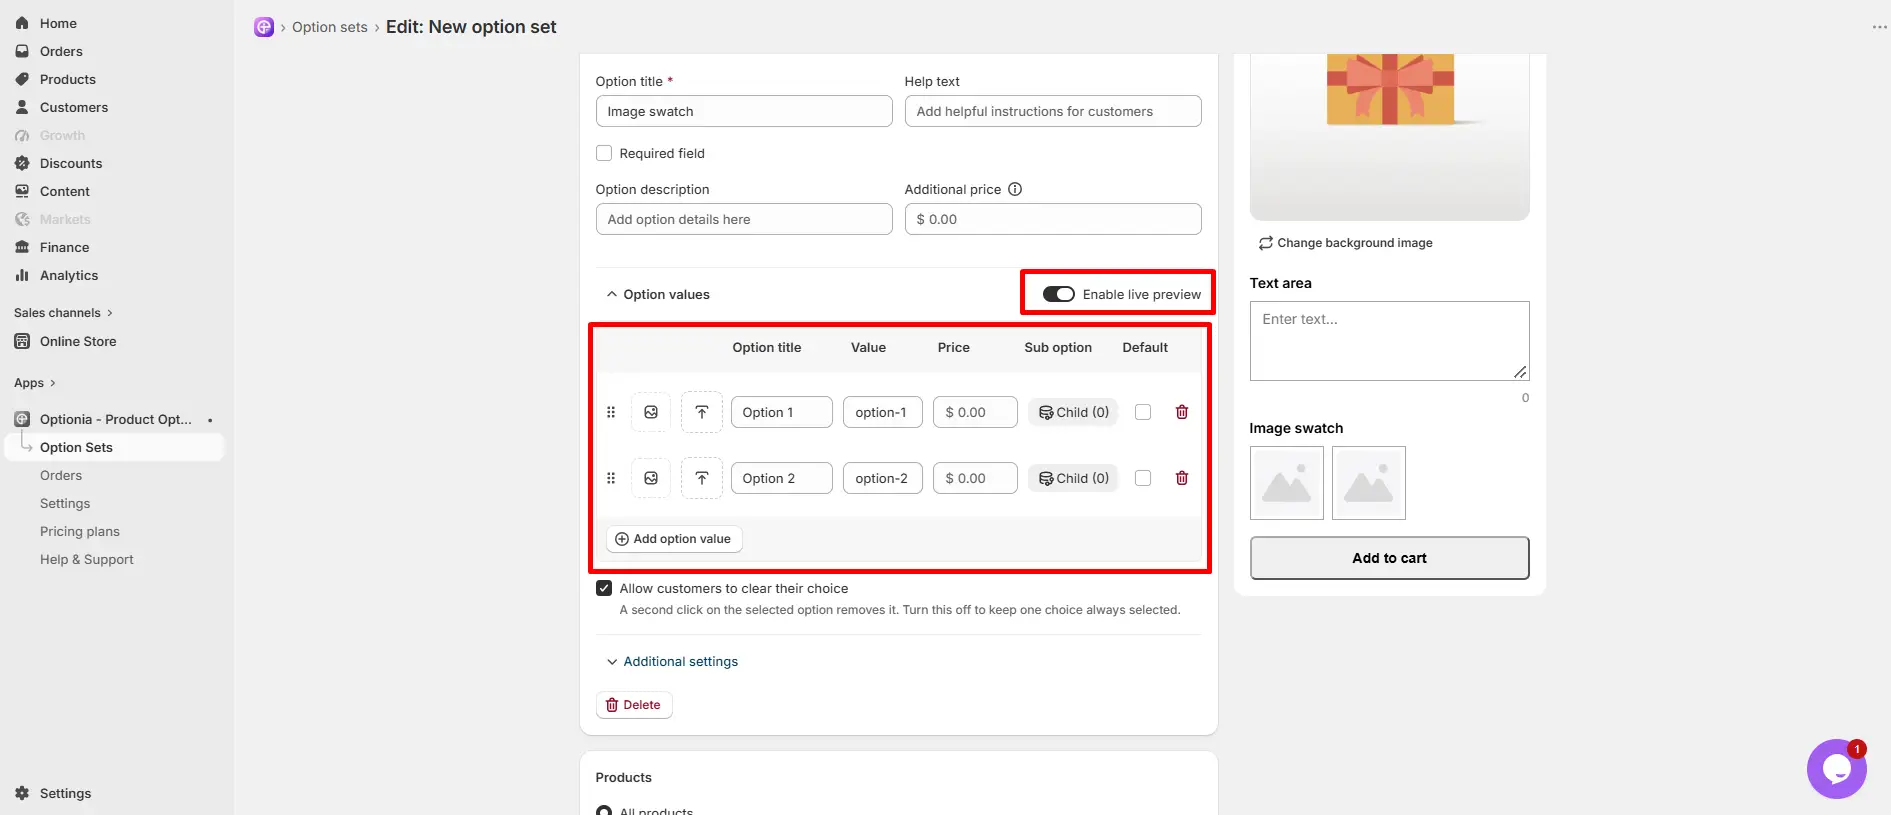
Click on the “Enable Live Preview” button to upload an image for each image swatch. When customers select the image on the product page, they will see the live product image of each swatch directly on the product page.
Please follow the steps below to set up the live preview on the image swatch option.
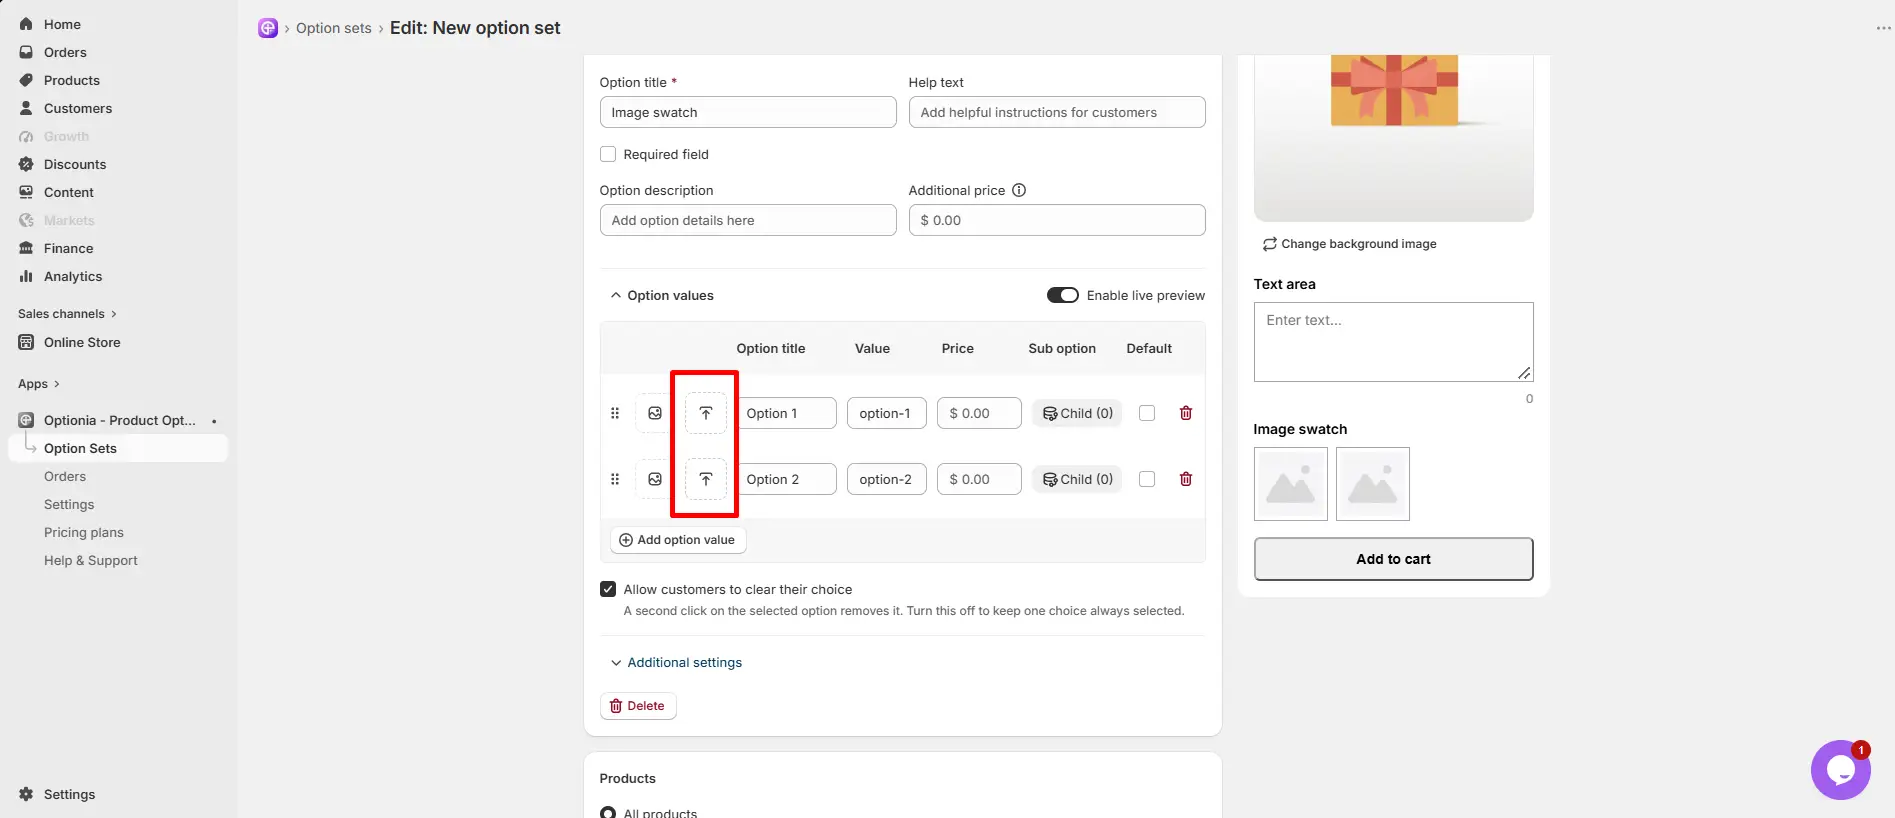
Click on the “Enable Live Preview” button to enable the image upload option for each swatch.
Then click on the upload icon to upload the product image of each option.
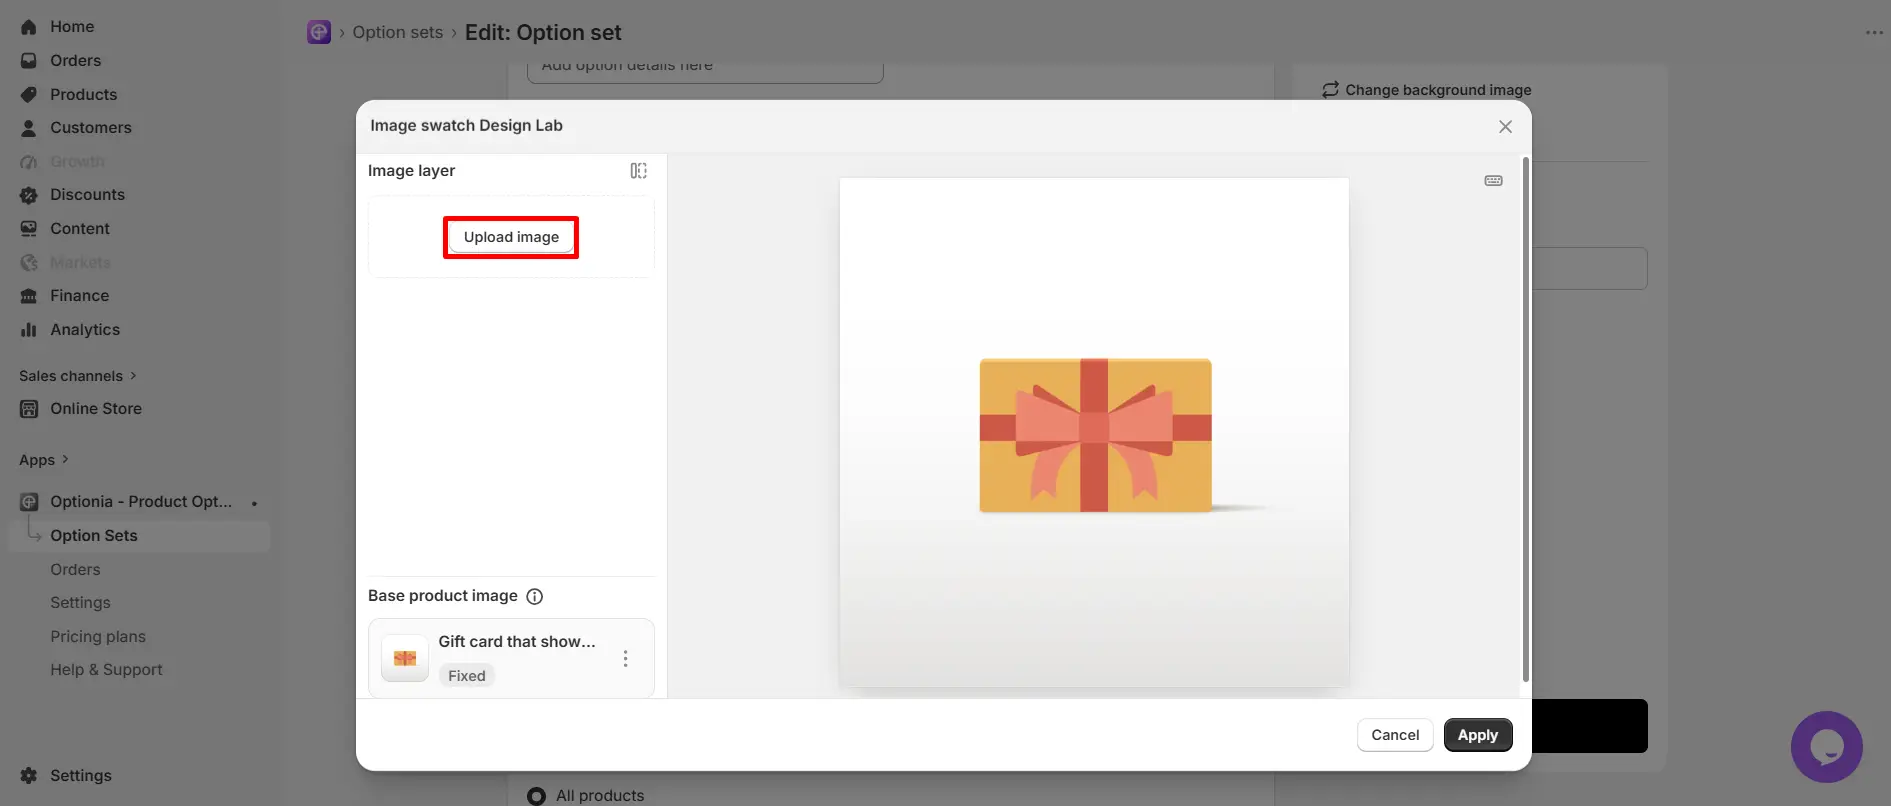
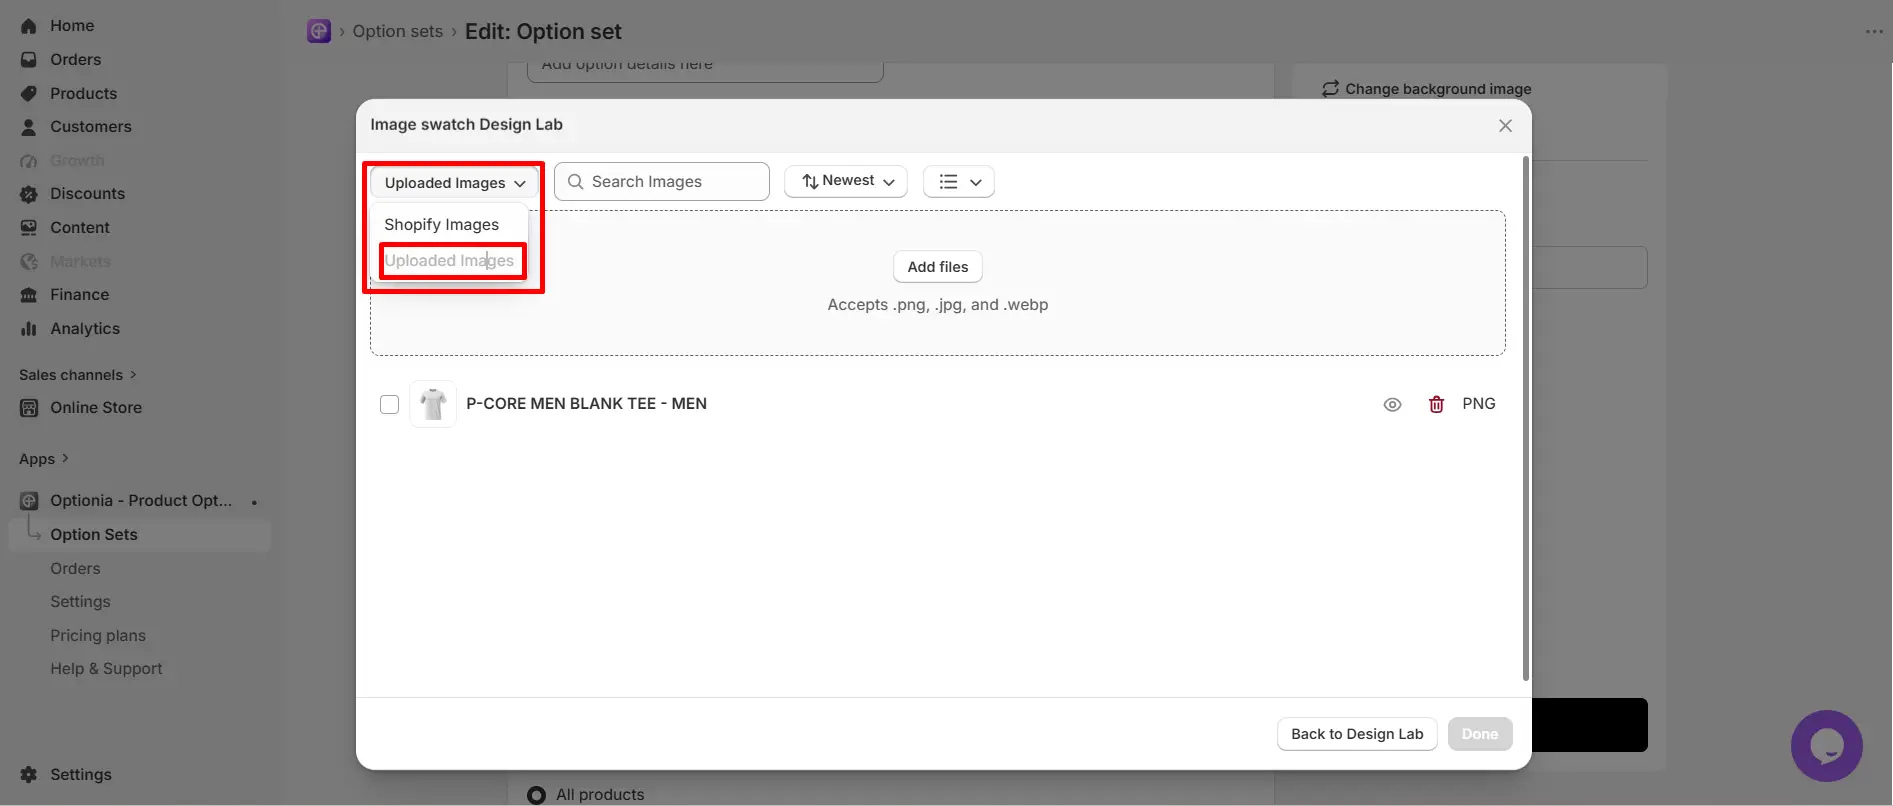
In the upload window, you can add an image in two ways: Shopify Image or Upload Image. Click the drop-down menu to select your preferred option.
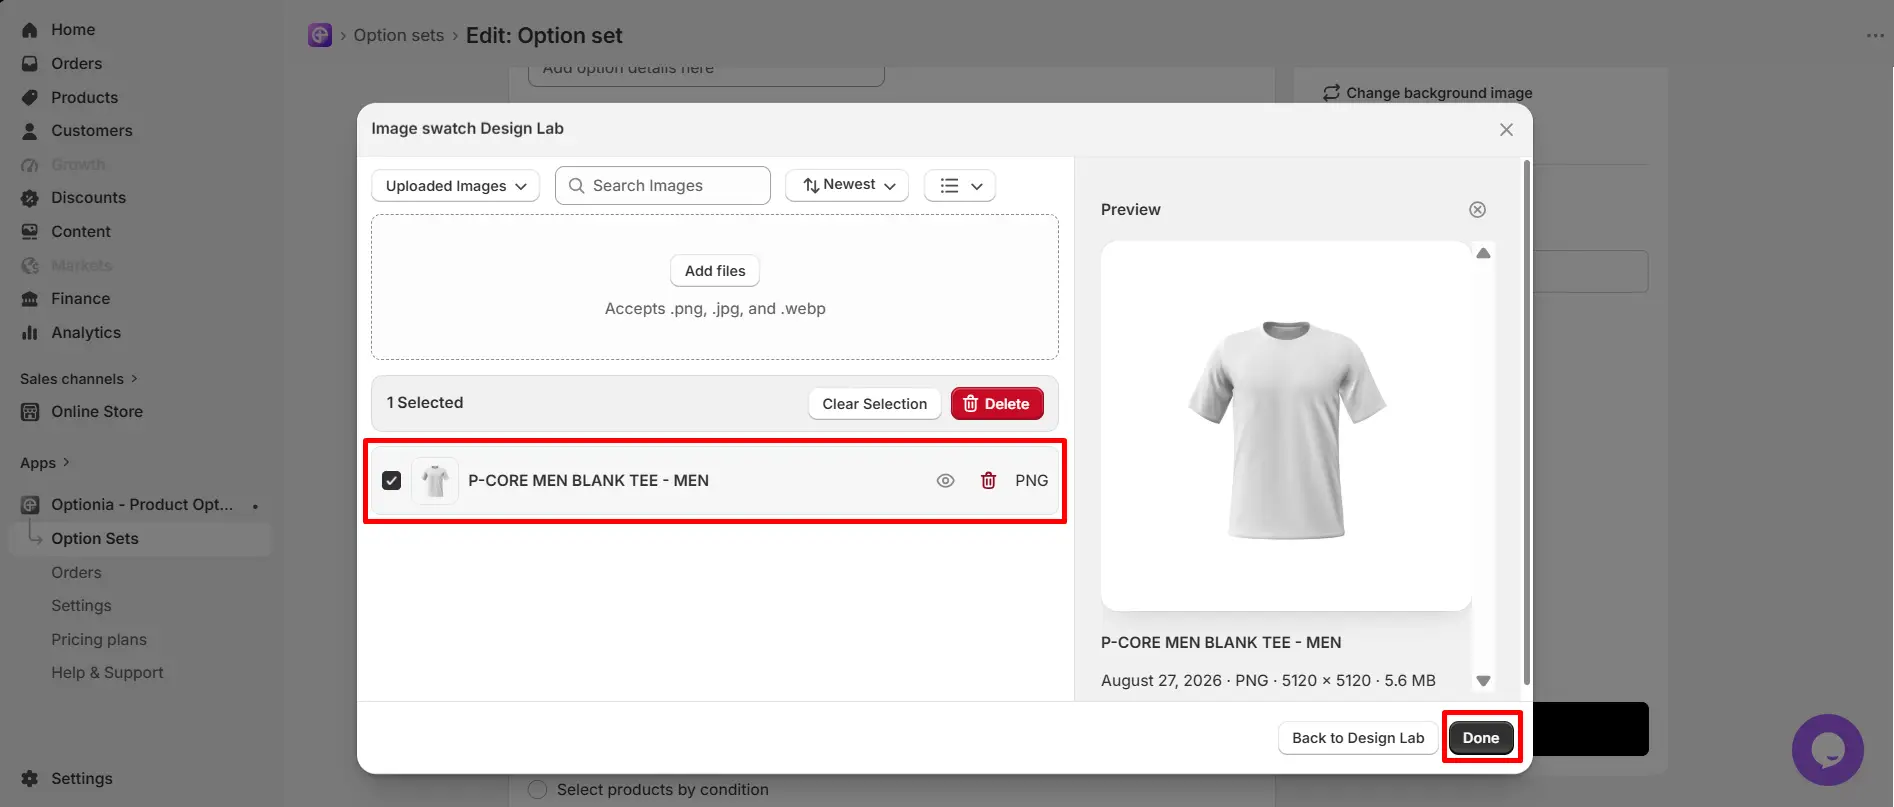
Shopify image: Select the Shopify image option from the drop-down. You will get a list of all Shopify products and can select one from them, like the image above.
Upload image: Select Upload Image from the drop-down and click on the “Add file” button to upload an image from your device. Accepted file types are PNG, JPG & WEBP.
It will redirect you to the designlab with a bunch of options to adjust the image. The design elements inside the designlab are described below:
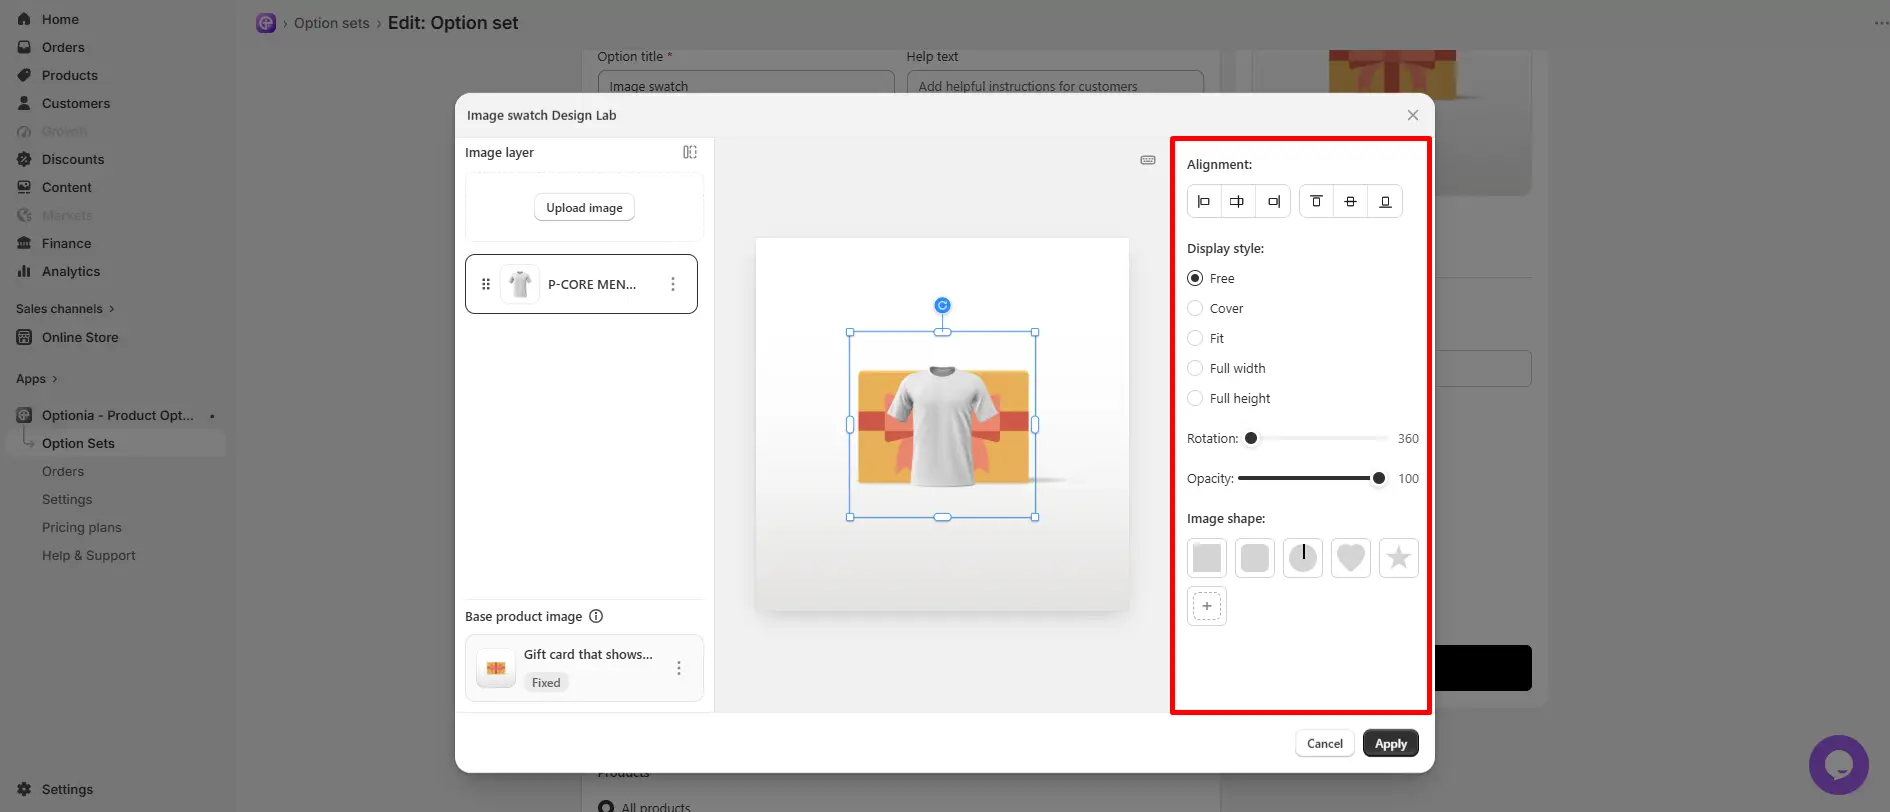
Alignment:
This section allows customers to align their uploaded image on the product differently.
Align Left: Positions the image to the left edge of the product image area.
Center Horizontally: Centers the image horizontally within the product image area.
Align Right: Positions the image to the right edge of the product image area.
Align Top: Positions the image to the top edge of the product image area.
Center Vertically: Centers the image vertically within the product image area.
Align Bottom: Positions the image to the bottom edge of the product image area.
Display Style:
This section allows customers to choose how their image is displayed within the design area.
Free: Customers can resize and position their image freely within the product image area.
Fit: The image will be resized to fit within the product image area while maintaining its original aspect ratio.
Cover: The image will be resized to cover the entire product image area.
Full Width: The image will be resized to the full width of the product image area.
Full Height: The image will be resized to the full height of the product image area.
Rotation:
This section is only available when the "Free" display style is selected. It allows customers to rotate their image. Customers can drag the black dot to increase and decrease the degree of rotation of the image.
Note:
|
Opacity:
Use this setting to change the opacity of the image. The opacity is 100 by default. Drag the bar from right to left to make the image transparent. The opacity ranges from 0 to 100.
Image shape:
It defines the shape of the image on the cap. Click on any of the five existing shapes for your image. However, click on the + button to add more shapes to the shape library.
Note: Only PNG files are accepted. Use transparent-background PNGs Transparent areas in your PNG are removed, and the visible area becomes a shape. PNGs with a solid background will appear as rectangles. |
Apply: Click on the Apply button to complete the image upload process and apply the image for the color.
Need Help?
 Getting Started
 Option Sets
 Orders
 Settings
 Configuration
 Live Preview
 Packages
 Help & Support
 Price Add-Ons
 Conditional Logic
 Design Theme Styling
 Uninstallation