With this you can select multiple images listed.
To add the Multiple selection image swatch to your option set, follow the step-by-step guide below:
From the Optionia dashboard, click Option Sets from the left navigation menu.
Then, click the Option Set where you want to add the Image swatch option.
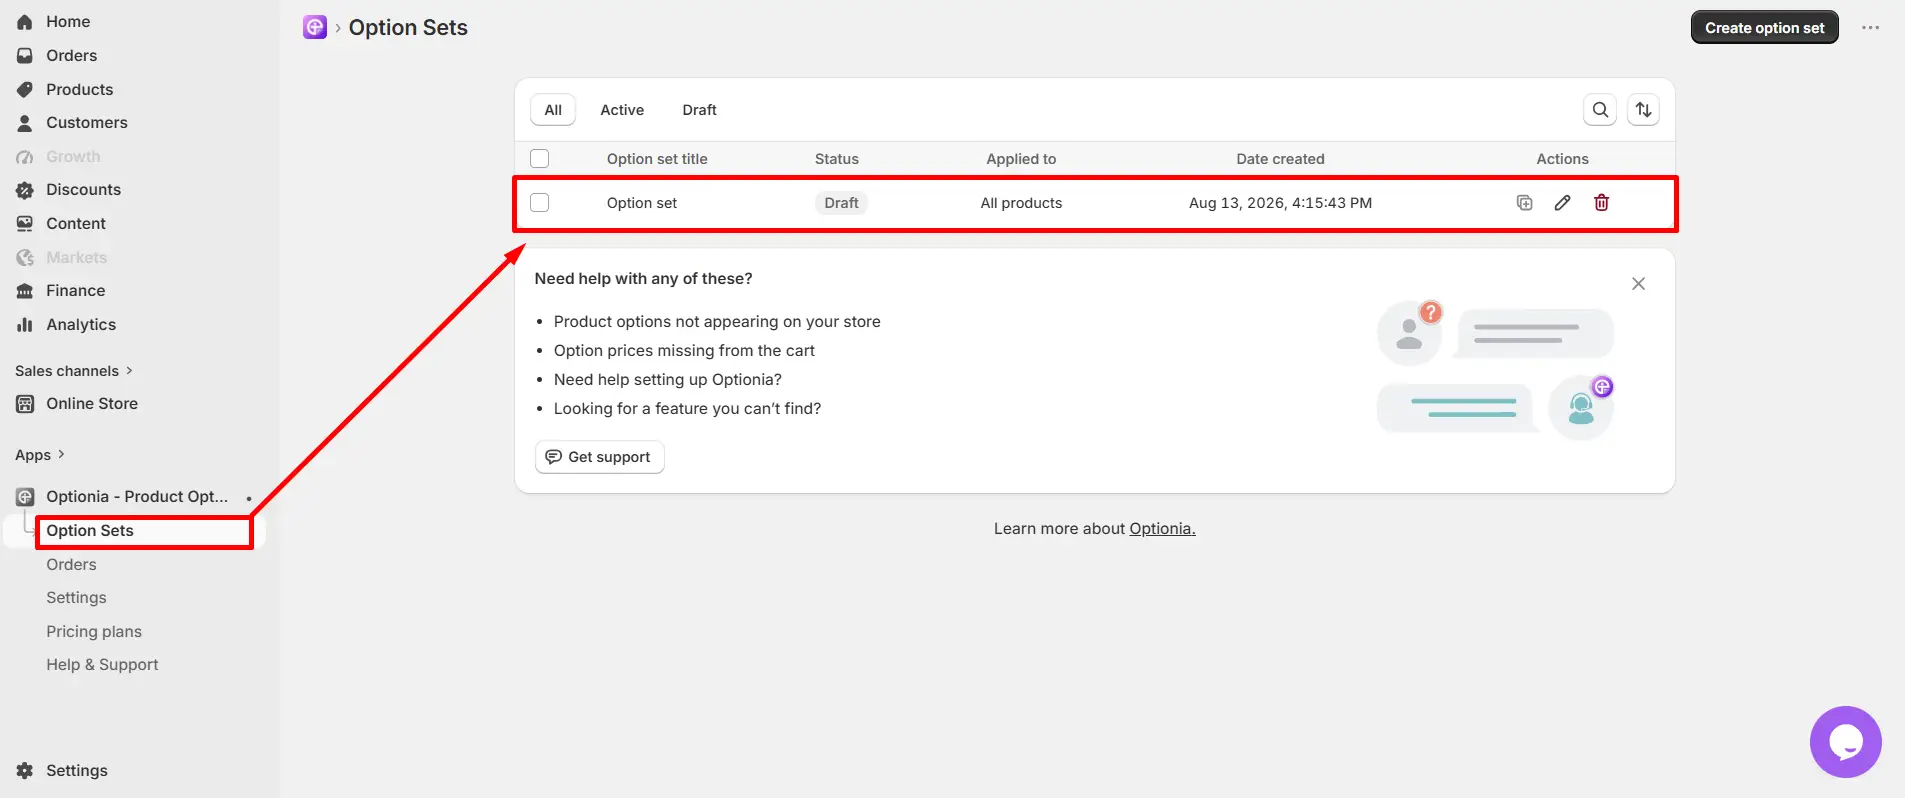
You can add the Image swatch option to either a new option set or an existing one. You can learn to create a new option set in another part. For now, we will discuss how to add an Image swatch option to an existing option set.
Click the “add options” button in the top right corner.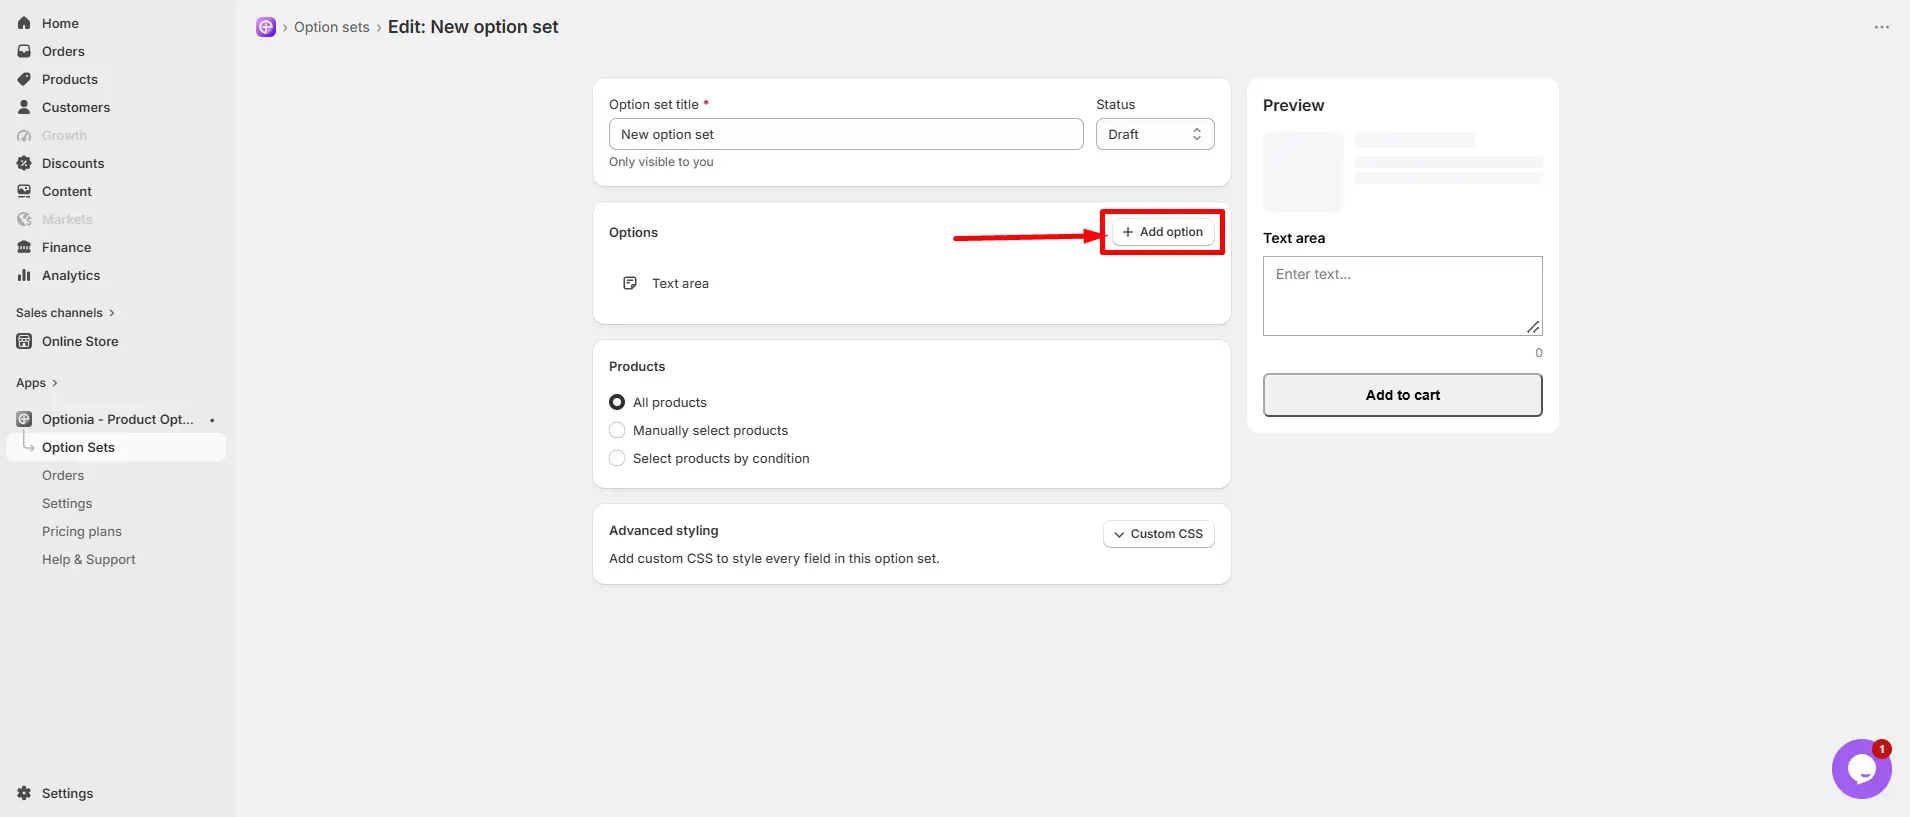
Select the “Image swatch” option under Multiple Selection.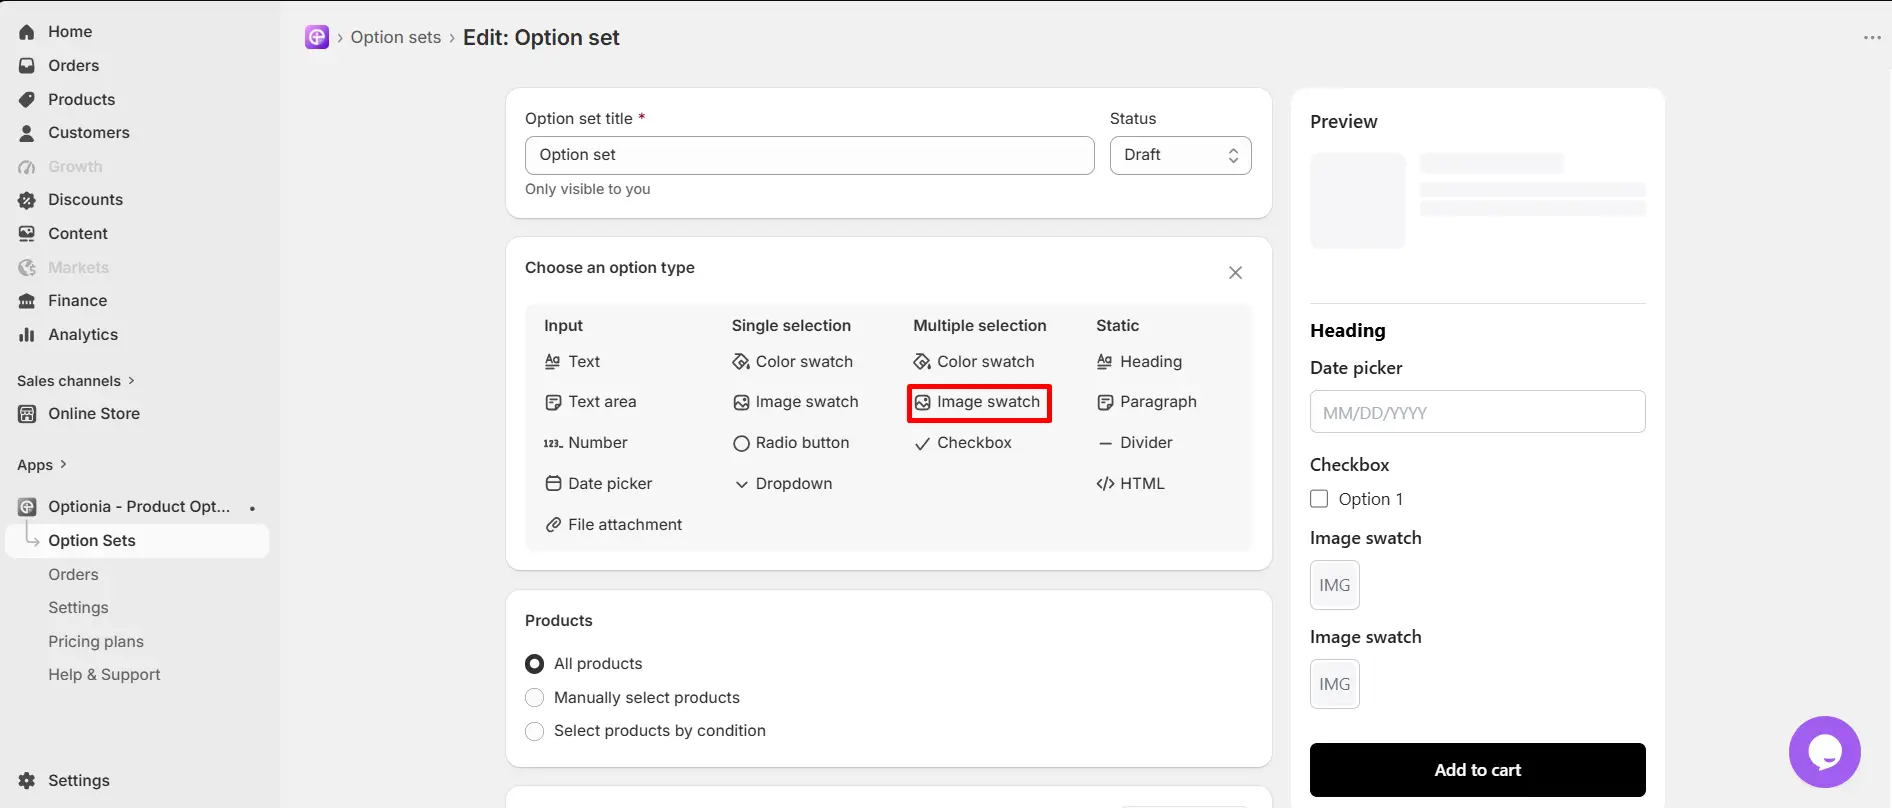
Fulfill all the necessary information first:
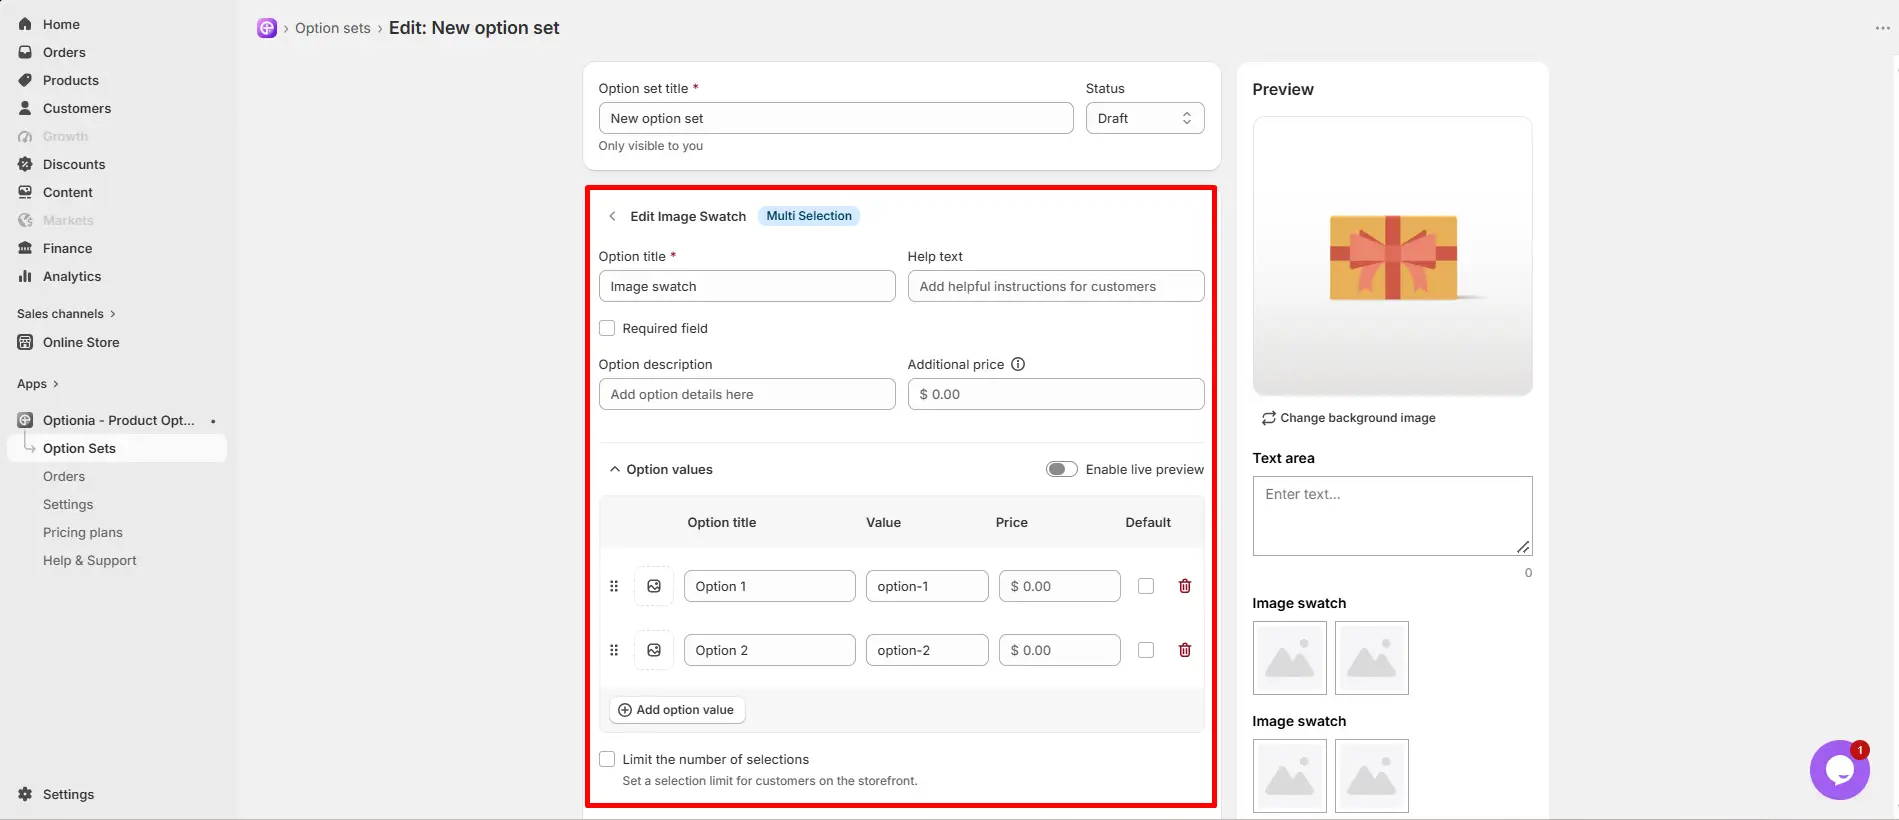
Option title: Add or edit the option title. This is a required field, so you must add the option title
Add a description: You can add a description in this field to clarify what kind of information to add.
Add a help text: Add help text to help customers with any additional information.
Additional Price: You can set a fixed extra price for this whole color swatch option. This price will be charged when the customer selects this option.
Option values: Here, you would find several fields to fill out:
Add Image: Add an image of your product. Click on the image icon > select custom image/ Shopify product image > click on “Add Image”/ “Select image” > click “Done.”
|
Important: The “Custom Image” option only accepts jpeg, jpg, png, gif, and WEBP. |
Option Value Title: Set a name for the options attribute here.
Value: You can provide a value for the attribute here.
Price: If you want to charge extra for the variant, put the added price here, which will be added to your base product price.
Default: Check the box to set an attribute as the default. It will be shown as the default attribute on the product page.
Delete: Click on the red trash icon to remove the options attribute, including all of its conditional child options (if any).
Add option value: Click here to add more option values for this option.
Enable live preview: To enable the live preview of your image swatch, please follow this help doc for better understanding.
|
Note: You can add multiple values using the “+ add option value” button |
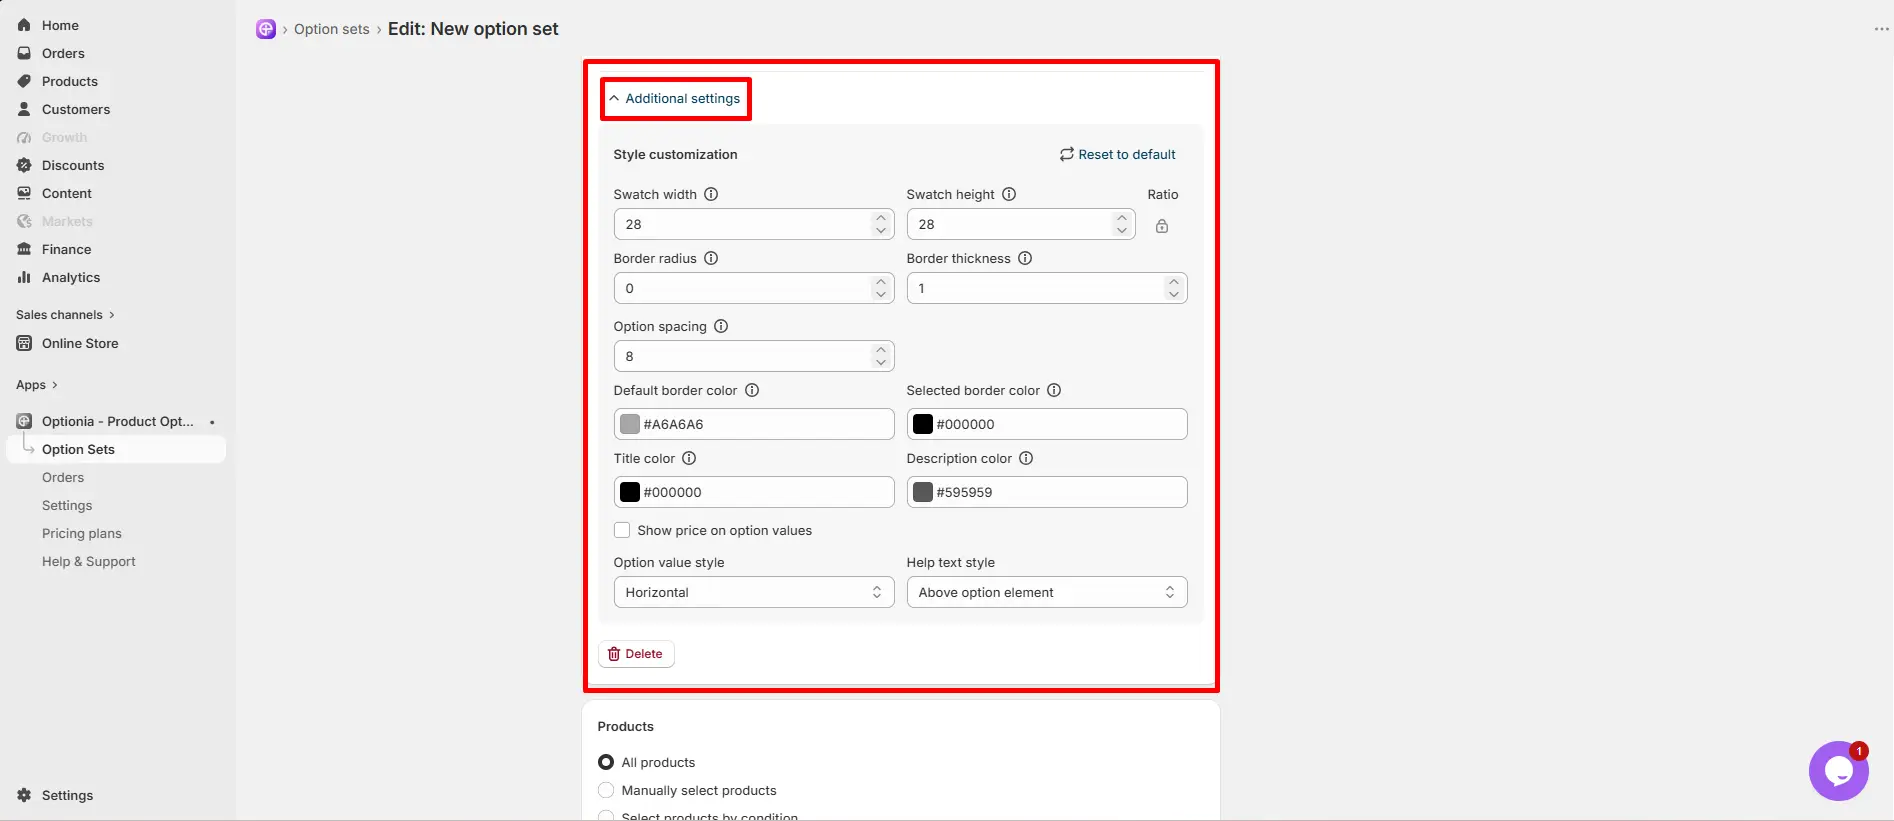
After you are done with the essential settings, scroll down to find the “additional settings”. Optionia lets you style each option however you like.
In the Additional Settings, stylize:
Swatch Width: It controls the horizontal size of the swatch or option. Increasing this value makes the option wider.
Swatch Height: It controls the vertical size of the swatch or option. Increasing this value makes the option taller.
Ratio:
When the ratio is locked, height and width stay proportional. Changing one dimension (height or width) automatically adjusts the other.
When the ratio is unlocked, height and width can be changed independently. Adjusting one dimension does not affect the other.
Border radius: This value adjusts the degree of corner rounding of your swatches.
Lower value → sharper corners
Higher value → more rounded or circular look
Border thickness: It sets the border thickness around the option. A higher value makes the border more visible.
Default border color: Defines the default border color for options.
Selected border color: Defines the border color for the selected option, helping it stand out.
Choice spacing: You can increase or decrease spacing among the swatches with choice spacing.
Option value style: This setting allows you to control how option values are displayed on the storefront. You can choose to display the option values vertically or horizontally, depending on your preferred layout.
Help text style: This setting controls where the help text is displayed in relation to the option element. You can choose from the following options:
1. Above Option Element: Displays the help text above the option elements next to the option title as a tooltip message.
2. Below Option Element: Displays the help text below the option element.
3. No Help Text: Hides the help text completely.
Price shows with option value: A checkbox that, when checked, will display the price modifier (e.g., "$0") next to the option text in the final display.
Title color: Choose the color of the title.
Description color: Choose the color of the description.
Bring your brand’s vibe to the option sets with additional stylization.
When you are finished, save the Option set.
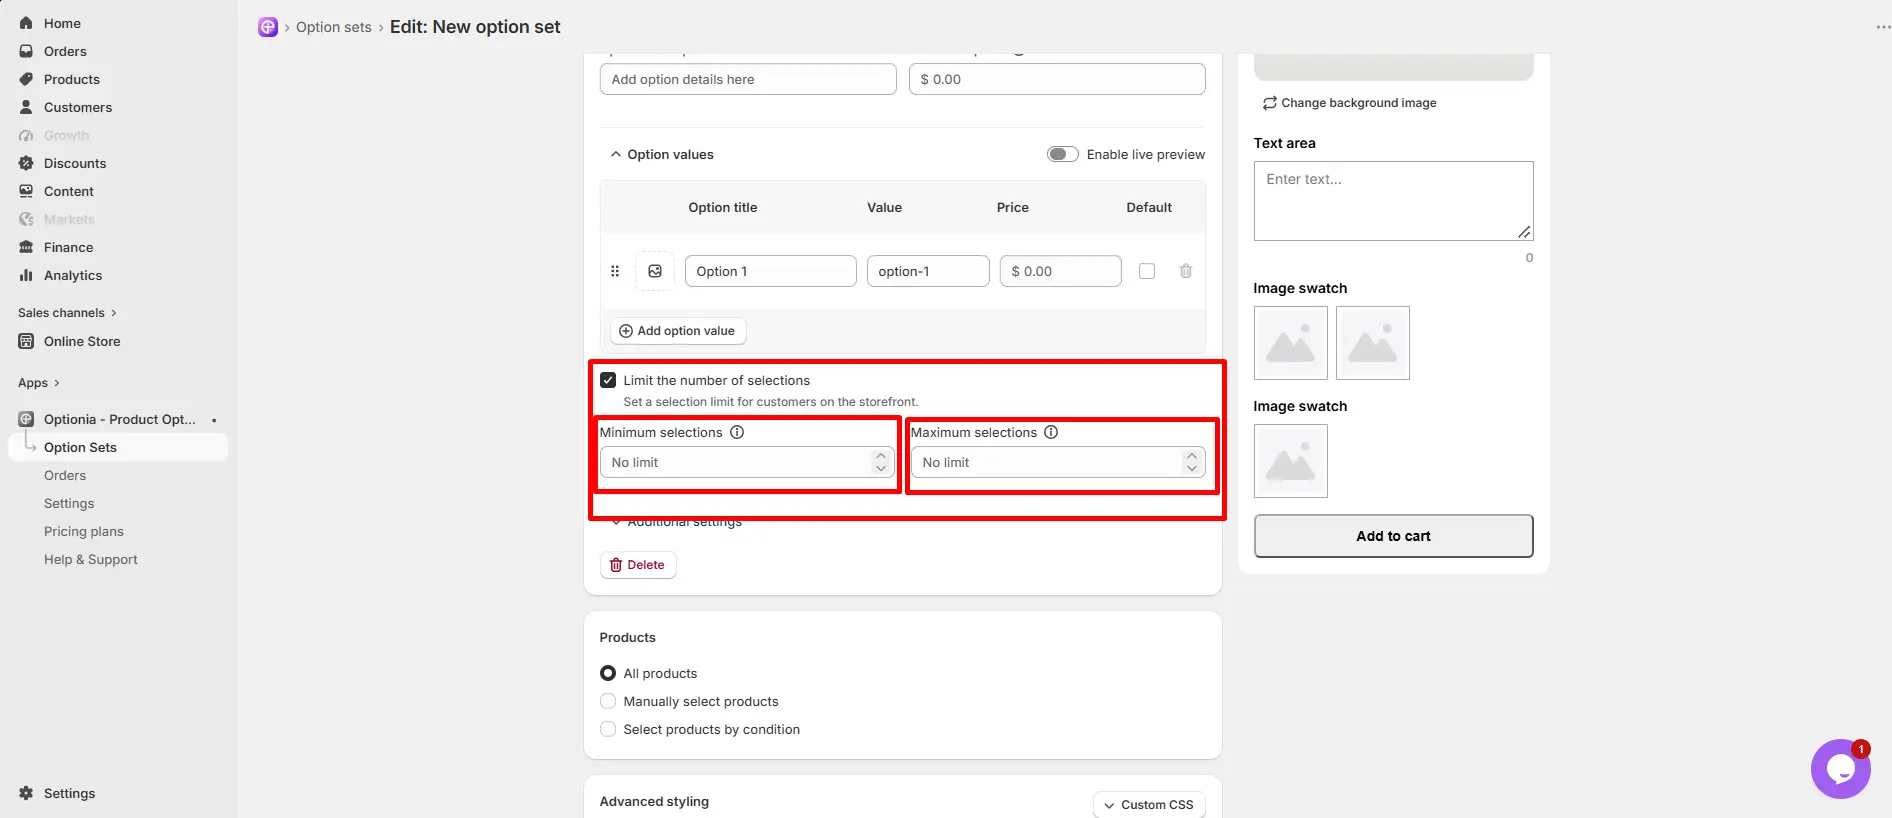
Check the box for Limit the number of selections if you want to set minimum or maximum limits on how many images a customer can pick:
Minimum selections: Set the least number of images a customer must select (for example: 2).
Maximum selections: Set the highest number of images a customer is allowed to select.
After configuring your Image swatch option, you need to assign the Option Set to the products where you want the checkboxes to appear.
You can find Product Assignment at the bottom of the Option Set.
|
Step: Open the option set > scroll down to find the “Product Assignment” option > select any of the three radio buttons. |
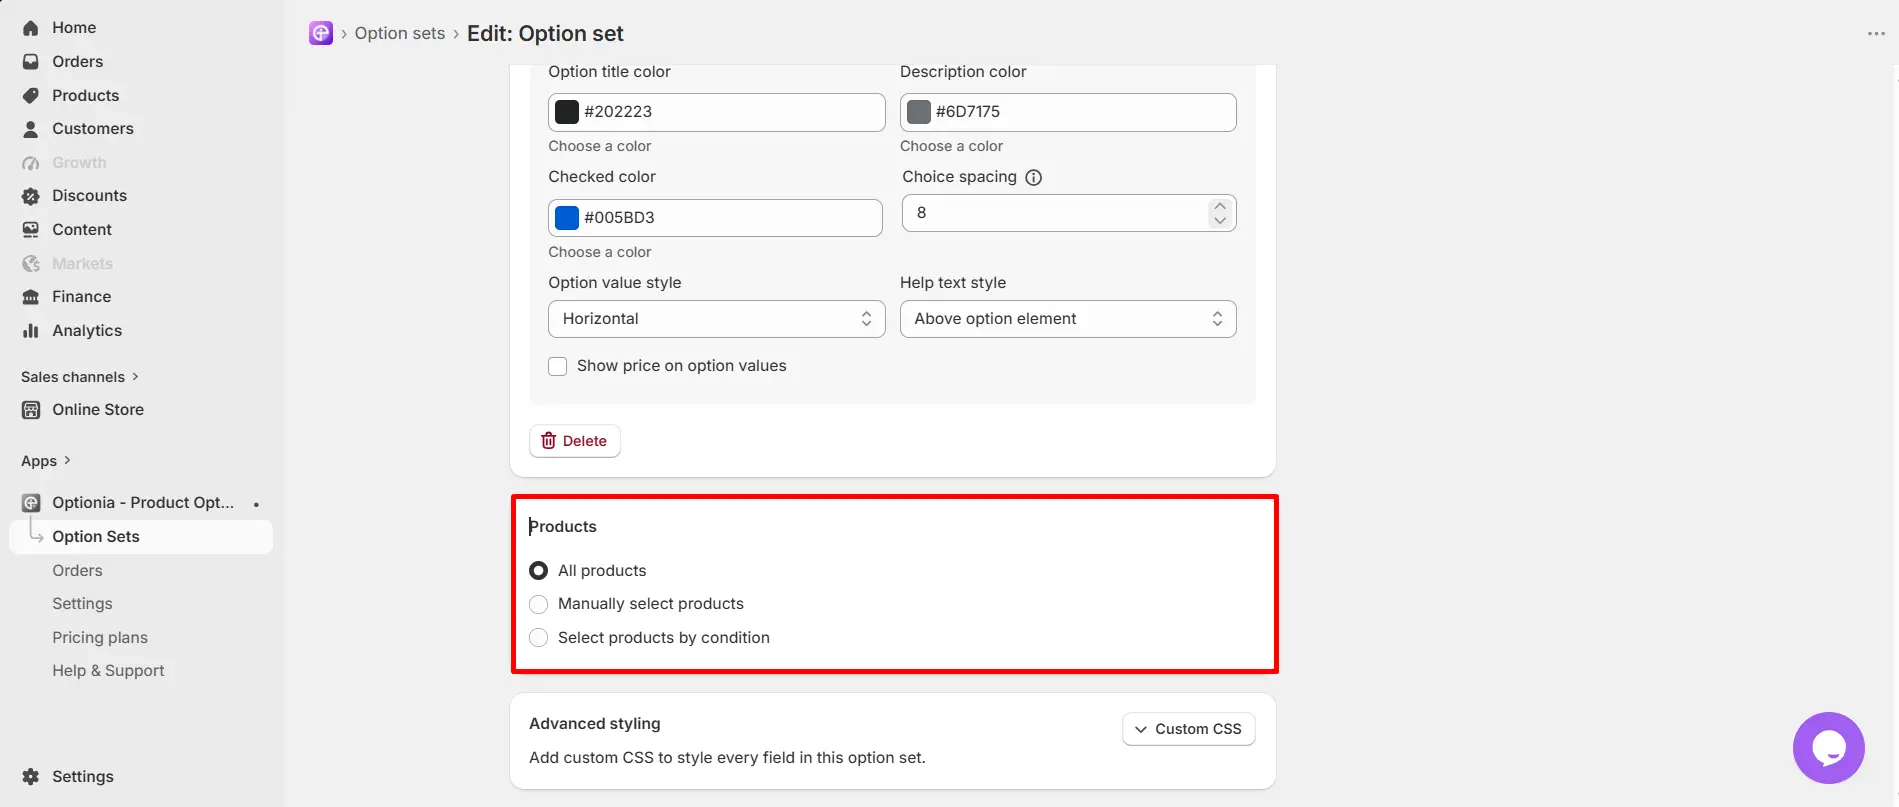
All Products: Select All Products to apply the Option Set to all products in your store.
Manually Select Products: Select Manually Select Products when you want to choose specific products to which the Option Set should be applied.
Select Products with Conditions: Select Products with Conditions when you want to apply the Option Set based on specific product conditions automatically.
You can use the available conditions to determine which products should receive the Option Set.
|
Important: You can assign the option to a product category from here. But if you add the Image swatch Option under an option set that’s already assigned to a product type, that option will also follow that product type. |
Need Help?
If you have any questions or need assistance, we will be happy to help.
Live Chat for quick assistance.
Submit a Support Ticket for detailed questions or issues.
Email: support@optionia.com
 Getting Started
 Option Sets
 Orders
 Settings
 Configuration
 Live Preview
 Packages
 Help & Support
 Price Add-Ons
 Conditional Logic
 Design Theme Styling
 Uninstallation