A step-by-step guide on how you can add a multiple-selection checkbox to your product page
From the Optionia dashboard, click Option Sets from the left navigation menu.
Then, click the Option Set where you want to add the checkbox option.
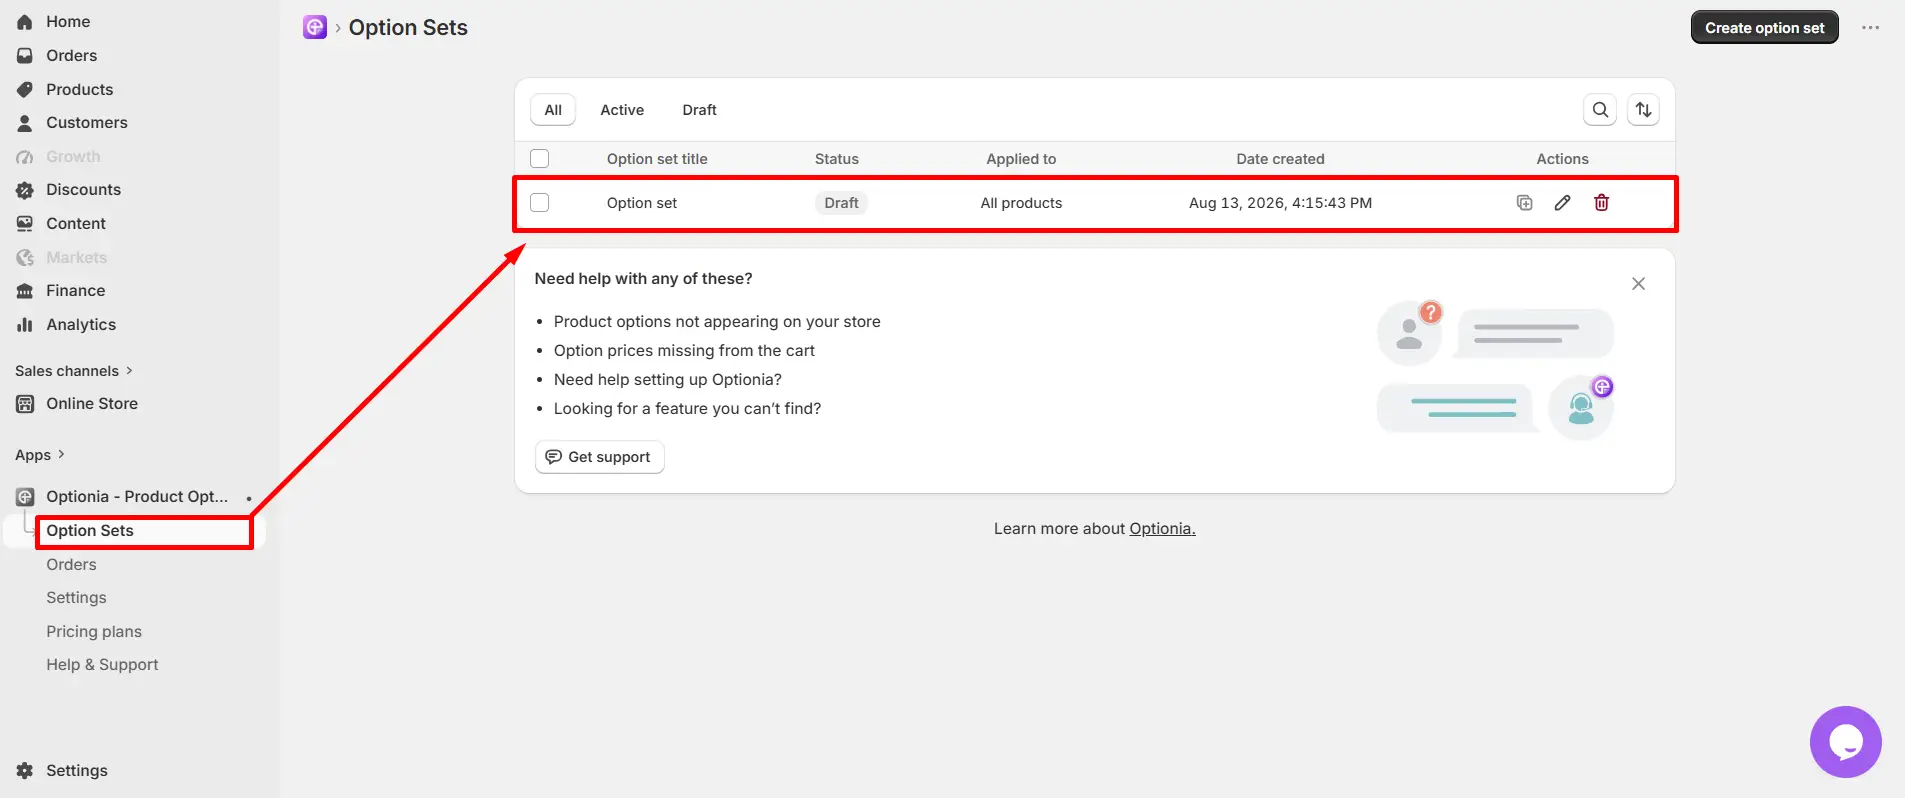
You can add the checkbox option to either a new option set or an existing one. You can learn to create a new option set in another part. For now, we will discuss how to add a checkbox option to an existing option set.
Click the “Add Options” button in the top right corner.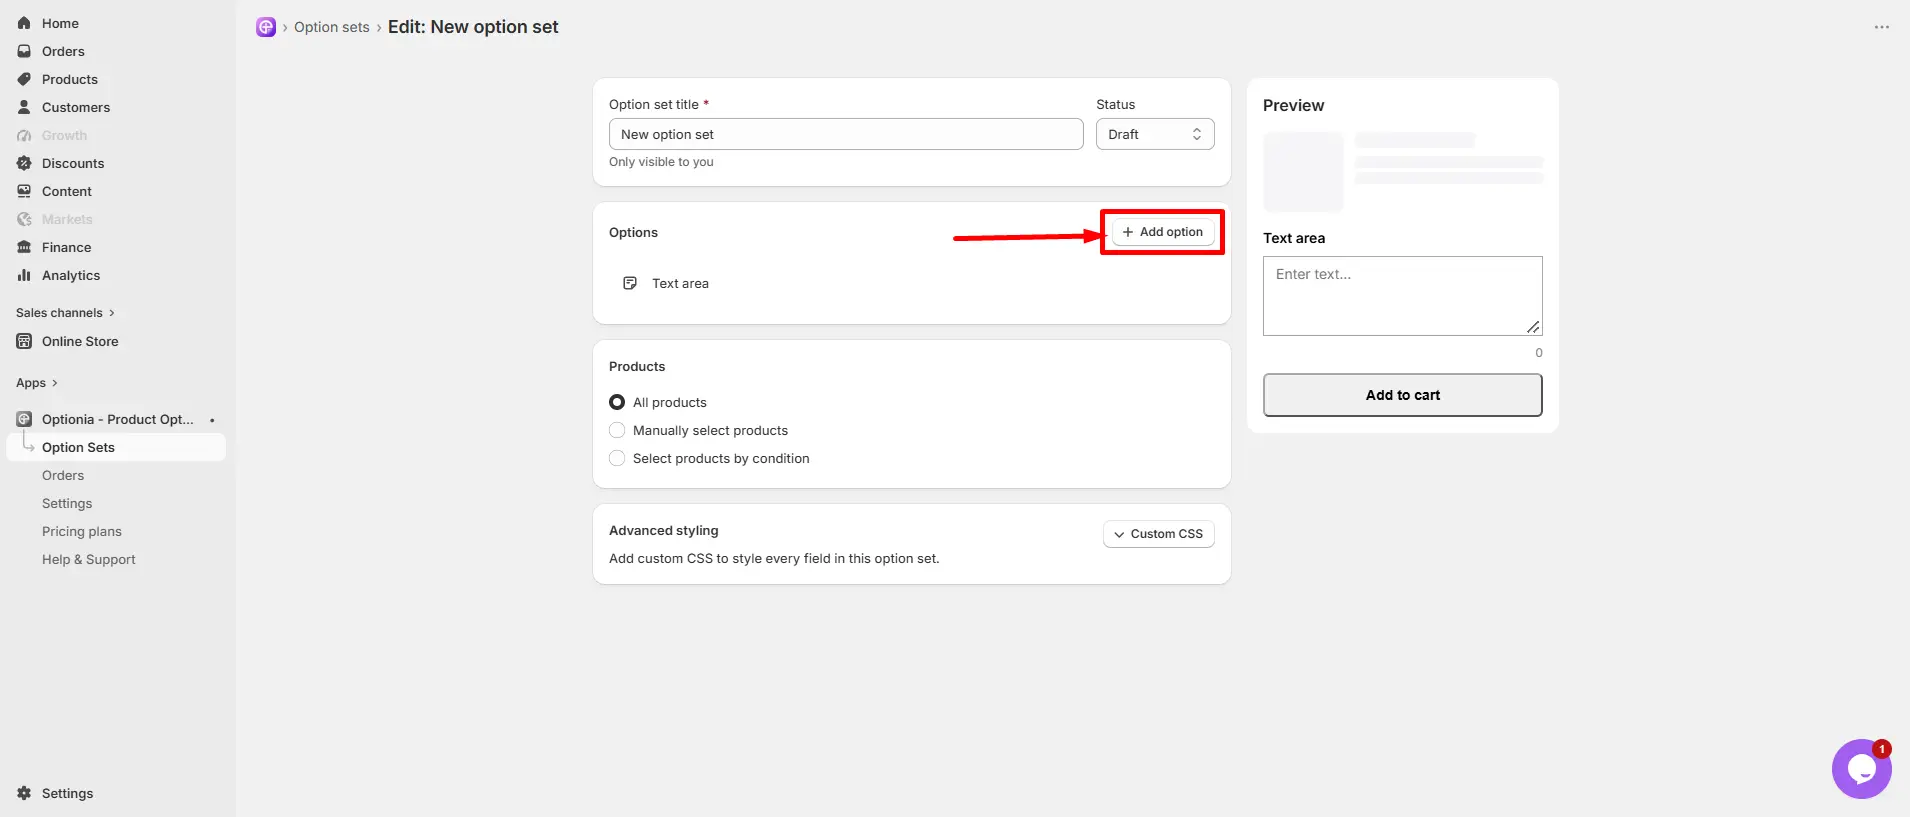
Select the “Checkbox” option under Multiple Selection.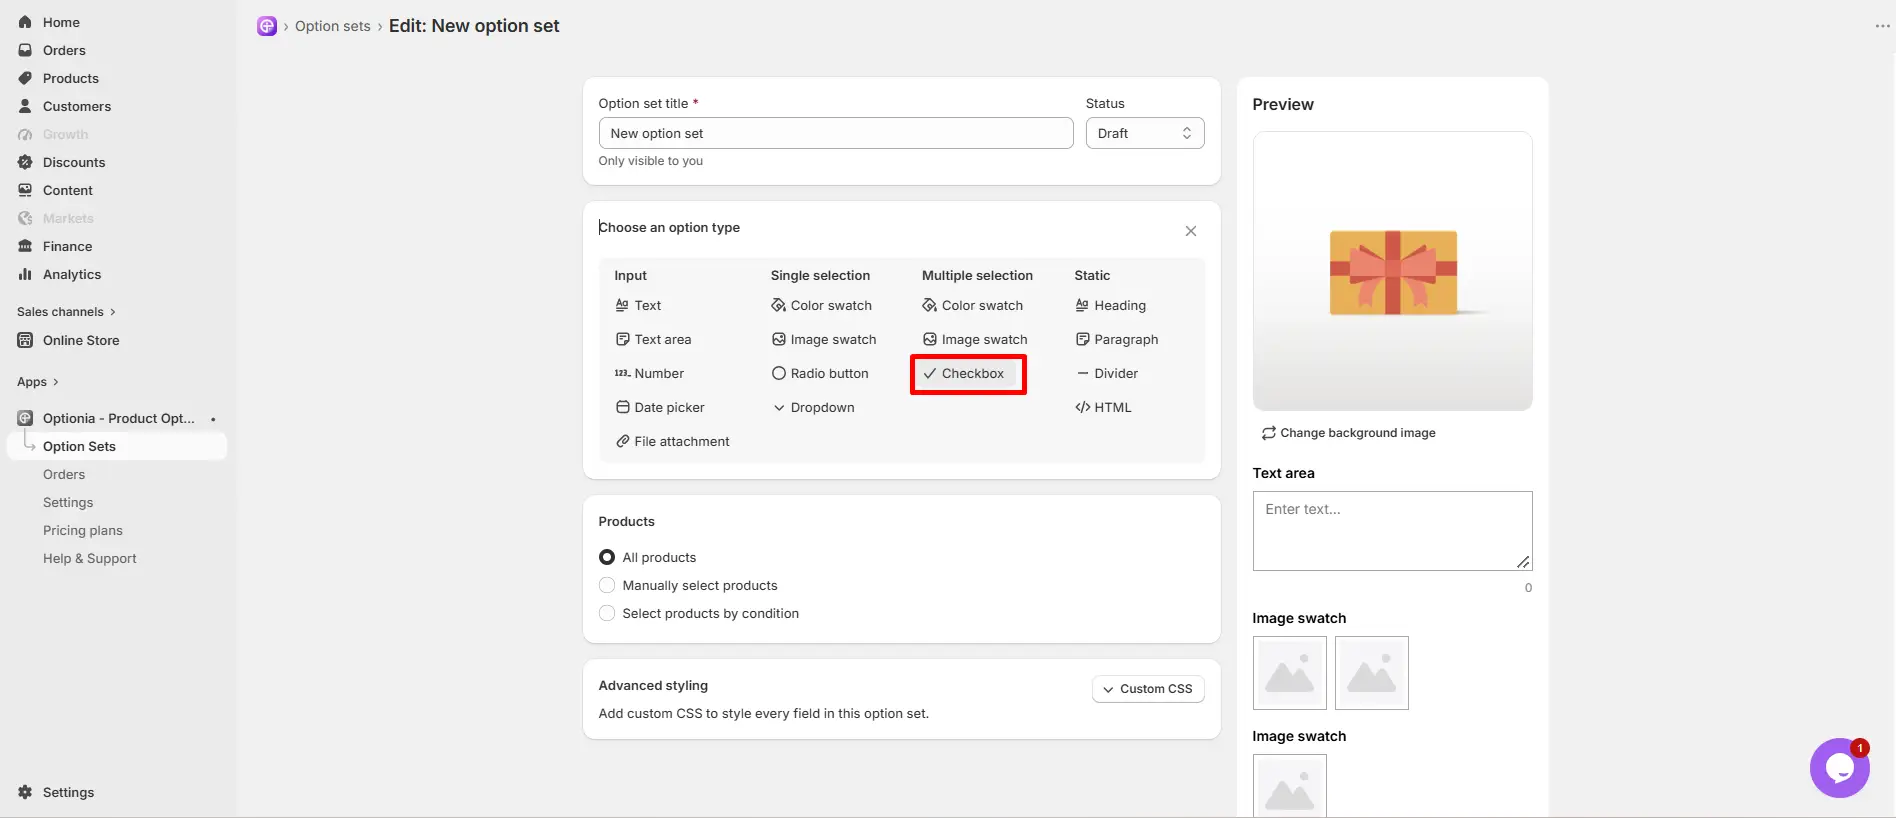
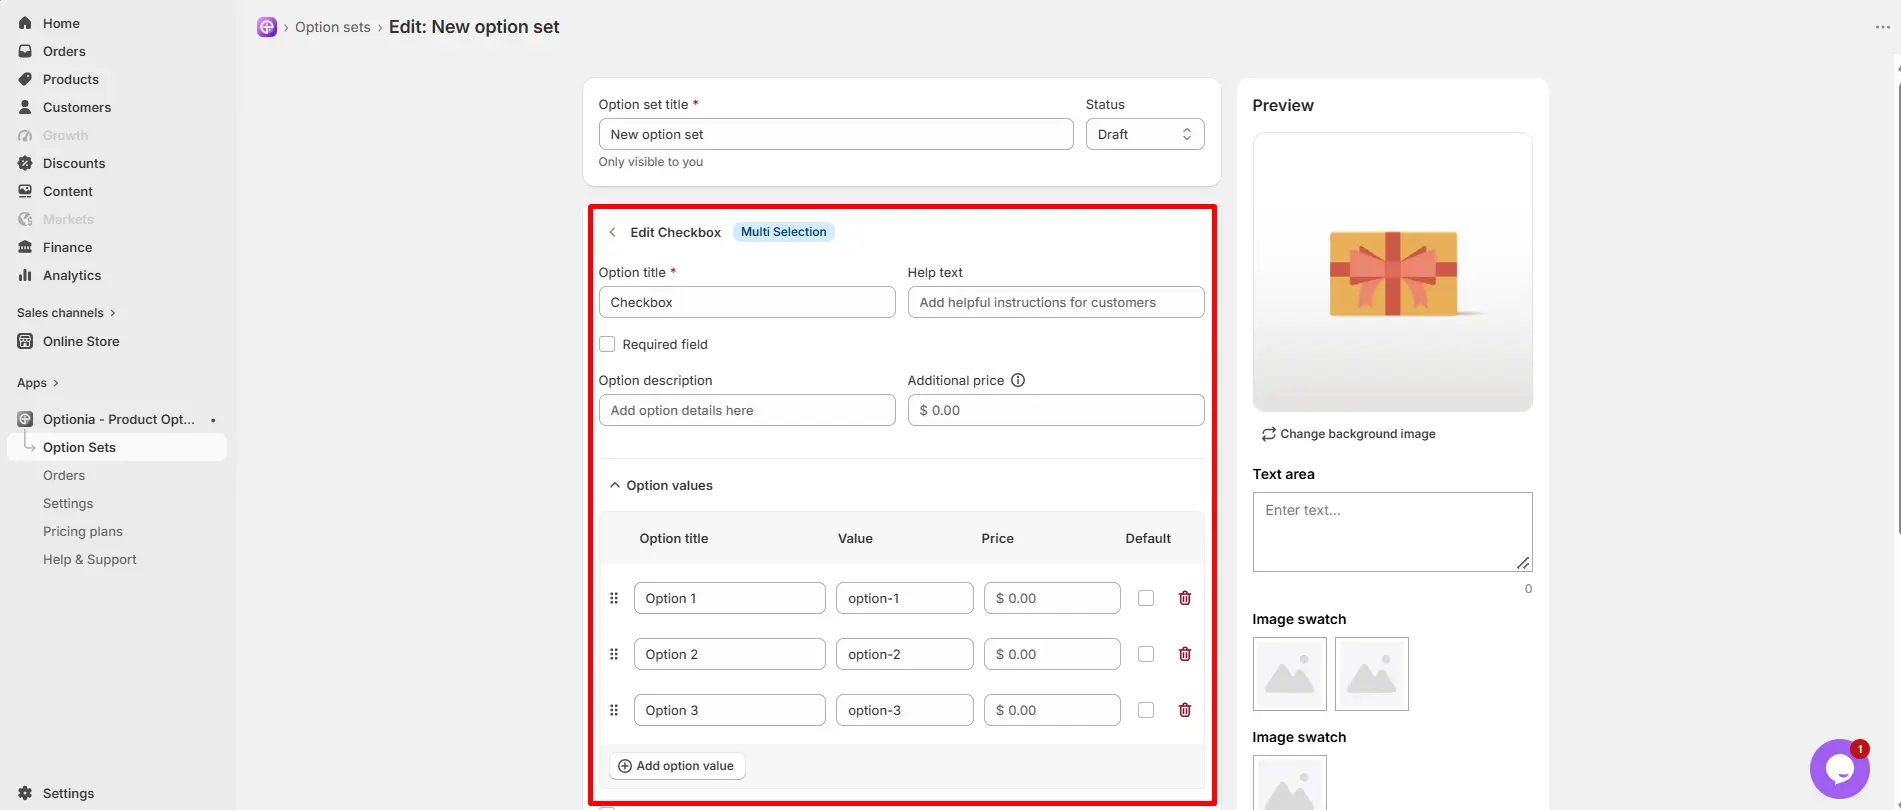
Then you can edit the checkbox option as you like. Fulfill all the necessary information first:
Option Title: Add or edit the option title. This is a required field, so you must add the option title.
Help text: Add helpful instructions for customers.
Option description: Add option details here.
Additional Price: If you want to charge extra for the option, put the added price here, which will be added to your base product price.
Option Value Title: Set a name for the options attribute here.
Value: You can provide value for the attribute here.
Price: If you want to charge extra for the option value, put the added price here, which will be added to your base product price.
Default: Check the box to set an attribute as the default. It will be shown as the default attribute selected on the product page.
Delete: Click on the red trash icon to remove the options attribute.
Add option value: Click here to add more option values for this option.
Limit the number of selections: Set a selection limit for customers on the storefront.
Reorder: Click and drag this dotted icon to rearrange attributes.
|
Note: You can add multiple values using the “+ Add Option value” button, and by checking the “Limit the number of selections” you can limit the number of options customers can select at a time. |
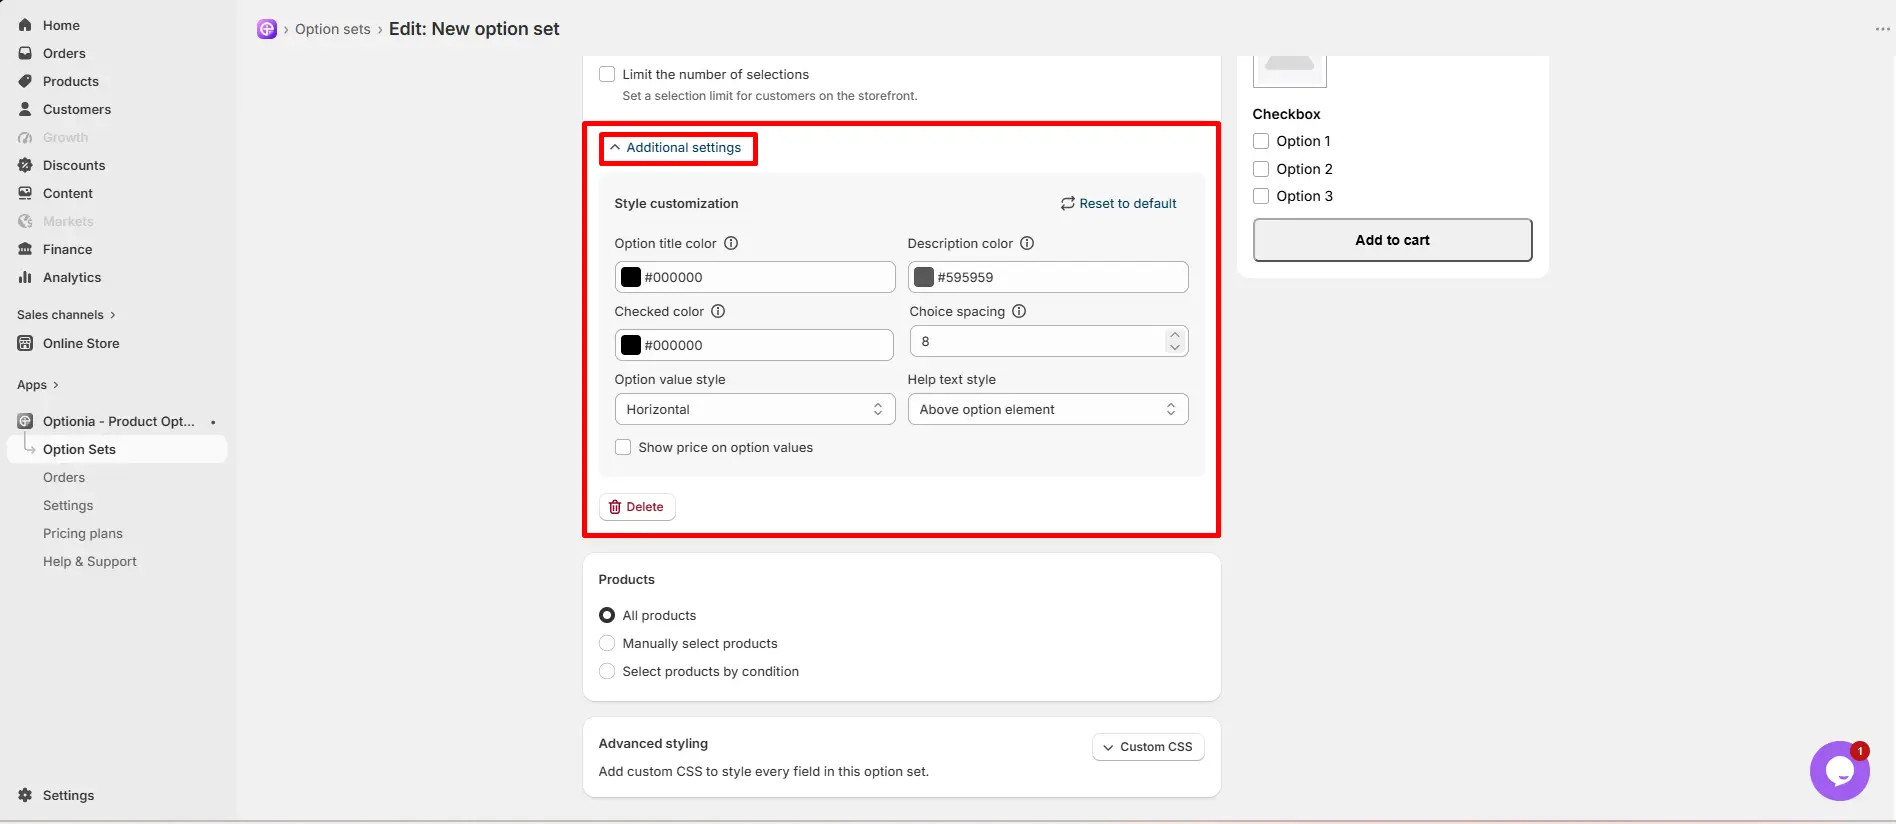
After you are done with the essential settings, scroll down to find the “Additional Settings”. Optionia lets you style each option however you like.
In the Additional Settings, stylize:
Option title color: This sets the color of the option title.
Description color: Choose the color of the description.
Checked color: This defines the fill color inside the checkbox when it is selected
Choice spacing: Spacing of the checkboxes.
Option value style: A dropdown menu that lets you change the layout orientation of the options. (horizontal/vertical)
Help text style: A dropdown menu to choose how helpful hints or descriptions are displayed to the user. It is currently set to "Tooltip."
Price shows with option value: A checkbox that, when checked, will display the price modifier (e.g., "$0") next to the option text in the final display.
Bring your brand’s vibe to the option sets with additional stylization.
When you are complete, save the Option set.
Check the box for Limit the number of selections if you want to set minimum or maximum limits on how many checkboxes a customer can pick:
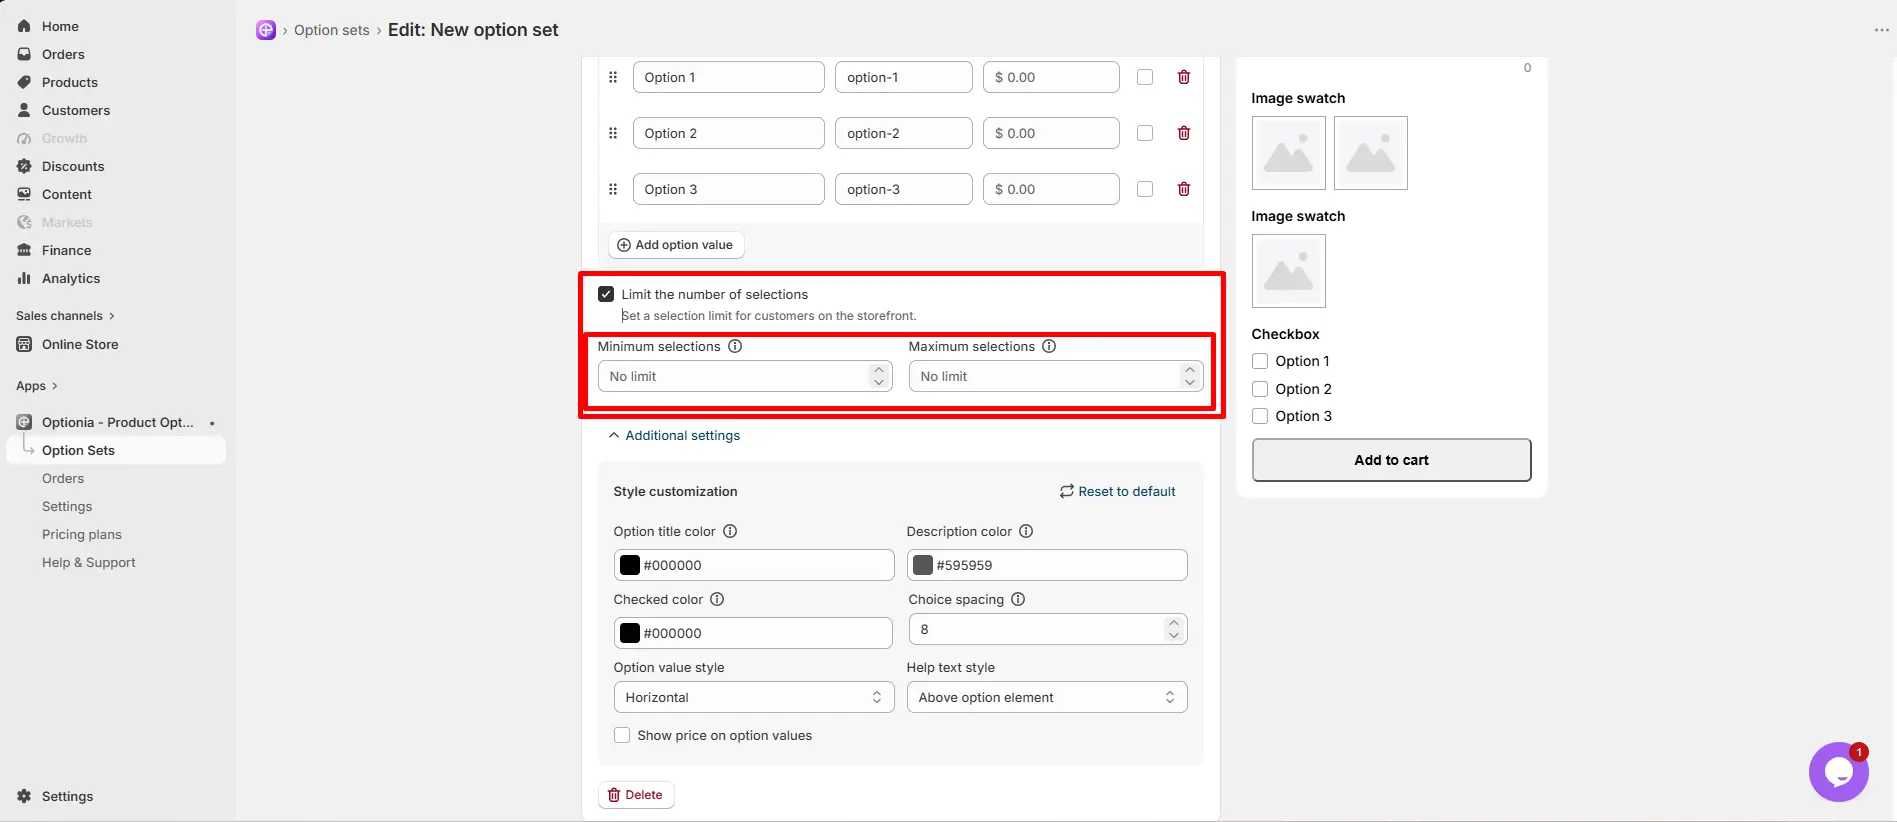
Minimum selections: Set the least number of checkboxes a customer must select (for example: 2).
Maximum selections: Set the highest number of checkboxes a customer is allowed to select.
After configuring your Checkbox option, you need to assign the Option Set to the products where you want the checkboxes to appear.
You can find Product at the bottom of the Option Set.
|
Step: Open the option set > scroll down to find the “Product Assignment” option > select any of the three radio buttons. |
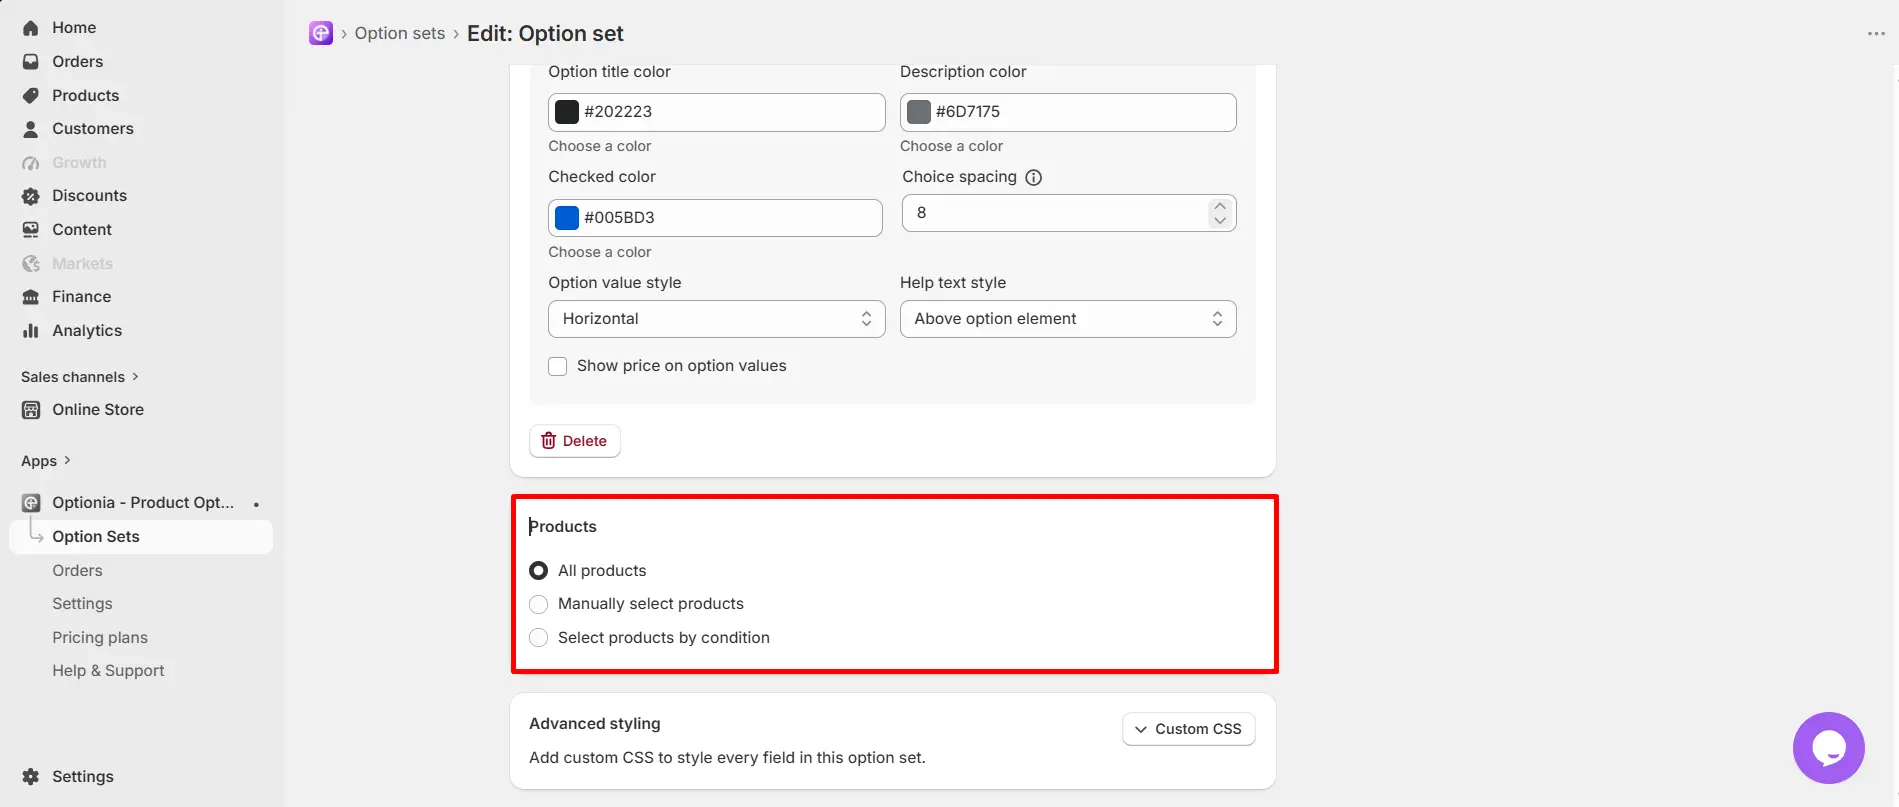
All Products: Select All Products to apply the Option Set to all products in your store.
Manually Select Products: Select Manually Select Products when you want to choose specific products to which the Option Set should be applied.
Select Products with Conditions: Select Products with Conditions when you want to apply the Option Set based on specific product conditions automatically.
You can use the available conditions to determine which products should receive the Option Set.
|
Important: You can assign the option to a product category from here. But if you add the Checkbox Option under an option set that’s already assigned to a product type, that option will also follow that product type. |
Need Help?
If you have any questions or need assistance, we will be happy to help.
Live Chat for quick assistance.
Submit a Support Ticket for detailed questions or issues.
Email: support@optionia.com
 Getting Started
 Option Sets
 Orders
 Settings
 Configuration
 Live Preview
 Packages
 Help & Support
 Price Add-Ons
 Conditional Logic
 Design Theme Styling
 Uninstallation