A radio button allows customers to select one option from a group of choices. When a customer selects one radio button, any previously selected option in the same group is automatically deselected.
You can add the single-selection Radio Button option to either a new option set or an existing one. You can learn to create a new option set in another part. For now, we will discuss how to add a single-selection Radio Button option to an existing set of options.
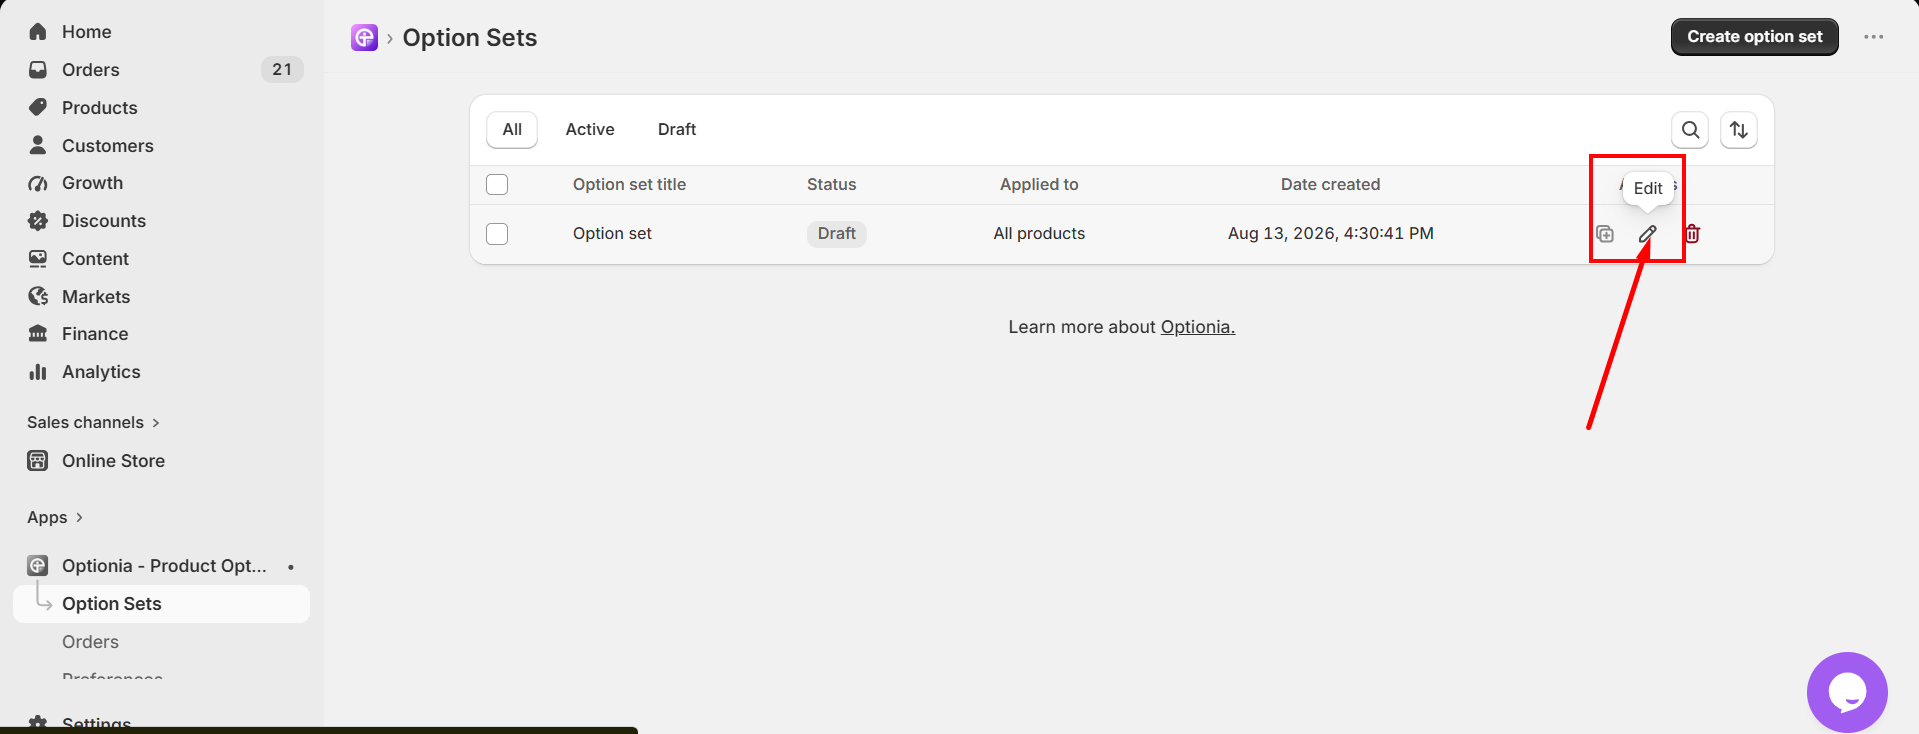
Go to an existing option set.
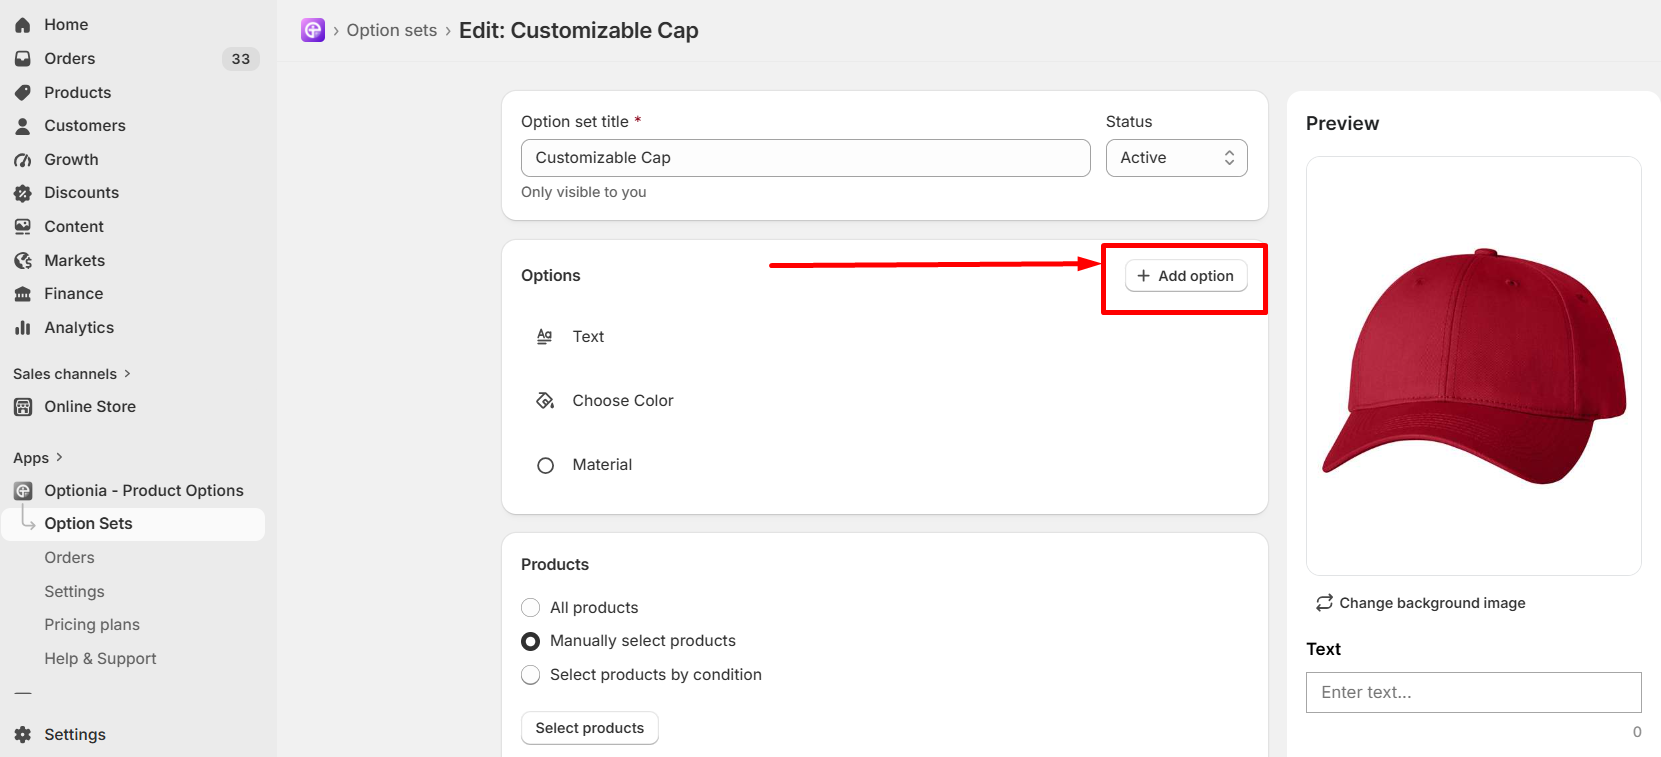
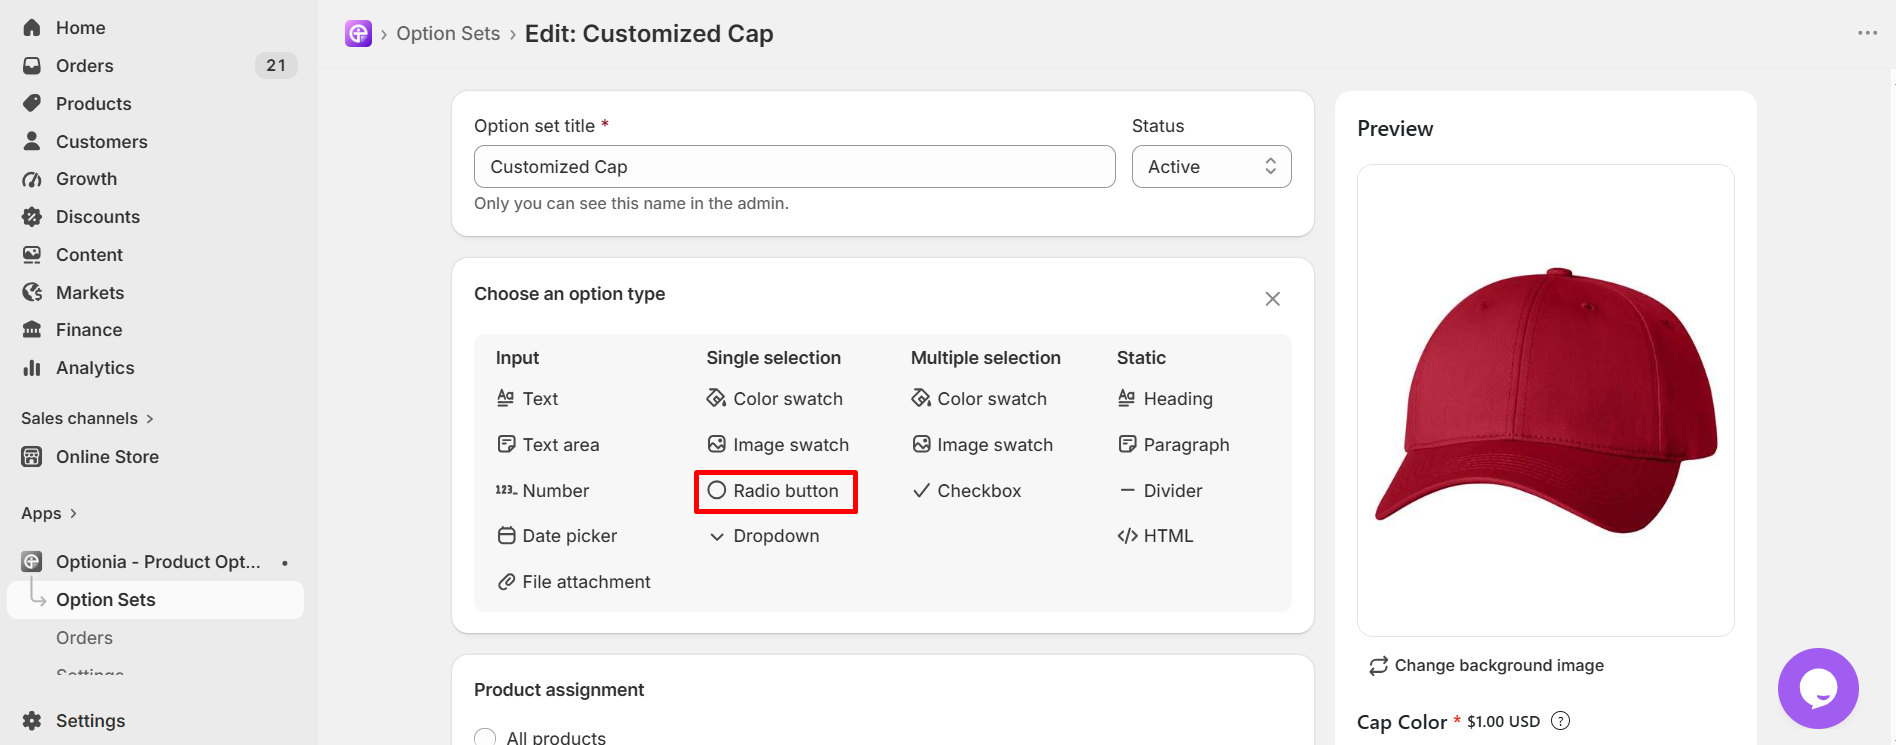
Then you can edit the single selection radio button option as you like. Fulfill all the necessary information first: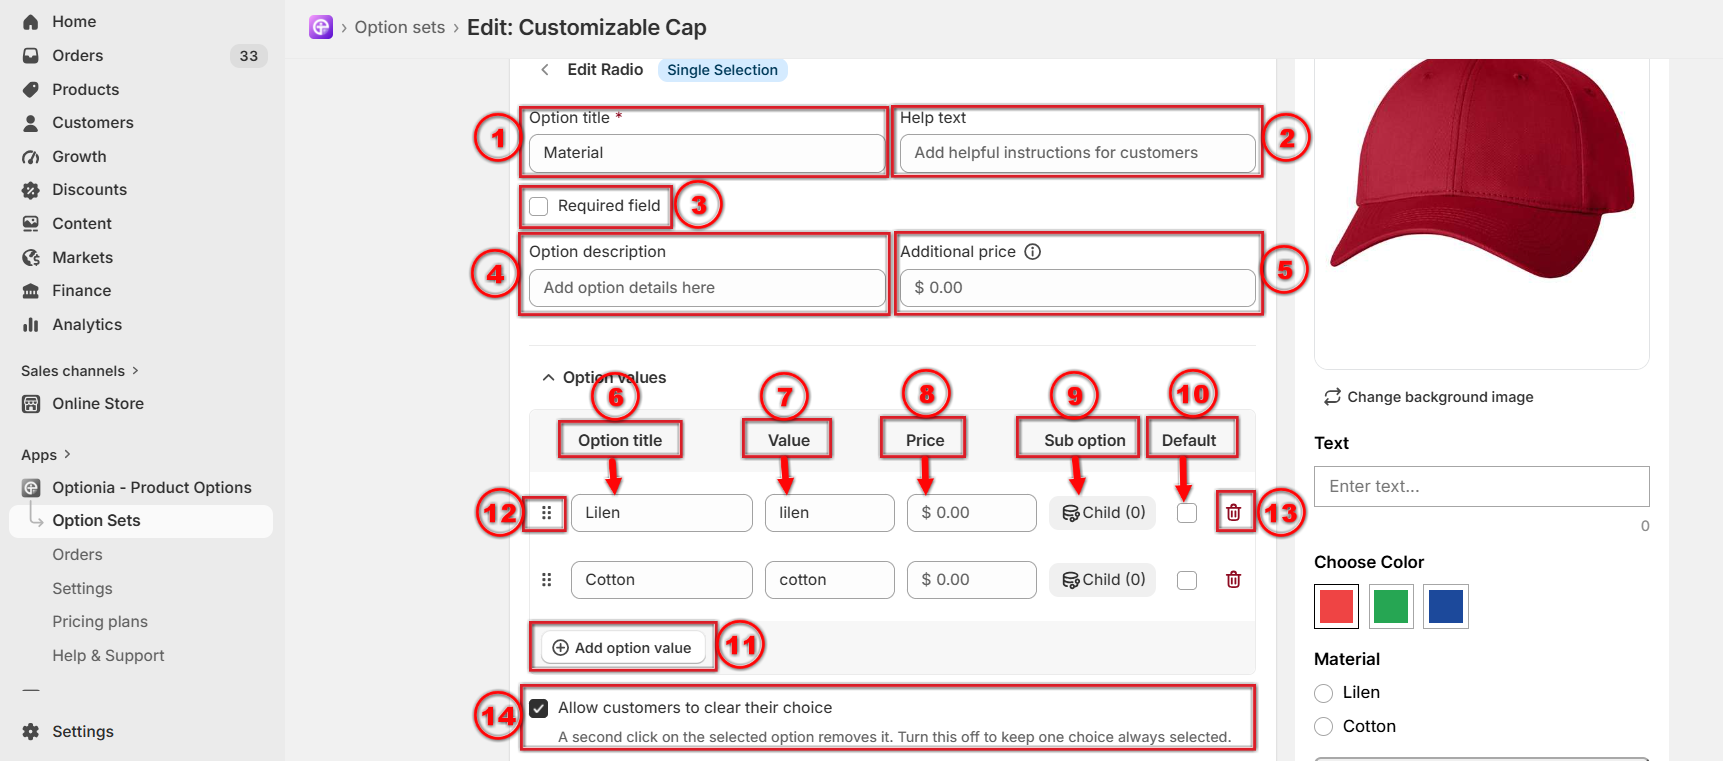
Option title: Add or edit the option title. This is a required field, so you must add the option title.
Help Text: Add help text to help customers with any additional information.
Required Field: You can make an option required by selecting this field. Click on the checkbox to make an option required if you don’t want to allow customers to add the product to their cart without selecting this option.
Option Description: You can add a description in this field to clarify what kind of information to add.
Additional Price: You can set a fixed extra price for this radio button option. This price will be charged once when the customer selects this option.
Option Value Title: Provide a name for the options attribute here.
Value: You can provide a value for the attribute here.
Price: If you want to charge extra for the option, put the added price here, which will be added to your base product price.
Sub-option: If you want to add a conditional option, you can use this. It will create a Child Option for that particular radio button. Then you need to add details to it, just like a new option.
Default: Check the box to set an attribute as the default. It will be shown as the default attribute on the product page.
Add option value: Click here to add more option values for this option. You can add multiple values by clicking on this button
Reorder: Click and drag this dotted icon to rearrange attributes.
Delete: Click on the red trash icon to remove the options attribute, including all of its conditional child options (if any).
Allow customers to clear their choice: You can allow customers a second click to deselect the selected option by enabling this field. If you turn this off, once an item is selected, it will always remain selected, and customers will not be able to deselect the option till reloads the page.
Preview: Preview will show you how the option will display on the product page. You can check the newly added radio button option on the preview.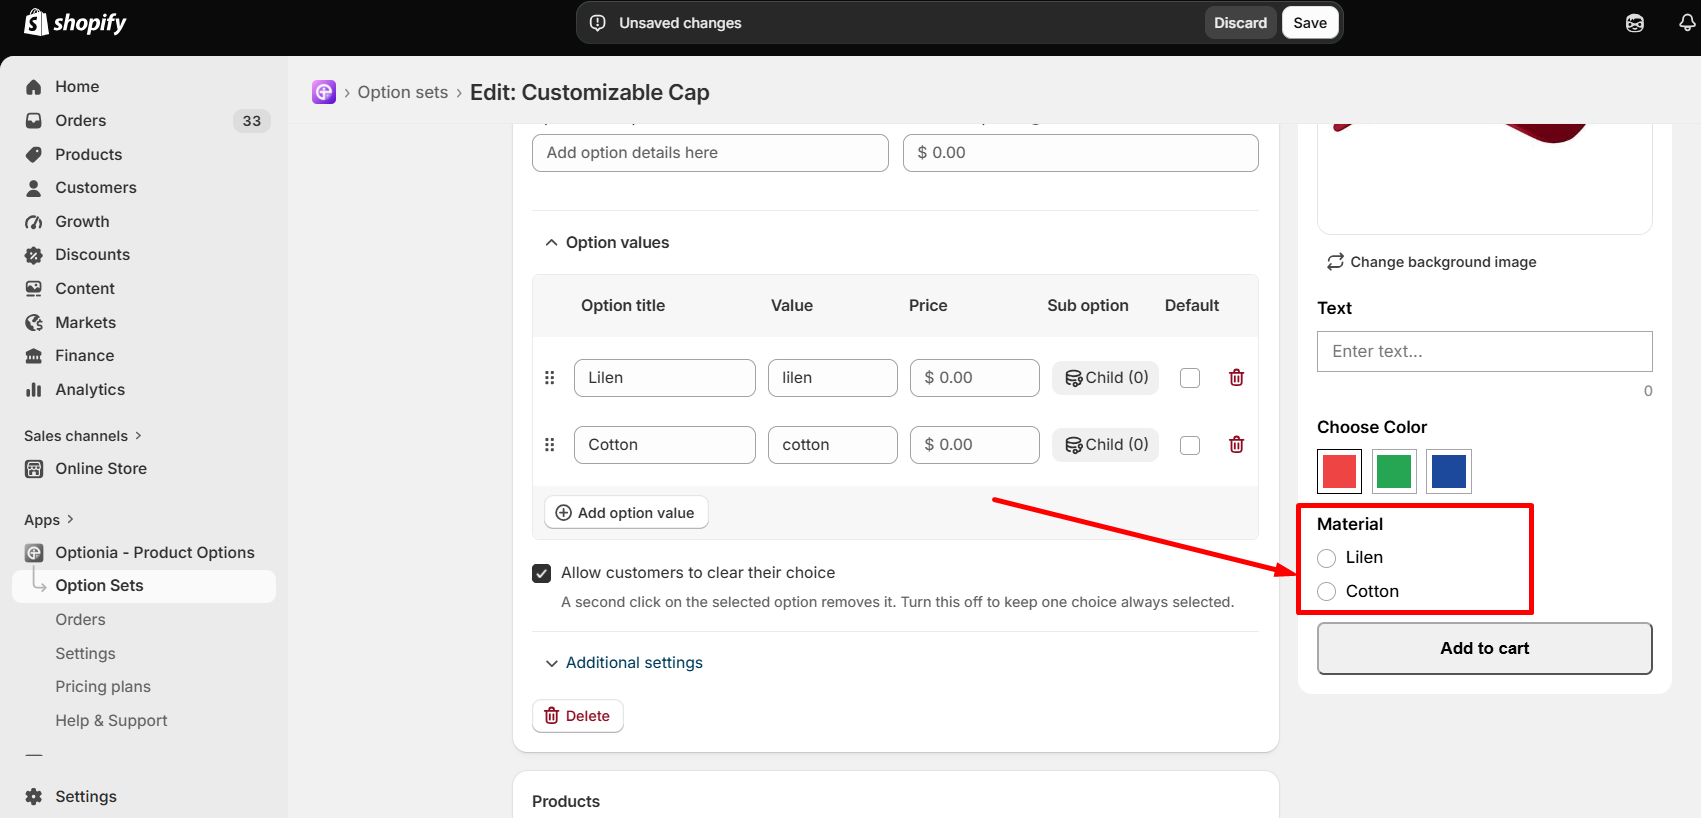
After you are done with the essential settings, scroll down to find the “Additional Settings”. Optionia lets you style each option however you like.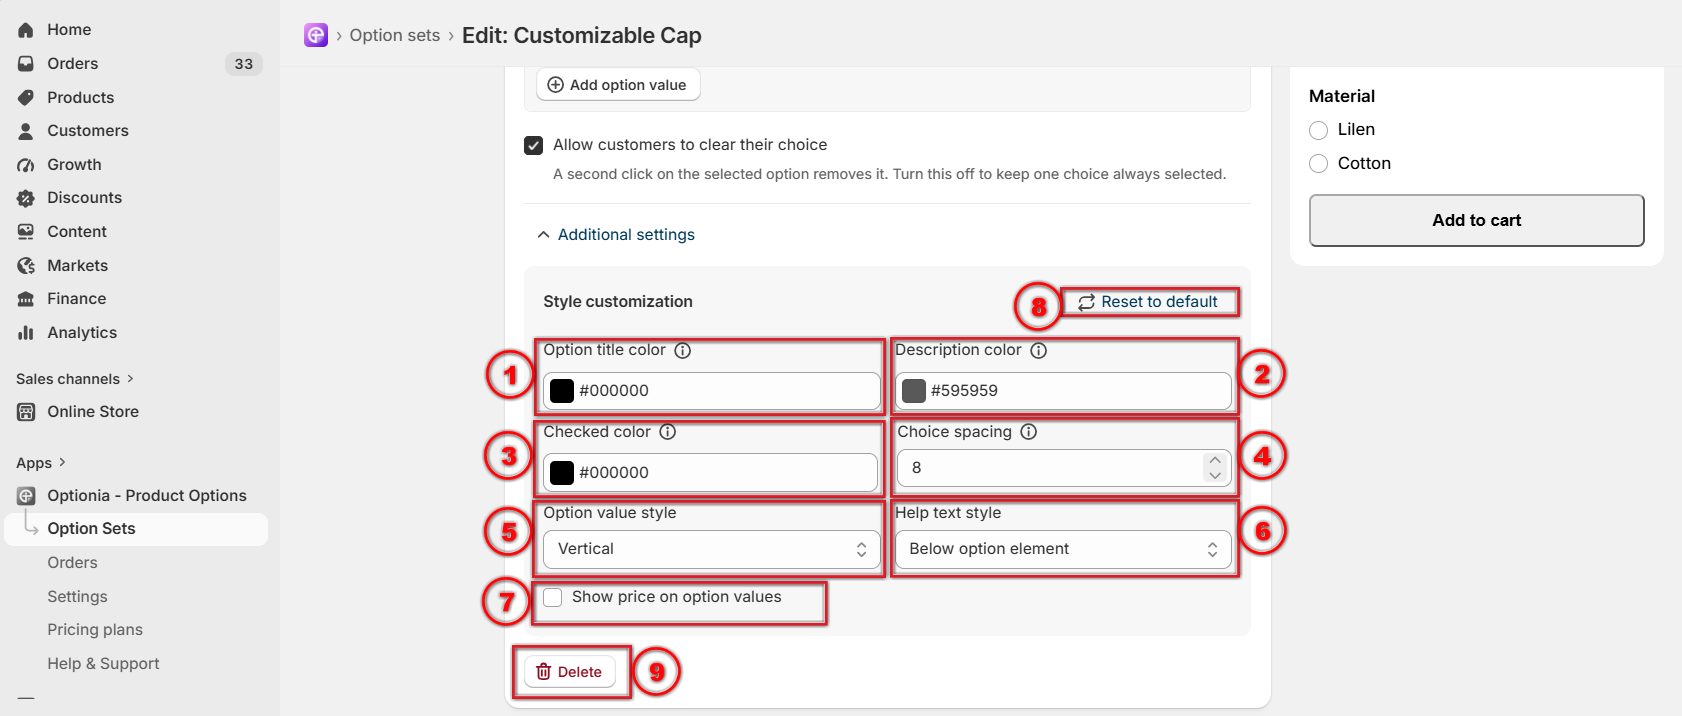
In the Additional Settings, stylize:
Option title color: It controls the color of the option title or label text.
Description color: Controls the color of the option description text shown below or beside the title.
Checked color: Sets the color of radio buttons when they are selected by the customer.
Choice spacing: Choice spacing allows you to increase or decrease the space between the option values.
Option value style: This setting allows you to control how option values are displayed on the storefront. You can choose to display the option values vertically or horizontally, depending on your preferred layout.
Help text style: This setting controls where the help text is displayed in relation to the option element. You can choose from the following options:
Above Option Element: Displays the help text above the option element next to the option title as a tooltip message.
Below Option Element: Displays the help text below the option element.
No Help Text: Hides the help text completely.
Show price on option values: If you want to display the additional price of the option, check the “Show Price with Option Value” checkbox. When enabled, the additional price will be displayed next to the option title in both the preview and storefront.
Reset to default: Restores all style settings in this section back to their default values.
Delete: Removes this option permanently.
Bring your brand’s vibe to the option sets with additional stylization.
When editing an option, you can use Save or Discard to manage your changes and the option.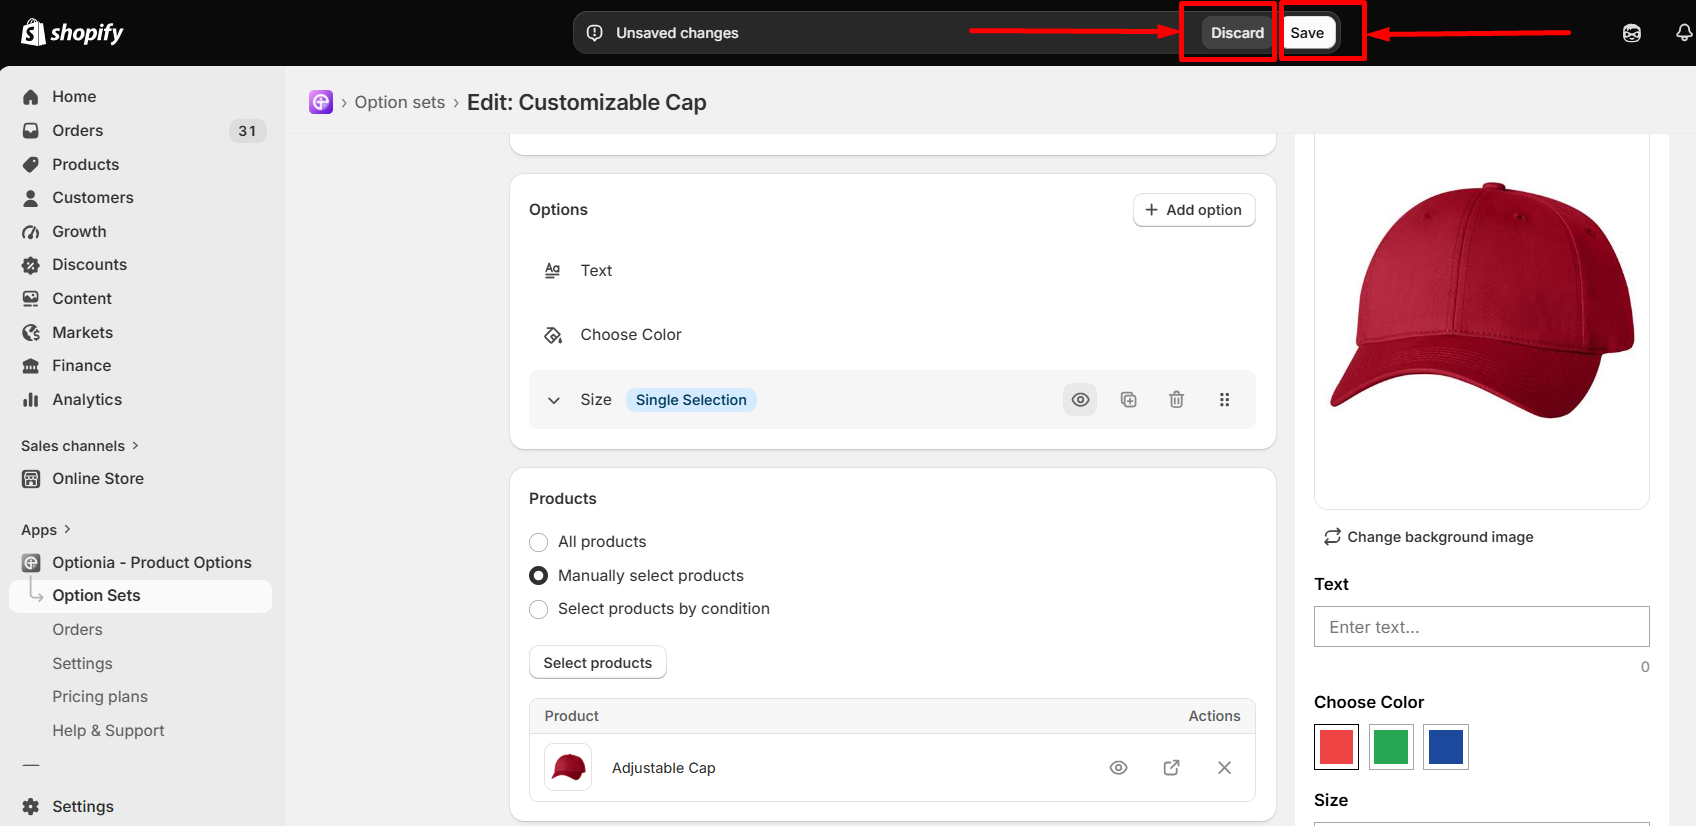
Save: When you are finished, hit the Save button to save all the changes.
Discard: Click Discard to cancel all unsaved changes and return to the last saved version.
After completing the configuration of your radio button option, you can view the product options in your storefront. The radio button option will display on the product page as shown in the image below. 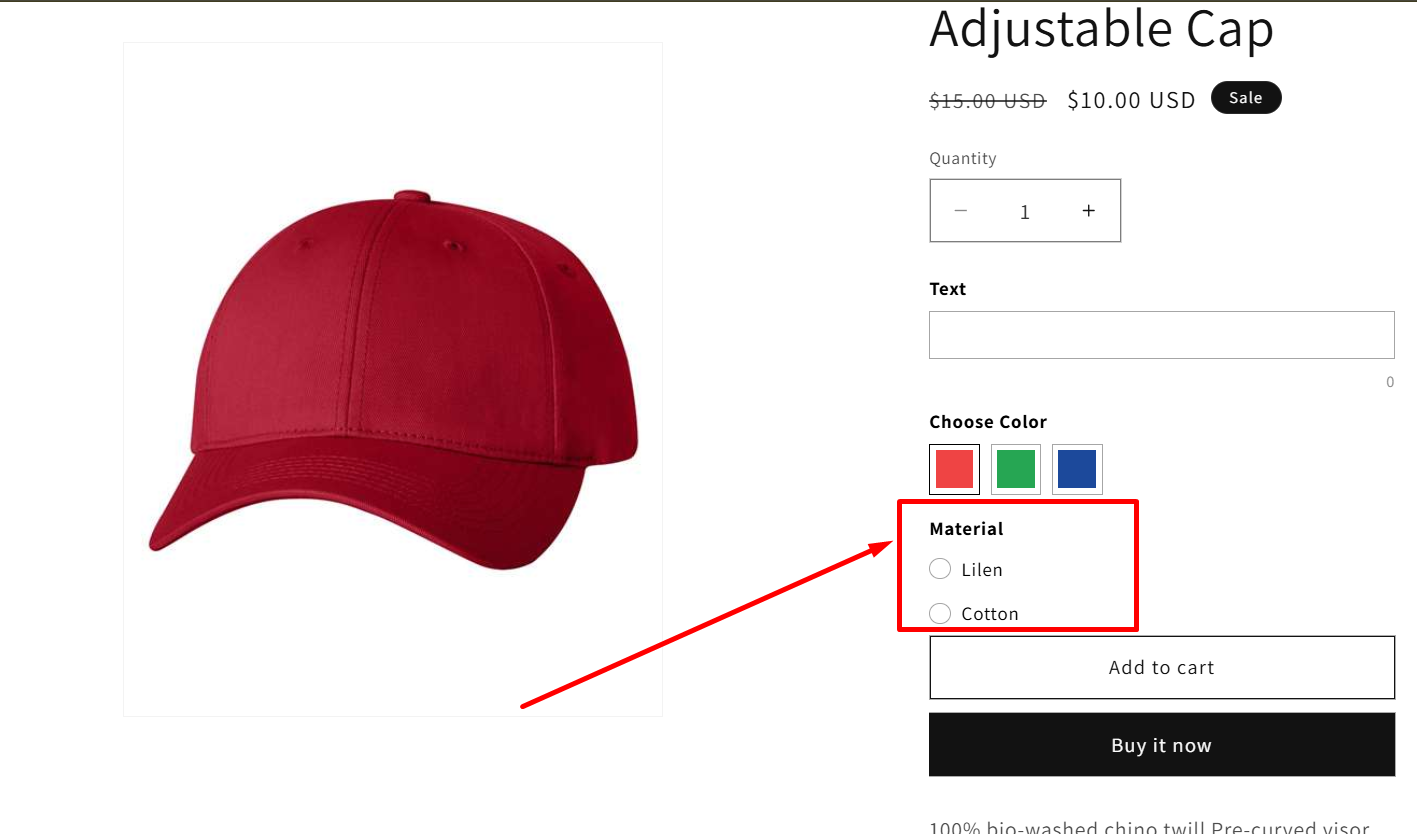
If you have any questions or need assistance, we will be happy to help.
Live Chat for quick assistance.
Submit a Support Ticket for detailed questions or issues.
Email: support@optionia.com
 Getting Started
 Option Sets
 Orders
 Settings
 Configuration
 Live Preview
 Packages
 Help & Support
 Price Add-Ons
 Conditional Logic
 Design Theme Styling
 Uninstallation