The Custom HTML option in Optionia allows you to add custom HTML content directly to your product option layout. It is useful when you need more flexibility than the standard static options provide, such as displaying formatted content, custom instructions, messages, or specially designed sections.
The Custom HTML option is a display-only element. It does not collect customer input or directly affect product pricing.
Here’s a Step-by-Step Guide to Adding a Custom HTML Option in Your Store:
You can add the Custom HTML option to either a new or an existing option set. You can learn to create a new option set in another part. For now, we will discuss how to add a Custom HTML option to an existing option set.
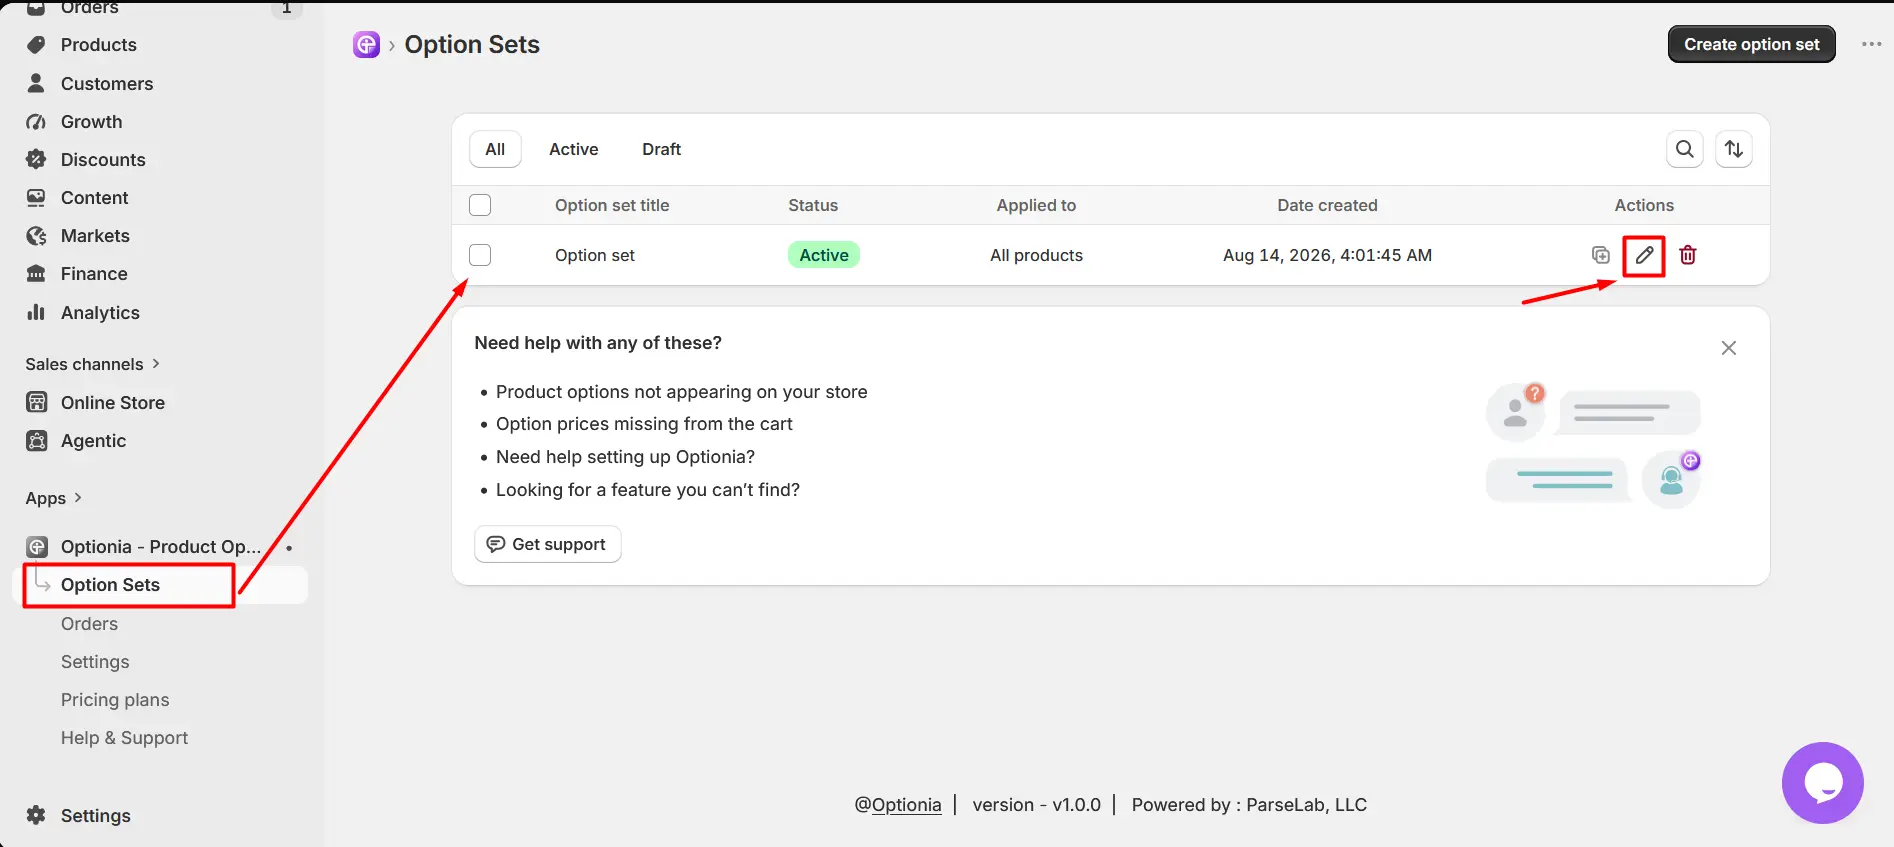
Go to an existing option set.
Click the Edit option to open it.
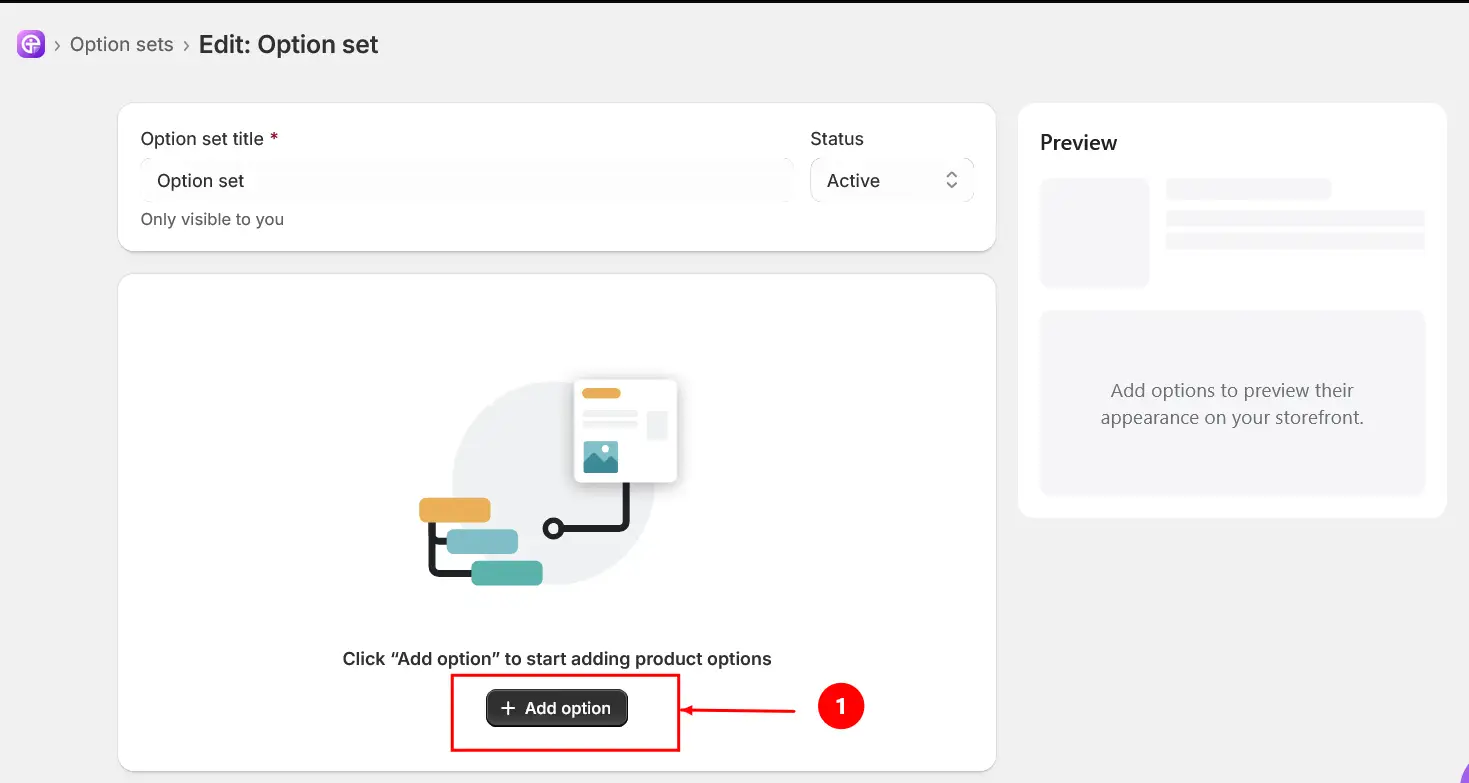
Click the “Add options” button.
Select the “HTML” option under Static.
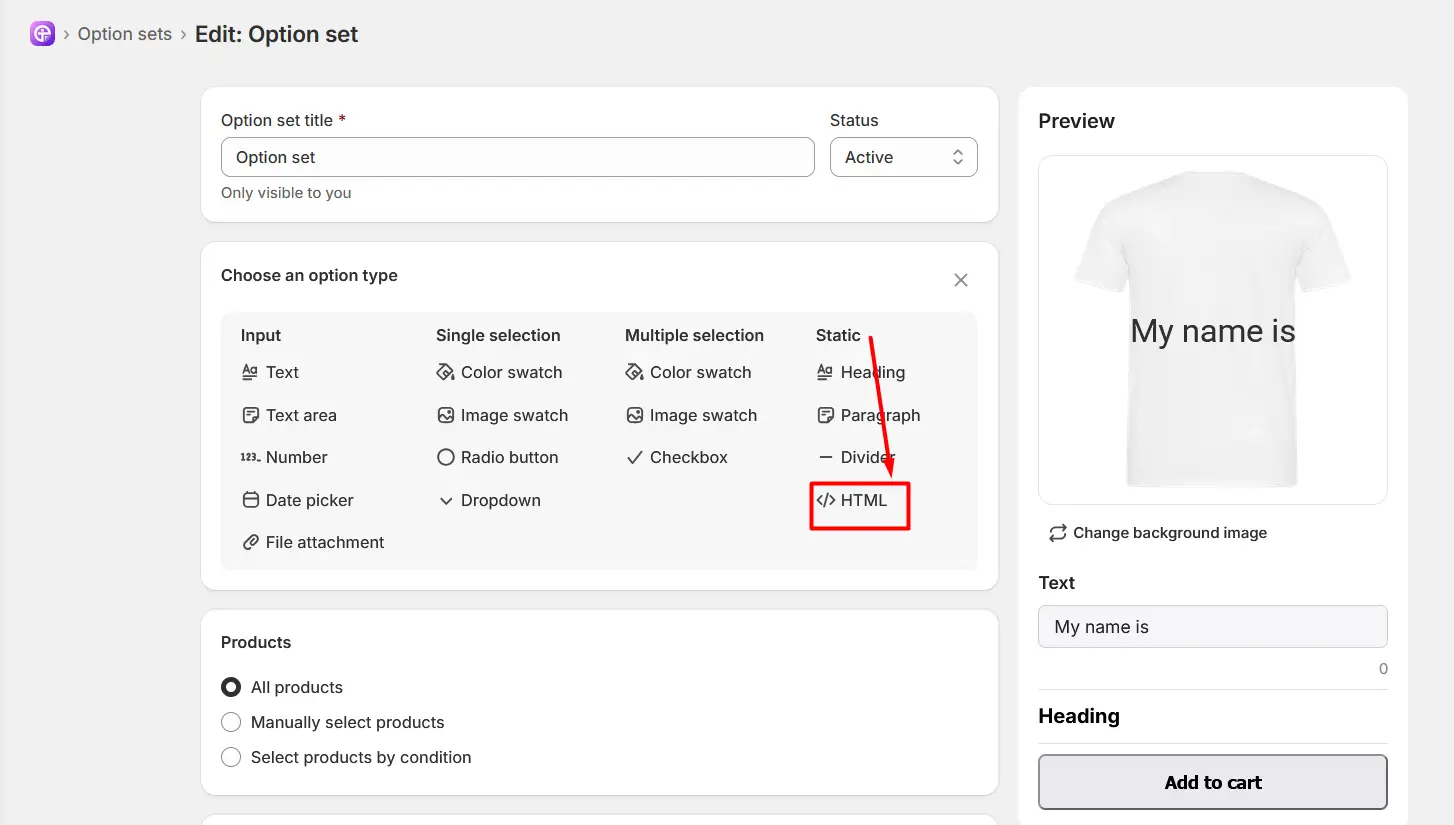
Use the HTML option to add custom text and formatted content to your product page. You can use the visual editor to format your content or switch to HTML format to edit the HTML code directly.
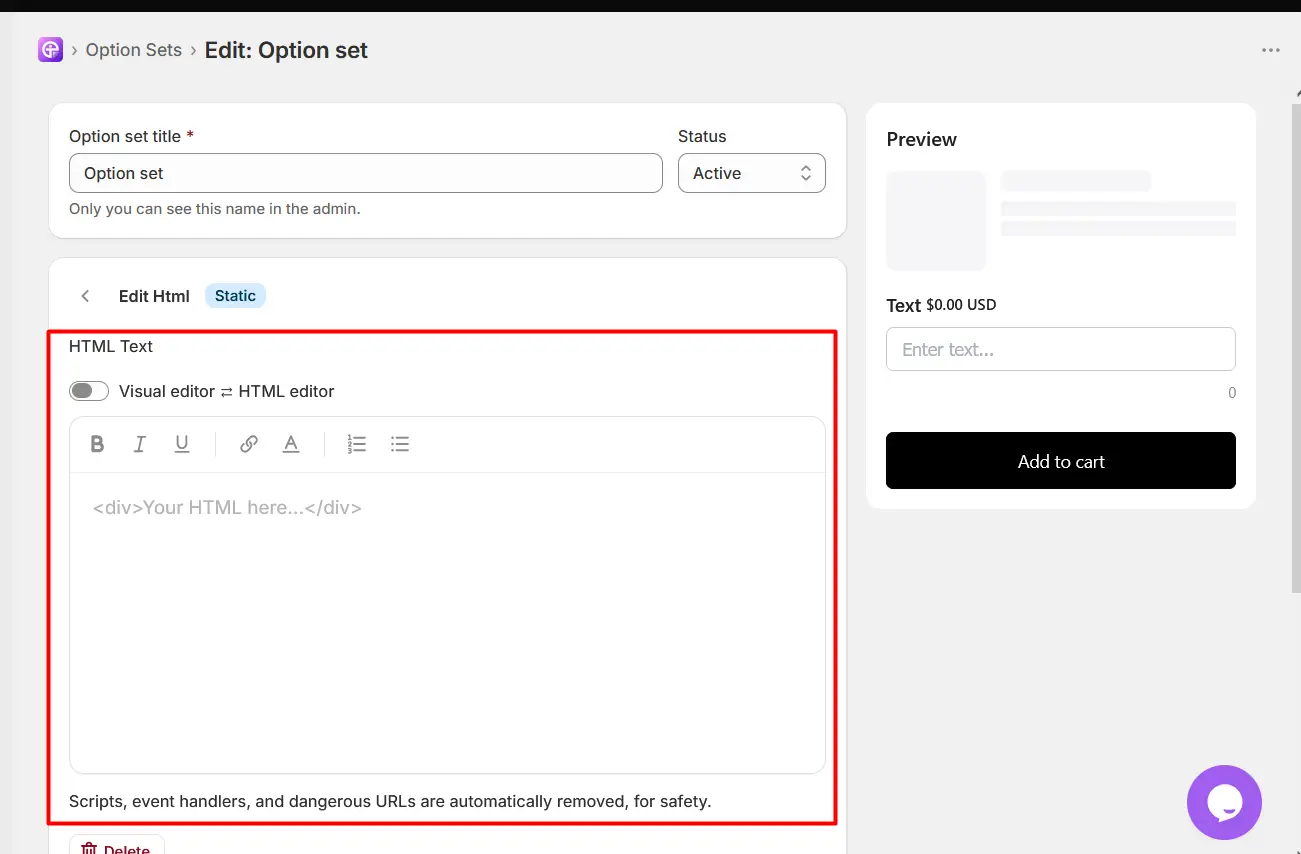
The HTML editor provides the following tools:
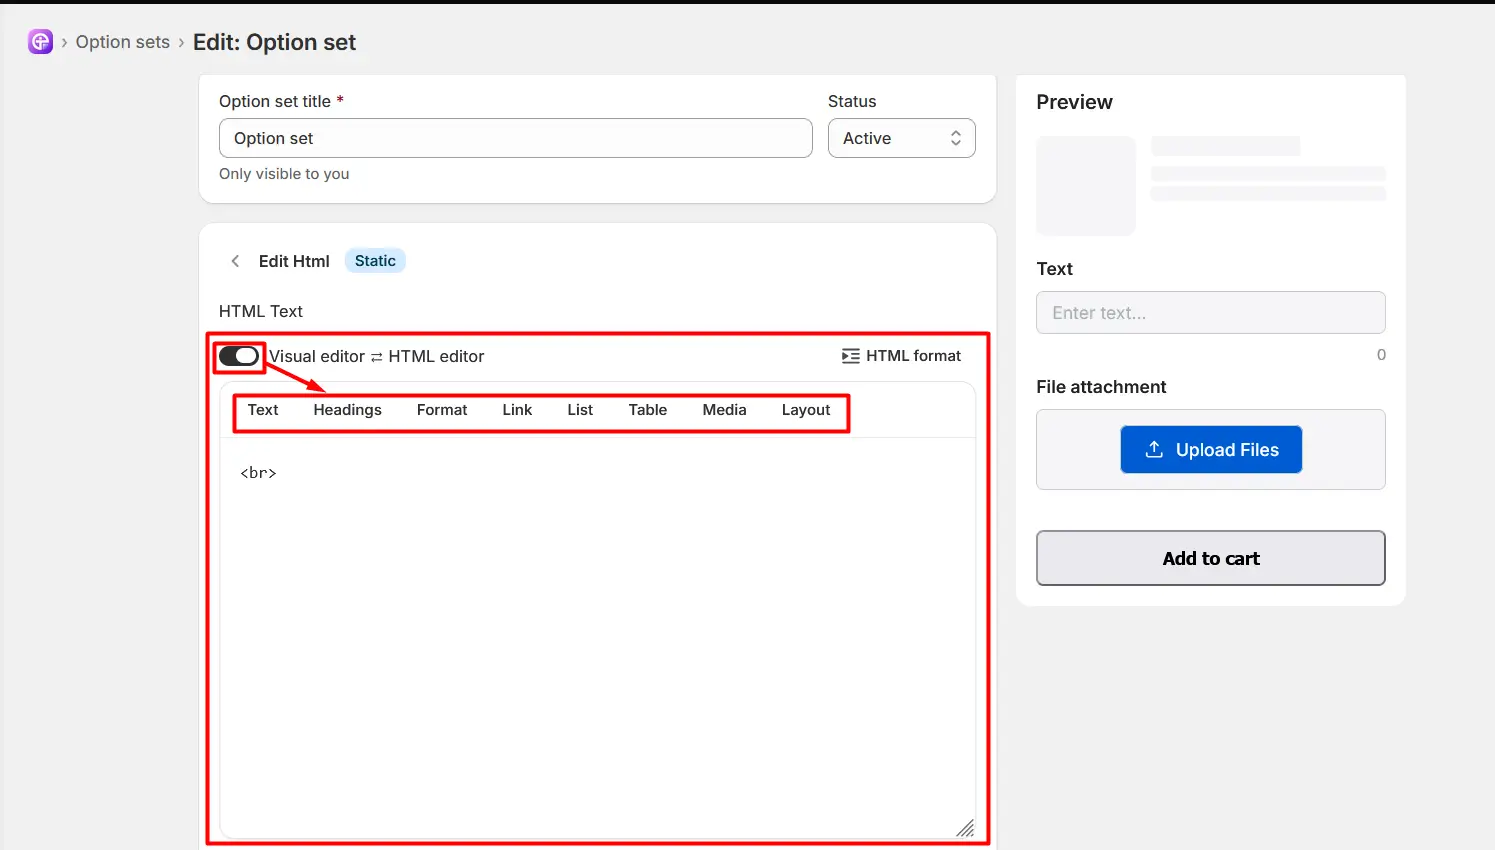
Text: Add and edit text content.
Headings: Add headings and subheadings to organize your content.
Format : Apply text formatting such as bold, italic, and underline.
Link: Add hyperlinks to your content.
List: Create bulleted or numbered lists.
Table: Add tables to organize information.
Media: Add media content to your HTML content.
Layout: Adjust the layout and structure of your content.
Visual Editor ⇄ HTML Editor: Turn on the toggle to switch between the visual editor and HTML code.
Note: Make sure your HTML code is correctly written before saving. Incorrect or unsupported code may affect the layout or display of the option form. The Custom HTML option does not collect customer input and does not affect product pricing. |
When to Use the Custom HTML Option
The Custom HTML option gives you additional flexibility when creating your product option layout. You can use it for:
Adding rich or formatted content.
Creating custom-designed sections.
Displaying styled instructions or messages.
Adding additional information between option groups.
Creating advanced layouts using HTML.
After configuring your html option, you need to assign the Option Set to the products where you want the html to appear. You can find Products at the bottom of the Option Set.
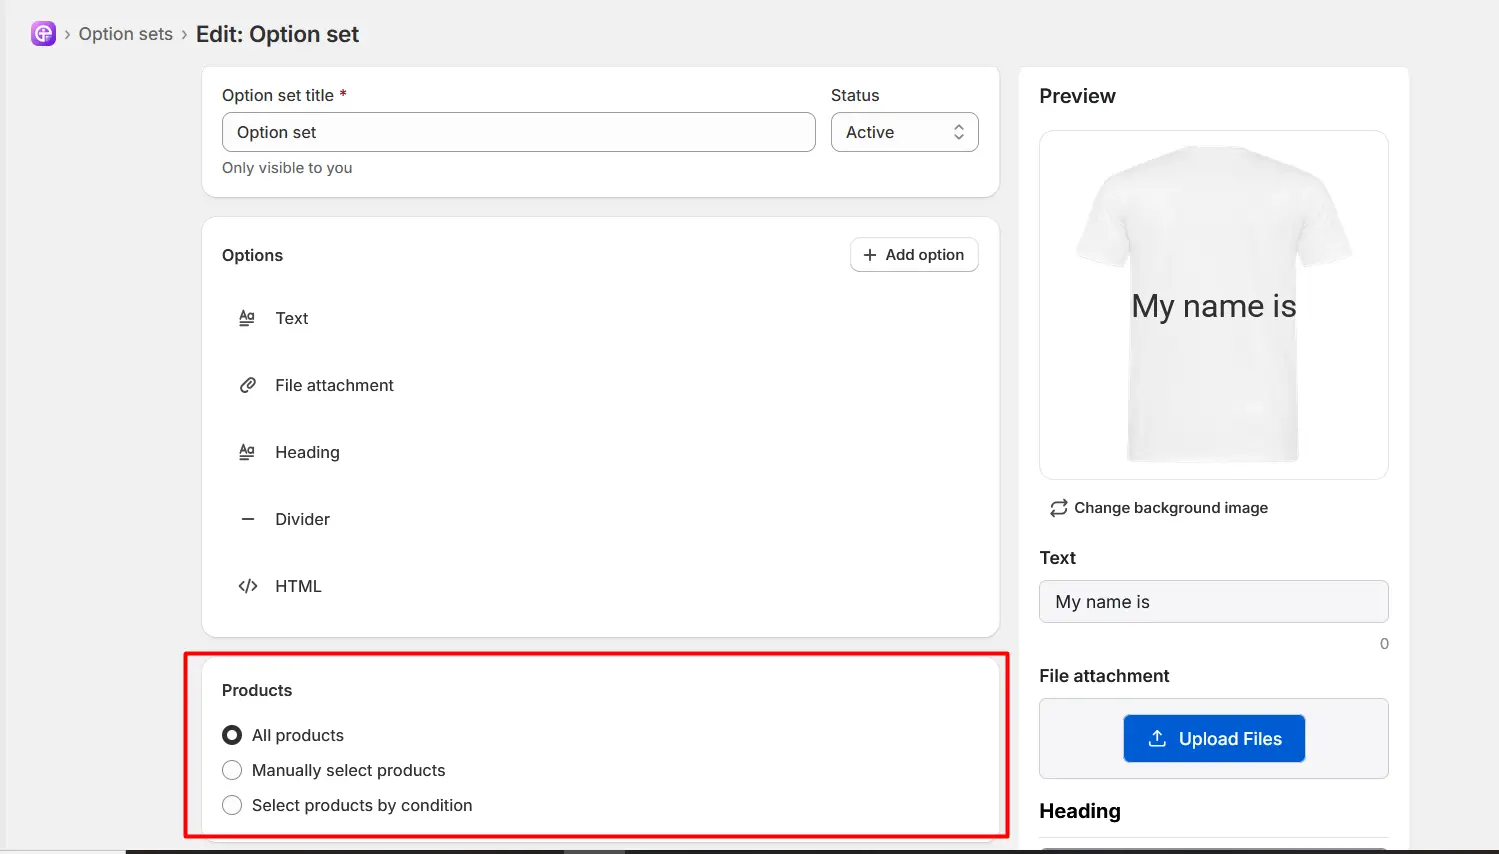
All Products: Select All Products to apply the Option Set to all products in your store.
Manually Select Products: Select Manually Select Products when you want to choose specific products to which the Option Set should be applied.
Select Products by Conditions: Select Products by Conditions when you want to apply the Option Set based on specific product conditions automatically.
You can use the available conditions to determine which products should receive the Option Set.
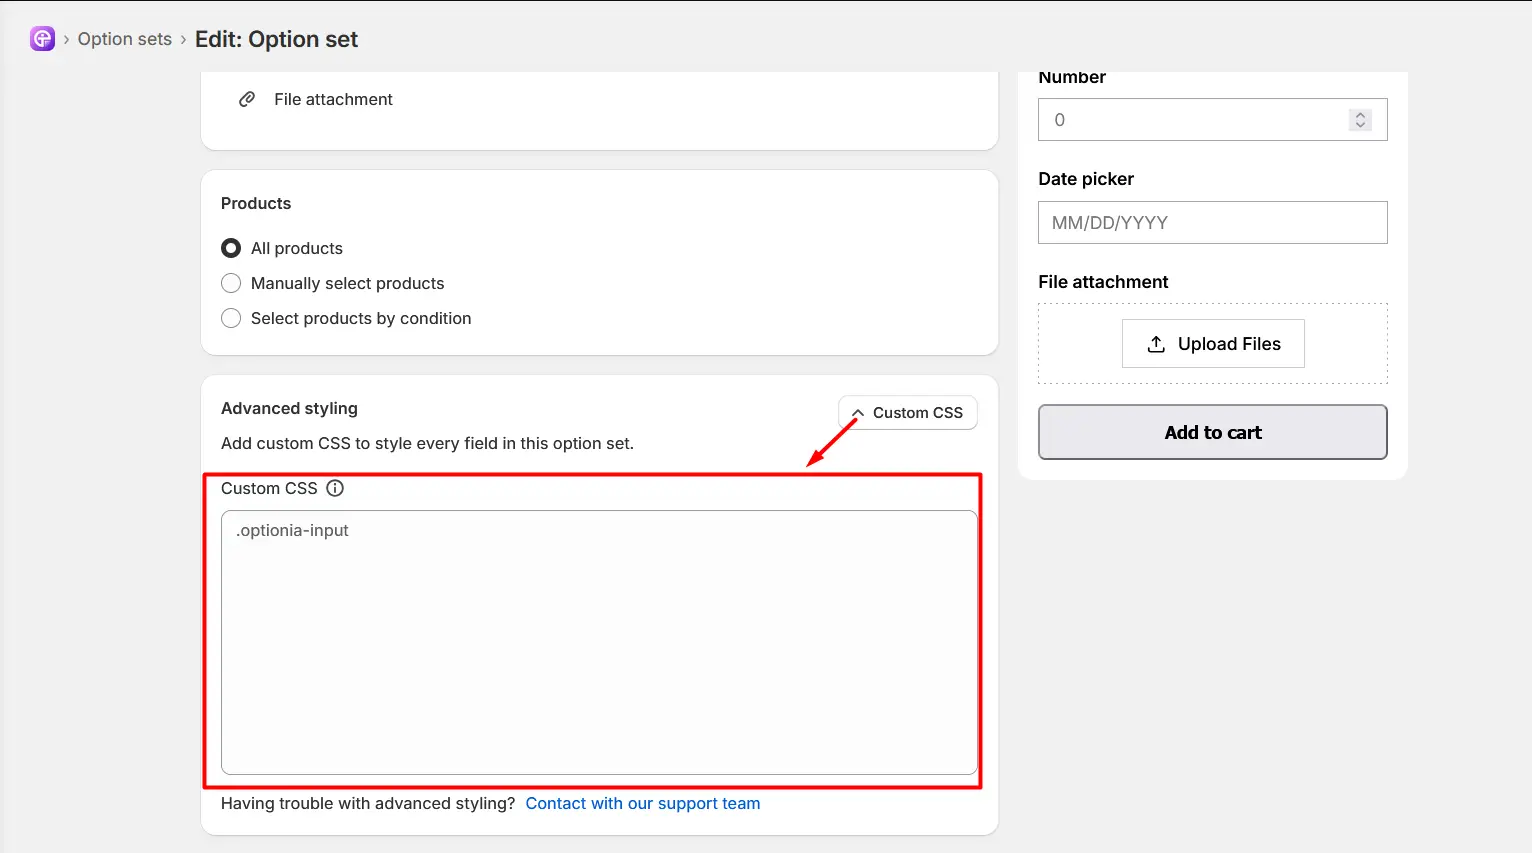
Important: Each Optionia option includes advanced styling with custom CSS. The text option is no different; you can find the advanced styling option at the bottom.
|
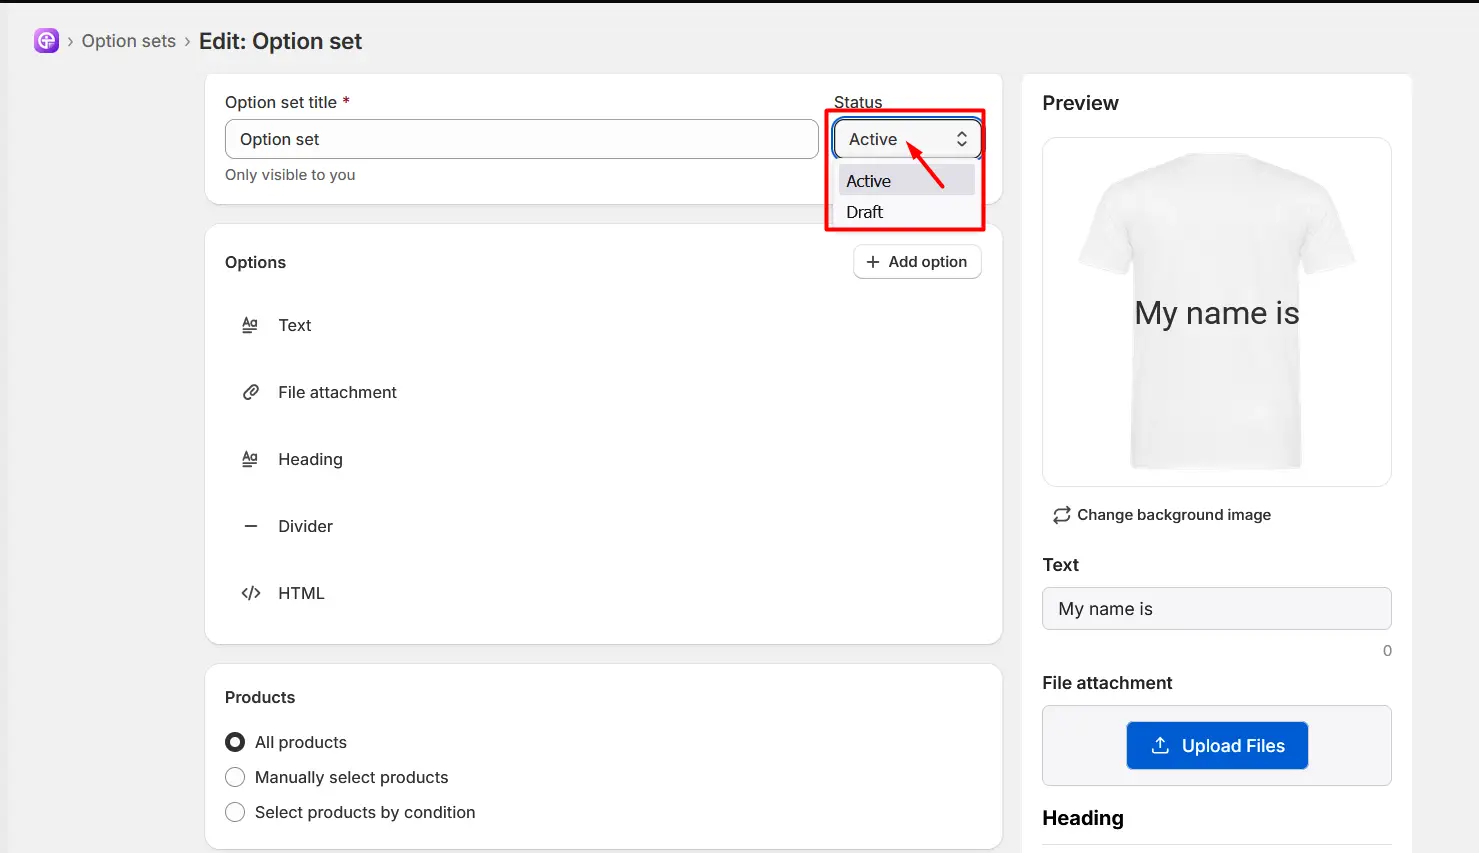
Note: When you create or edit the Option Set, it’s saved as a draft and is only visible in your dashboard. Change the status from draft to active to ensure visibility. You can see the status option right next to the Option Set title.
|
Once the Option Set is active and properly assigned, the Divider will appear on the relevant product pages.
Need Help?
 Getting Started
 Option Sets
 Orders
 Settings
 Configuration
 Live Preview
 Packages
 Help & Support
 Price Add-Ons
 Conditional Logic
 Design Theme Styling
 Uninstallation