The Heading option in Optionia helps you organize your product options into clear and easy-to-follow sections. You can use headings to separate different groups of options, highlight important instructions, or guide customers through a multi-step customization process.
Here’s a Step-by-Step Guide to Adding a Heading to Your Store:
You can add the Heading option to either a new or an existing option set. You can learn to create a new option set in another part. For now, we will discuss how to add a Heading option to an existing option set.
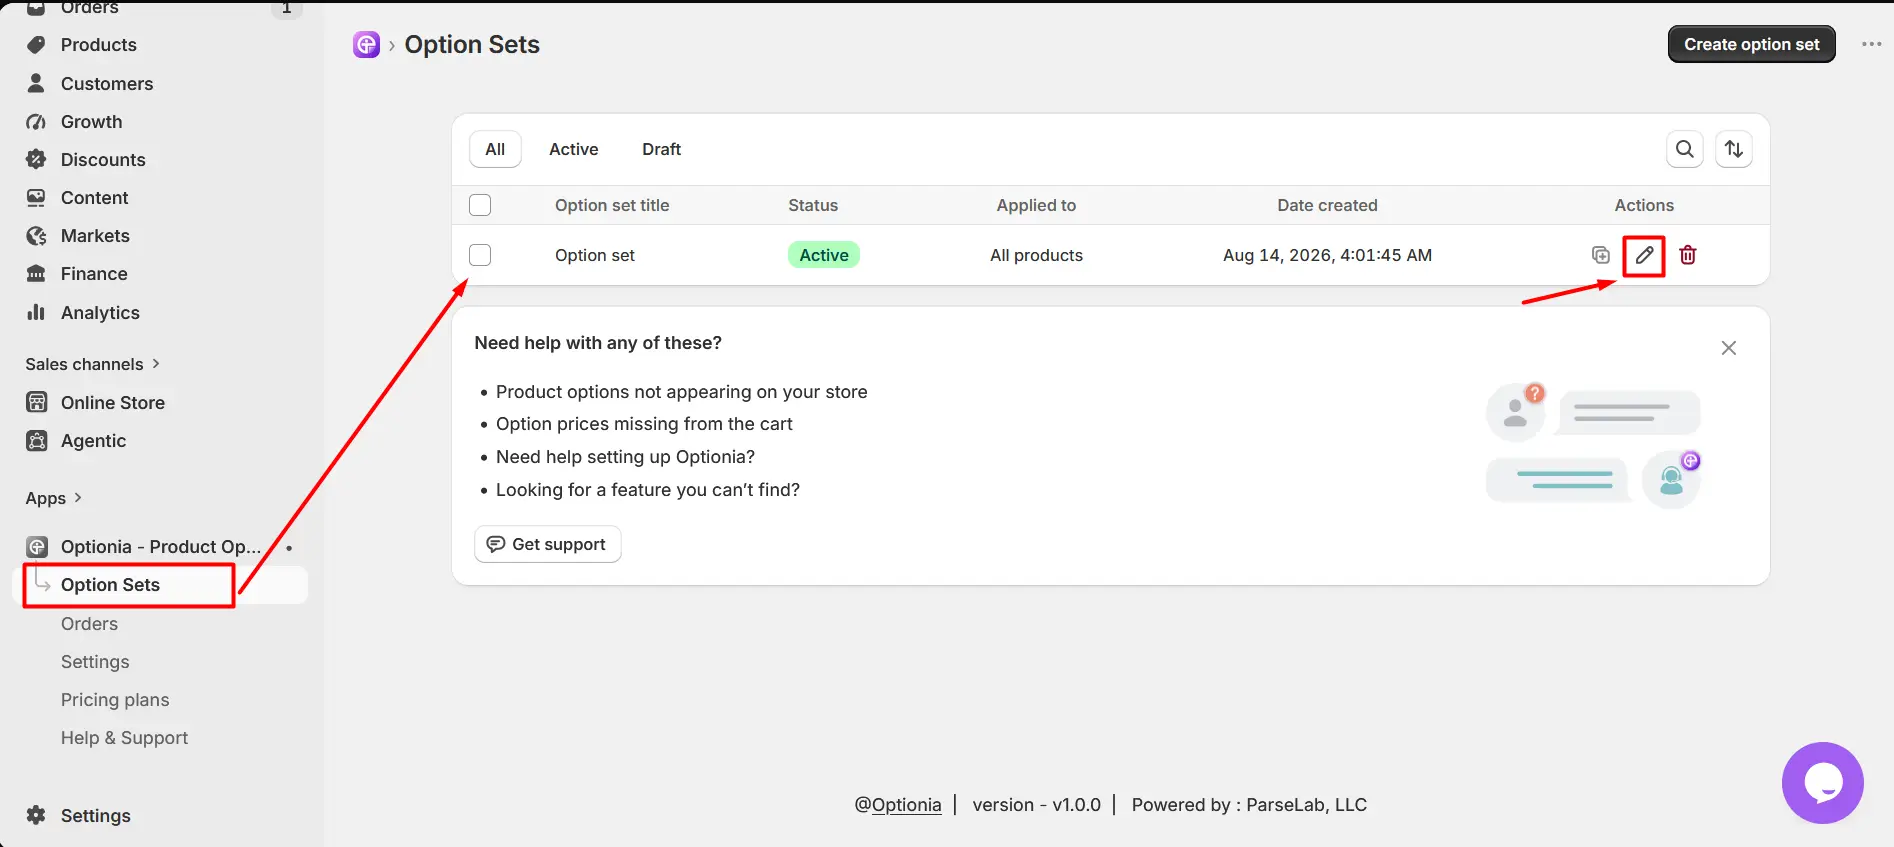
Go to an existing option set.
Click the Edit option to open it.
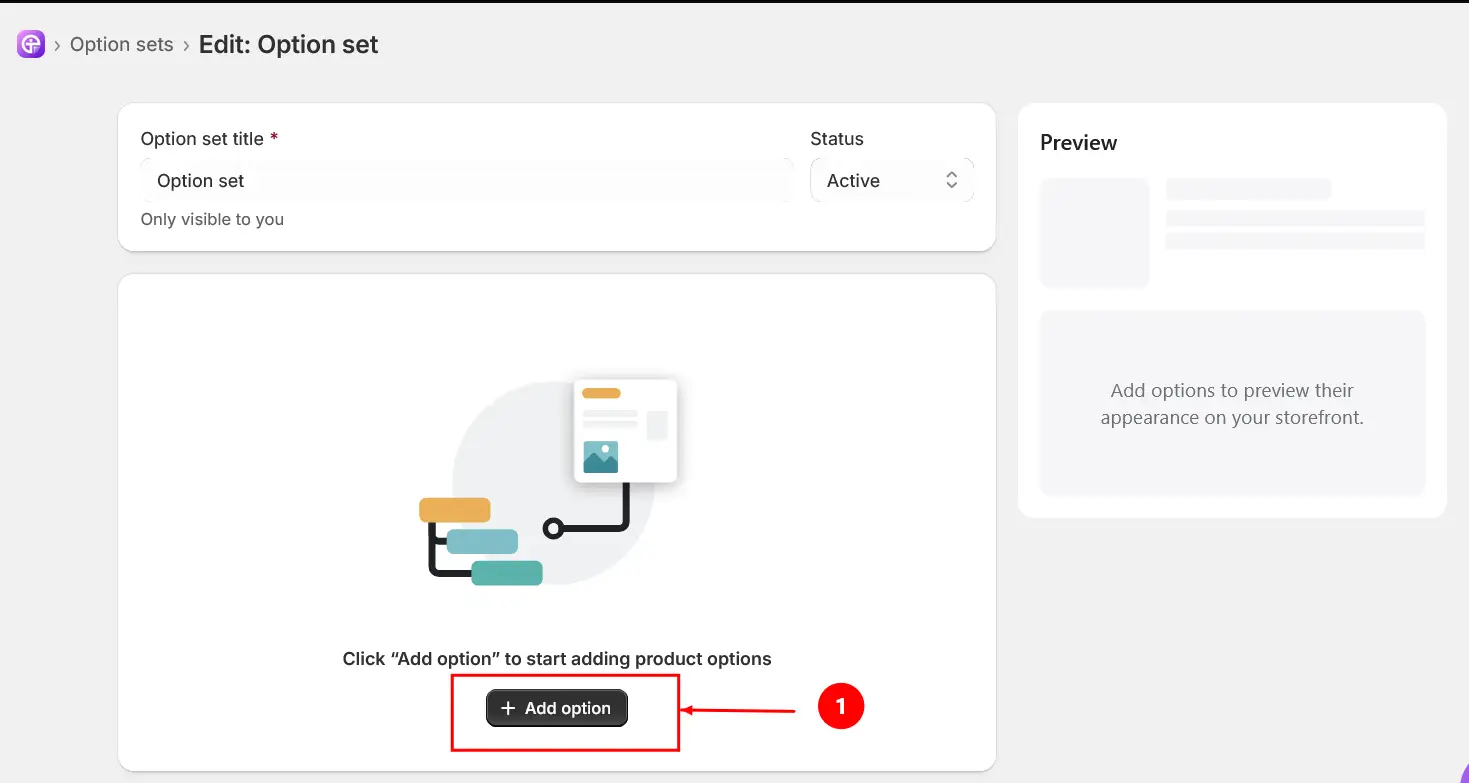
Click the “Add options” button.
Select the “Heading” option under Static.
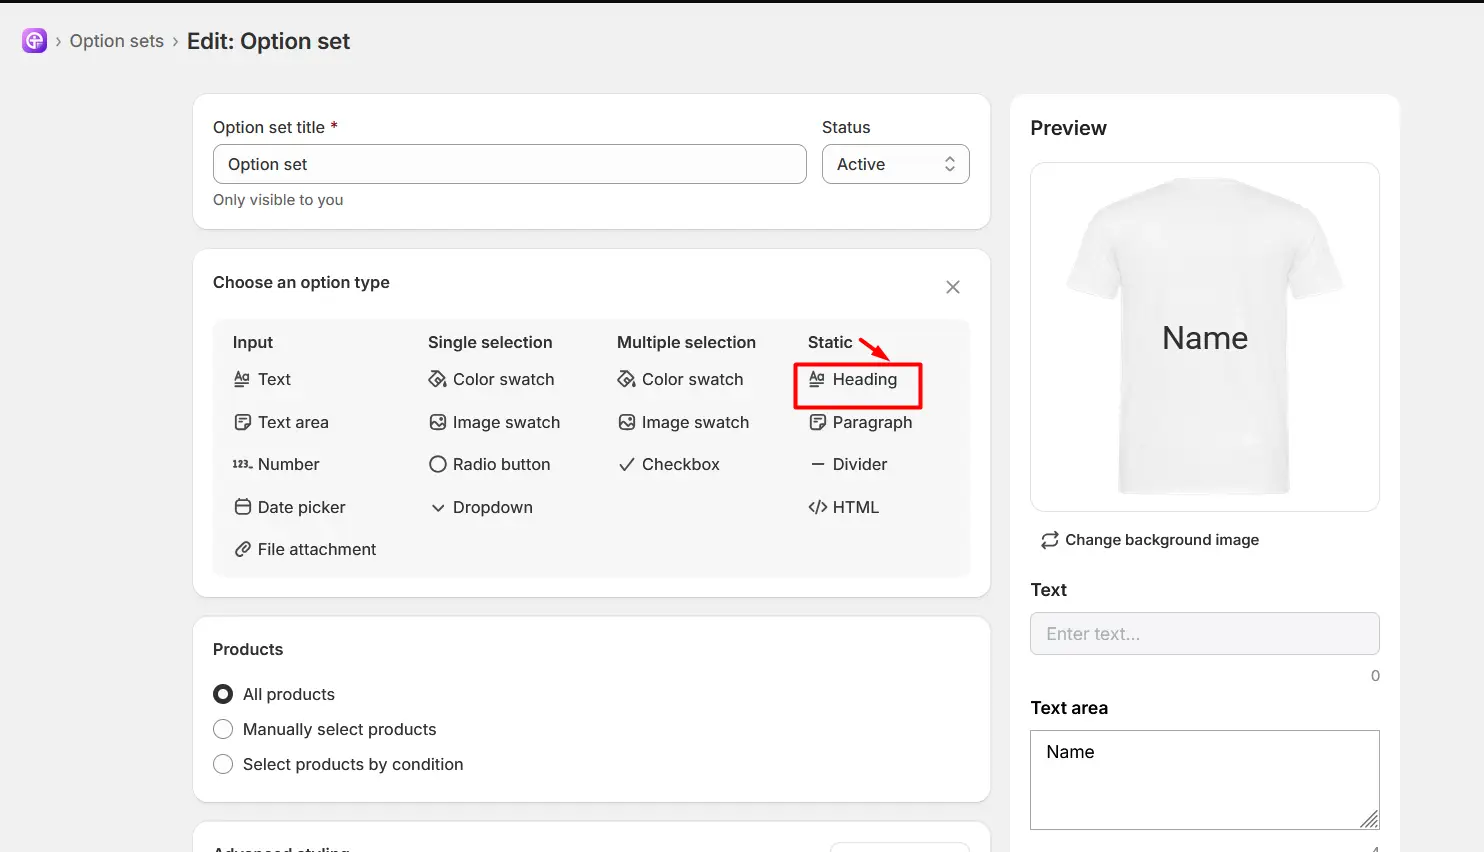
After selecting the Heading option, you can customize its content and appearance according to your requirements.
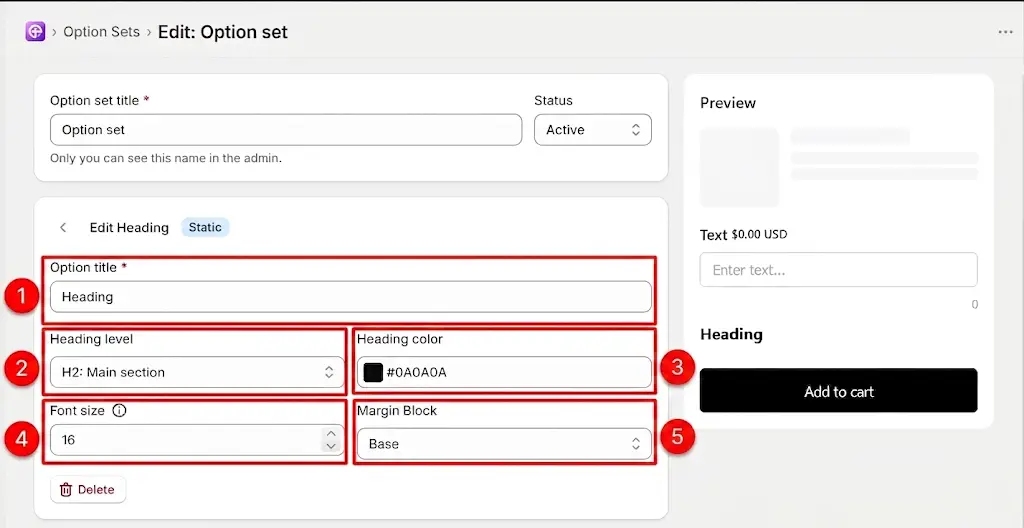
Option Title: Enter the text you want to display as the heading.
Heading Level: Select the appropriate heading level from the dropdown. You can choose from Heading 1 through Heading 6.
Heading Color: Choose a color for the heading to match your store’s branding and design.
Font Size: Set the size of the heading text.
Margin Block: Adjust the spacing around the heading to create the desired layout.
When to Use the Heading Option
The Heading option can help improve the structure and readability of your product options. You can use it to:
Divide options into logical sections.
Group related customization choices together.
Highlight important instructions or information.
Guide customers through a multi-step configuration process.
Make long or complex option forms easier to navigate.
After configuring your heading option, you need to assign the Option Set to the products where you want the heading to appear.
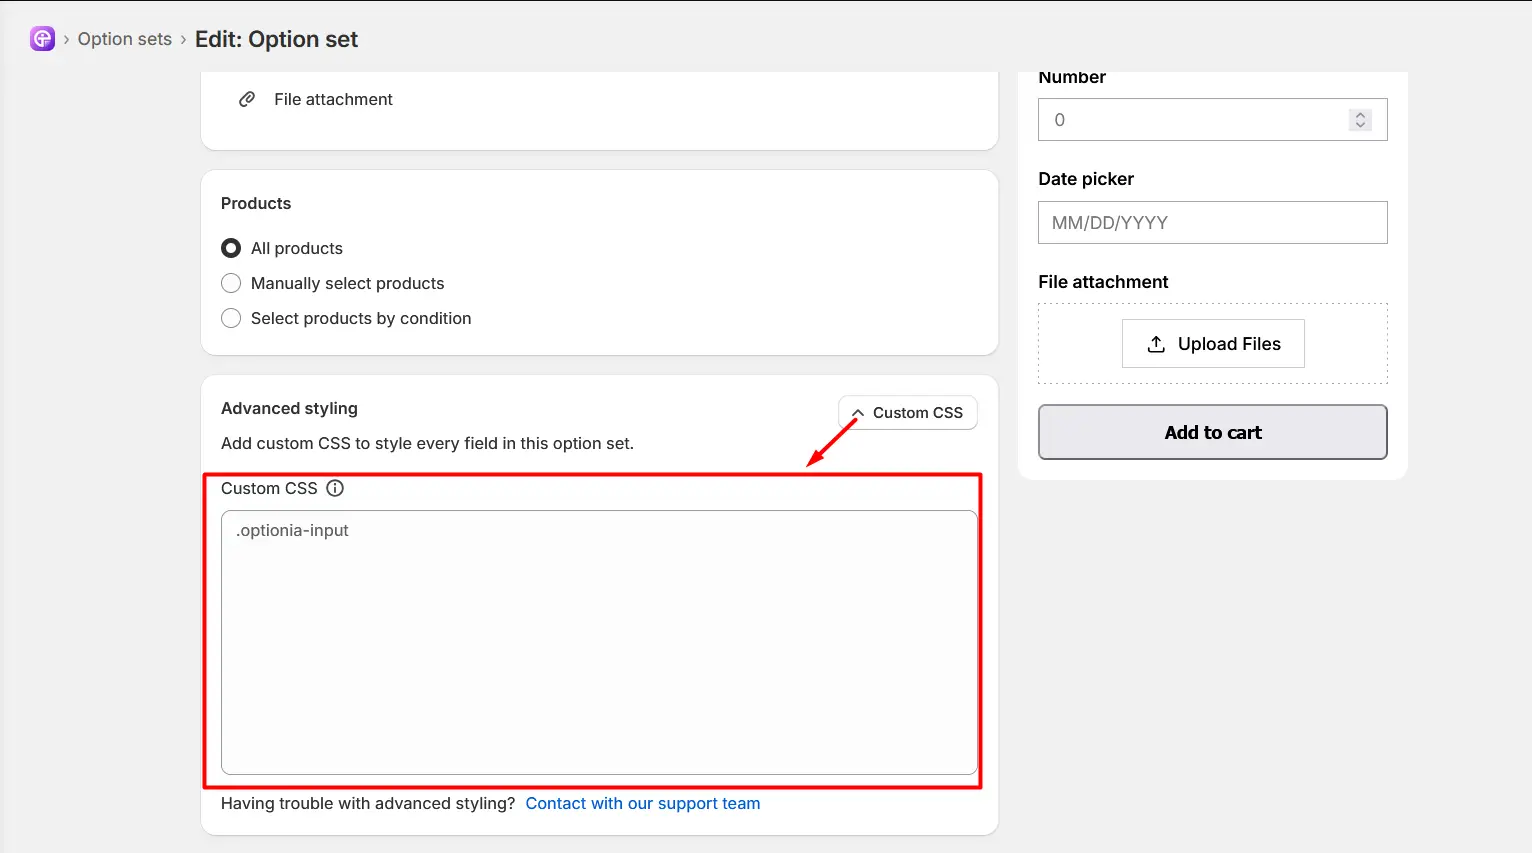
You can find Products at the bottom of the Option Set.
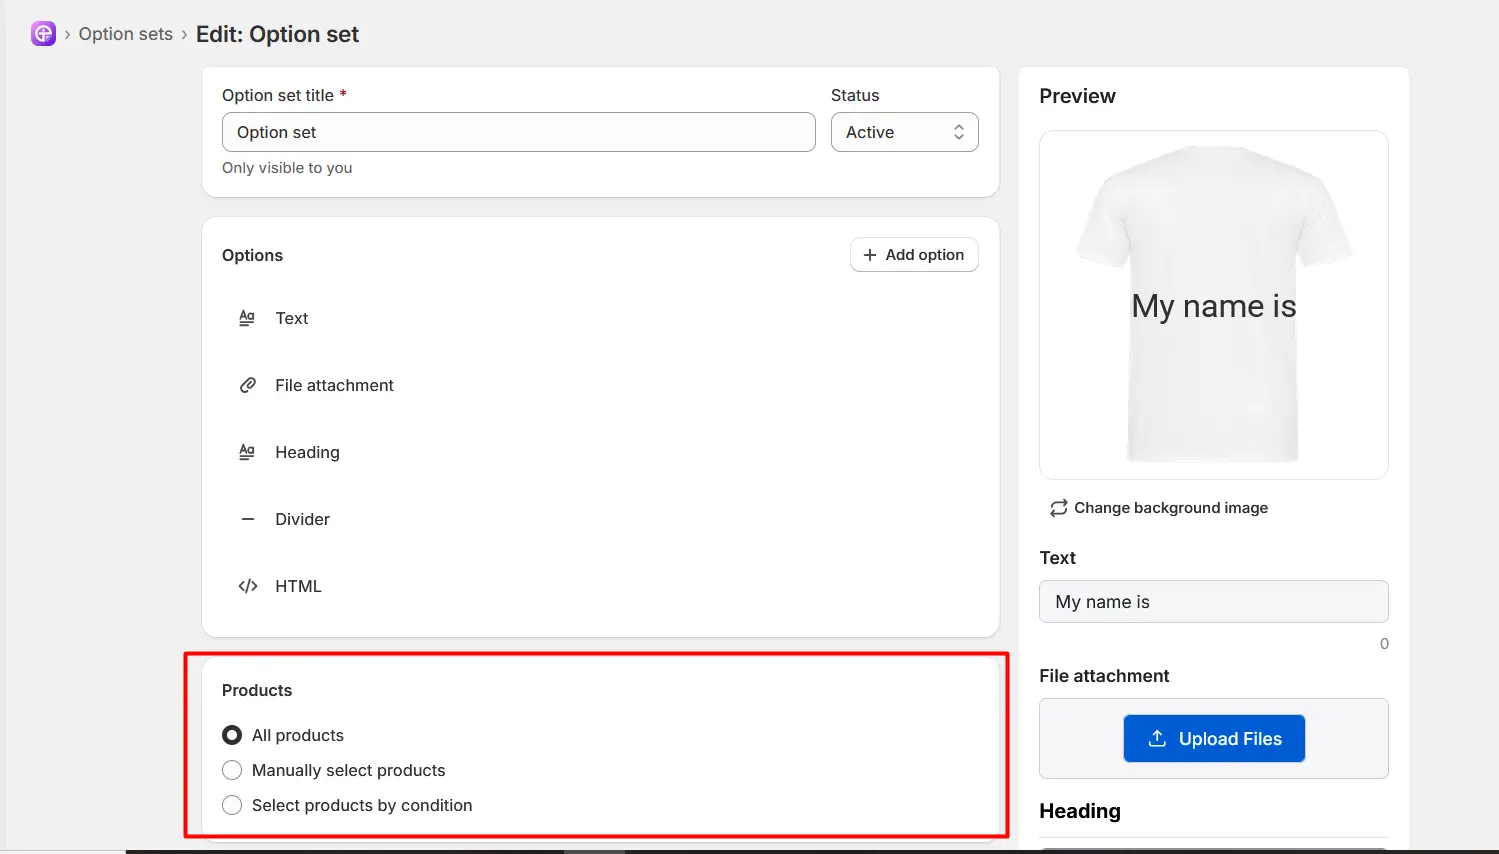
All Products: Select All Products to apply the Option Set to all products in your store.
Manually Select Products: Select Manually Select Products when you want to choose specific products to which the Option Set should be applied.
Select Products by Conditions: Select Products by Conditions when you want to apply the Option Set based on specific product conditions automatically.
You can use the available conditions to determine which products should receive the Option Set.
Important: Each Optionia option includes advanced styling with custom CSS. The text option is no different; you can find the advanced styling option at the bottom.
|
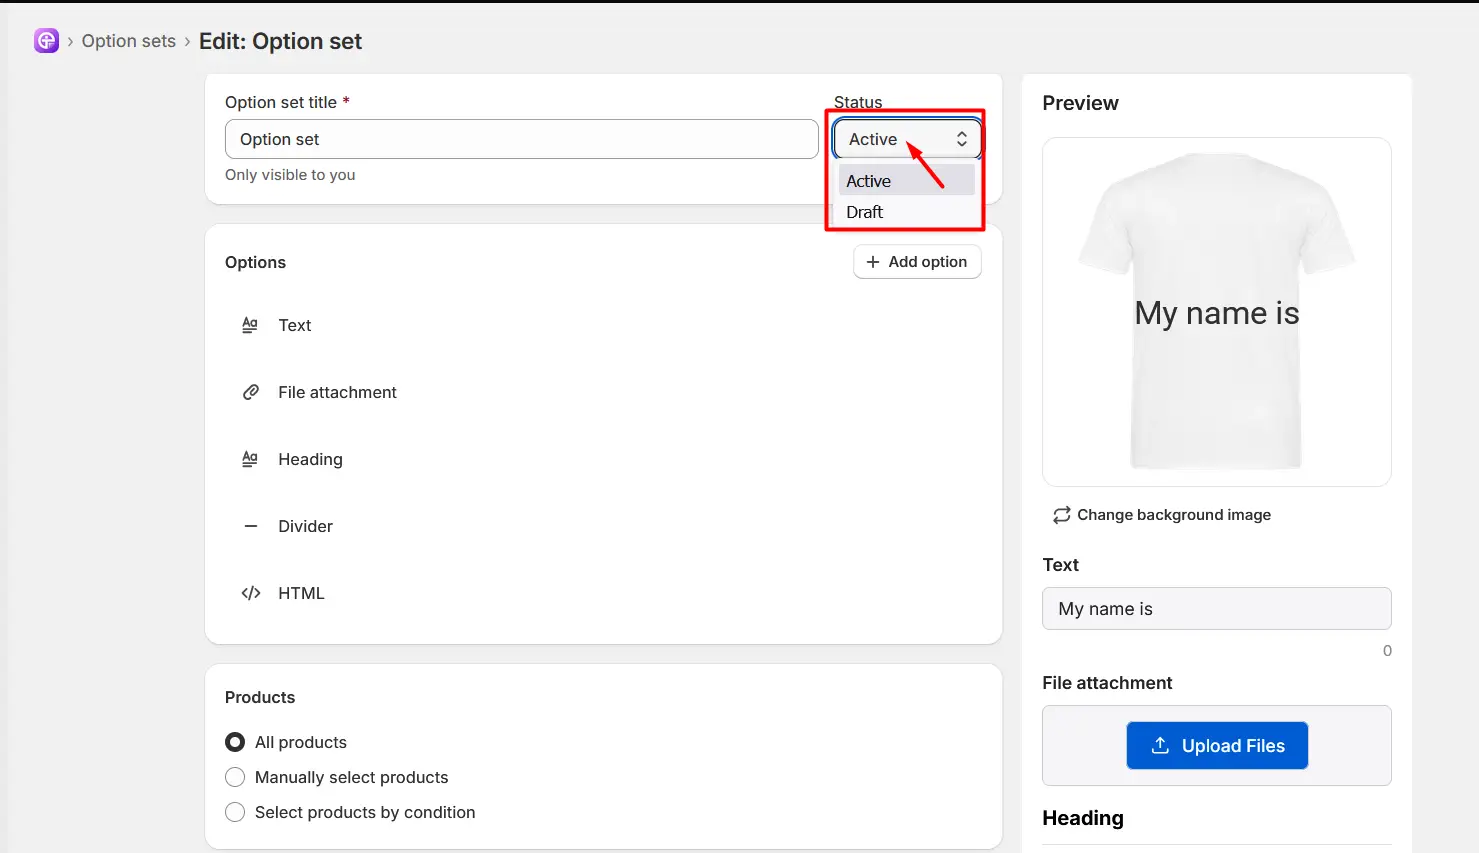
Note: When you create or edit the Option Set, it’s saved as a draft and is only visible in your dashboard. Change the status from draft to active to ensure visibility. You can see the status option right next to the Option Set title.
|
Once the Option Set is active and properly assigned, the Heading will appear on the relevant product pages.
Need Help?
 Getting Started
 Option Sets
 Orders
 Settings
 Configuration
 Live Preview
 Packages
 Help & Support
 Price Add-Ons
 Conditional Logic
 Design Theme Styling
 Uninstallation