After configuring your options, you need to assign the Option Set to the products where you want the options to appear.
You can find the Product section at the bottom of the Option Set. There are three ways to apply an option set to products. You can select from any of these three: All products, Manually select products, Select products with conditions.
Step: Open the option set > scroll down to find the “Product” section > select any of the three radio buttons. |
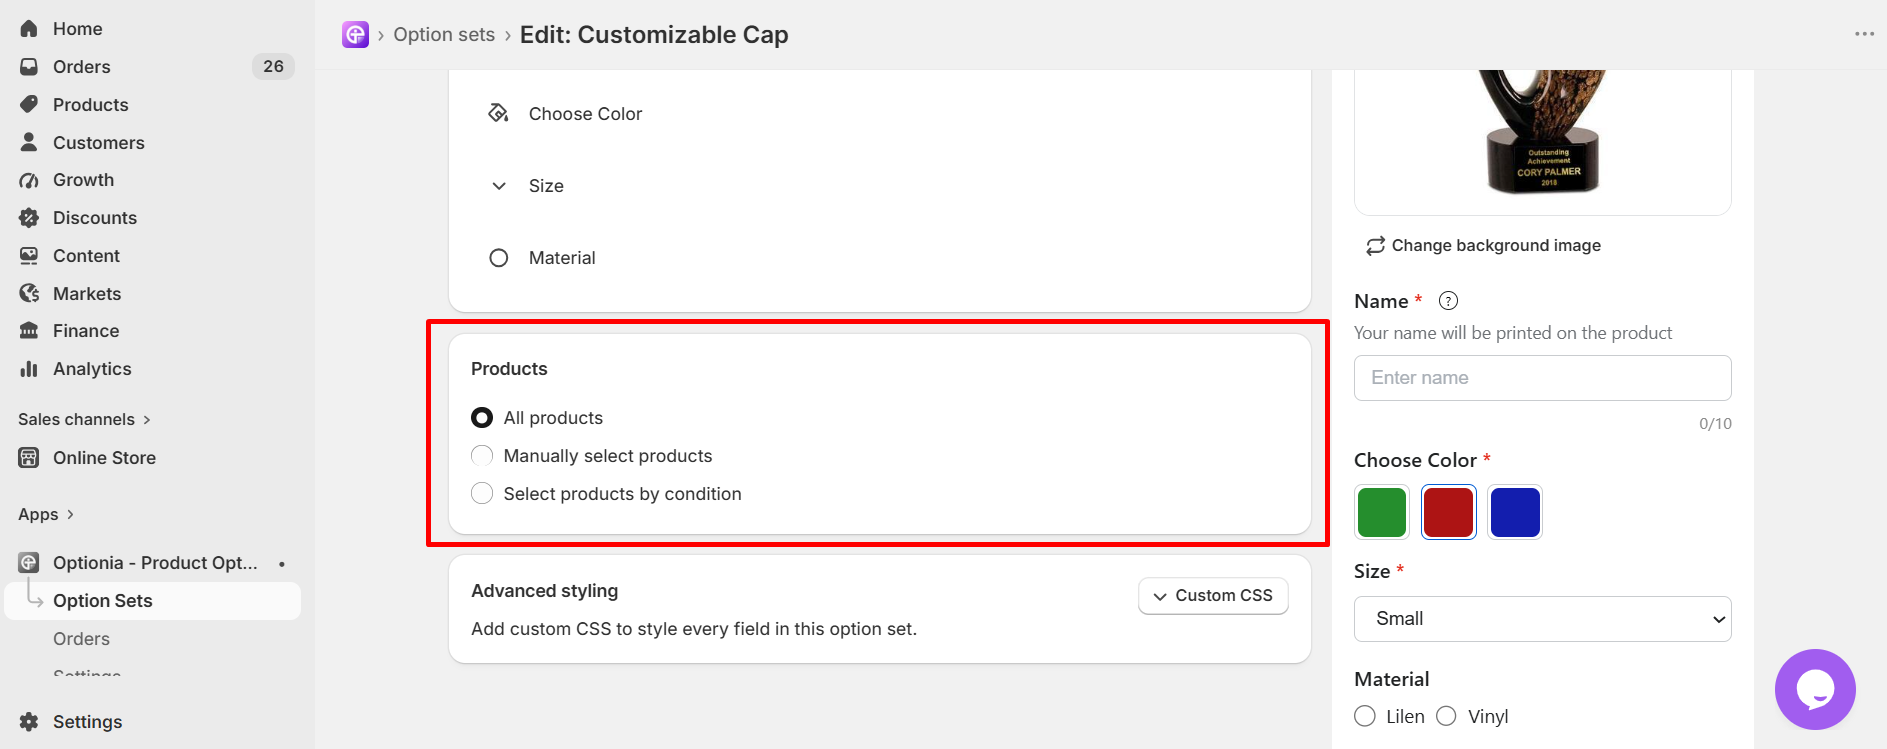
All Products: Select All Products to apply the Option Set to all products in your store automatically.
Manually Select Products: Select Manually Select Products when you want to choose specific products to which the Option Set should be applied.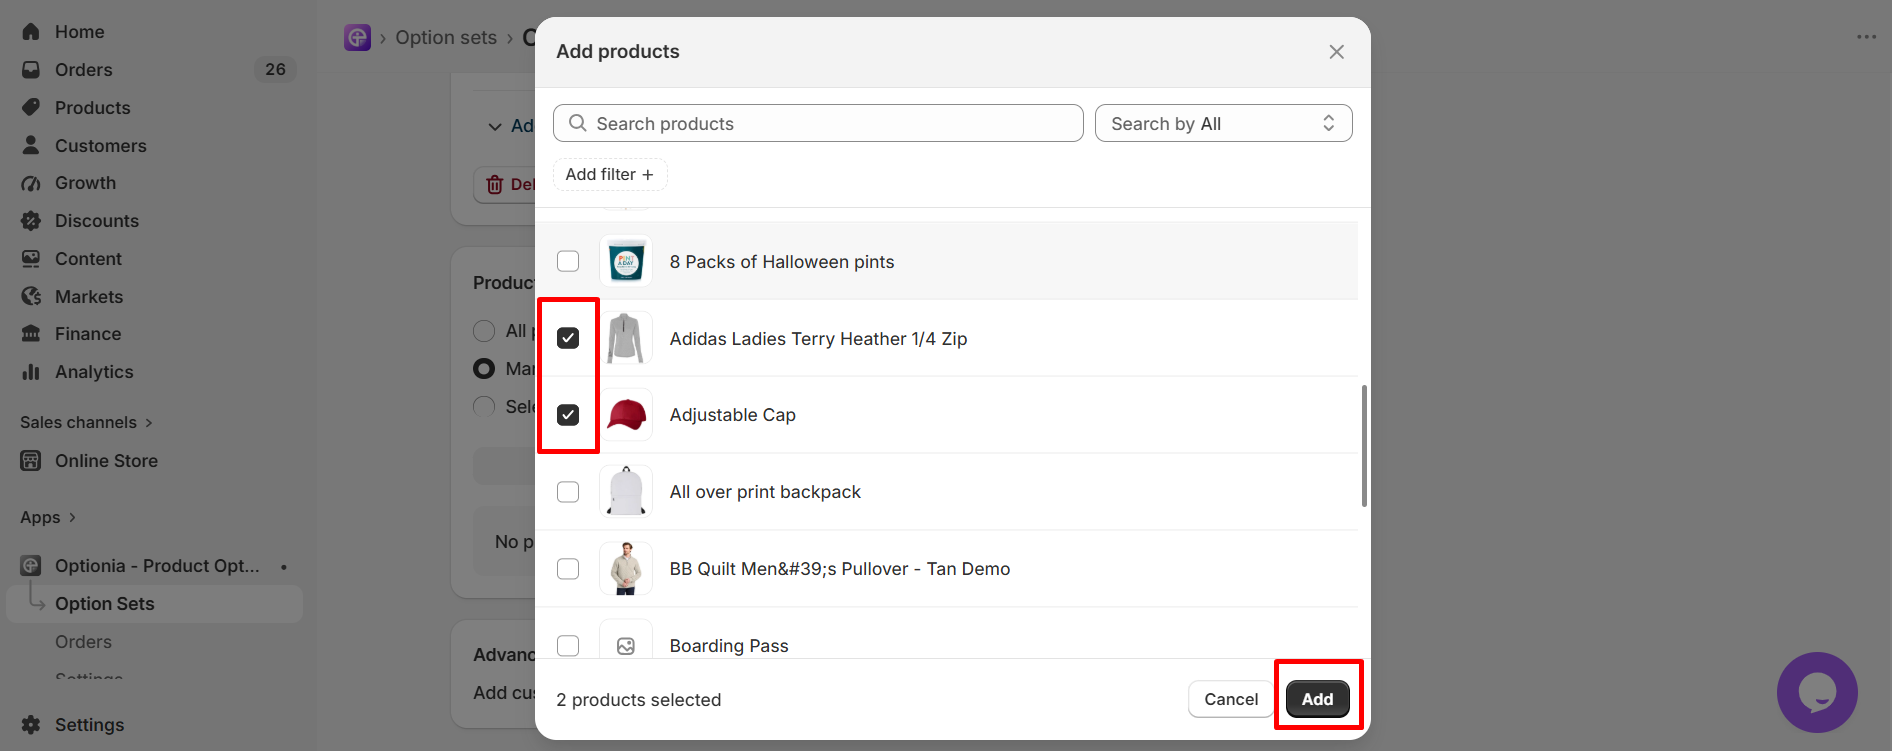 Select your preferred product from the Add product window and click on the "Add" button to apply the option set to those products.
Select Products with Conditions: Select Products with Conditions when you want to apply the Option Set based on specific product conditions automatically. Here is how you can set conditions: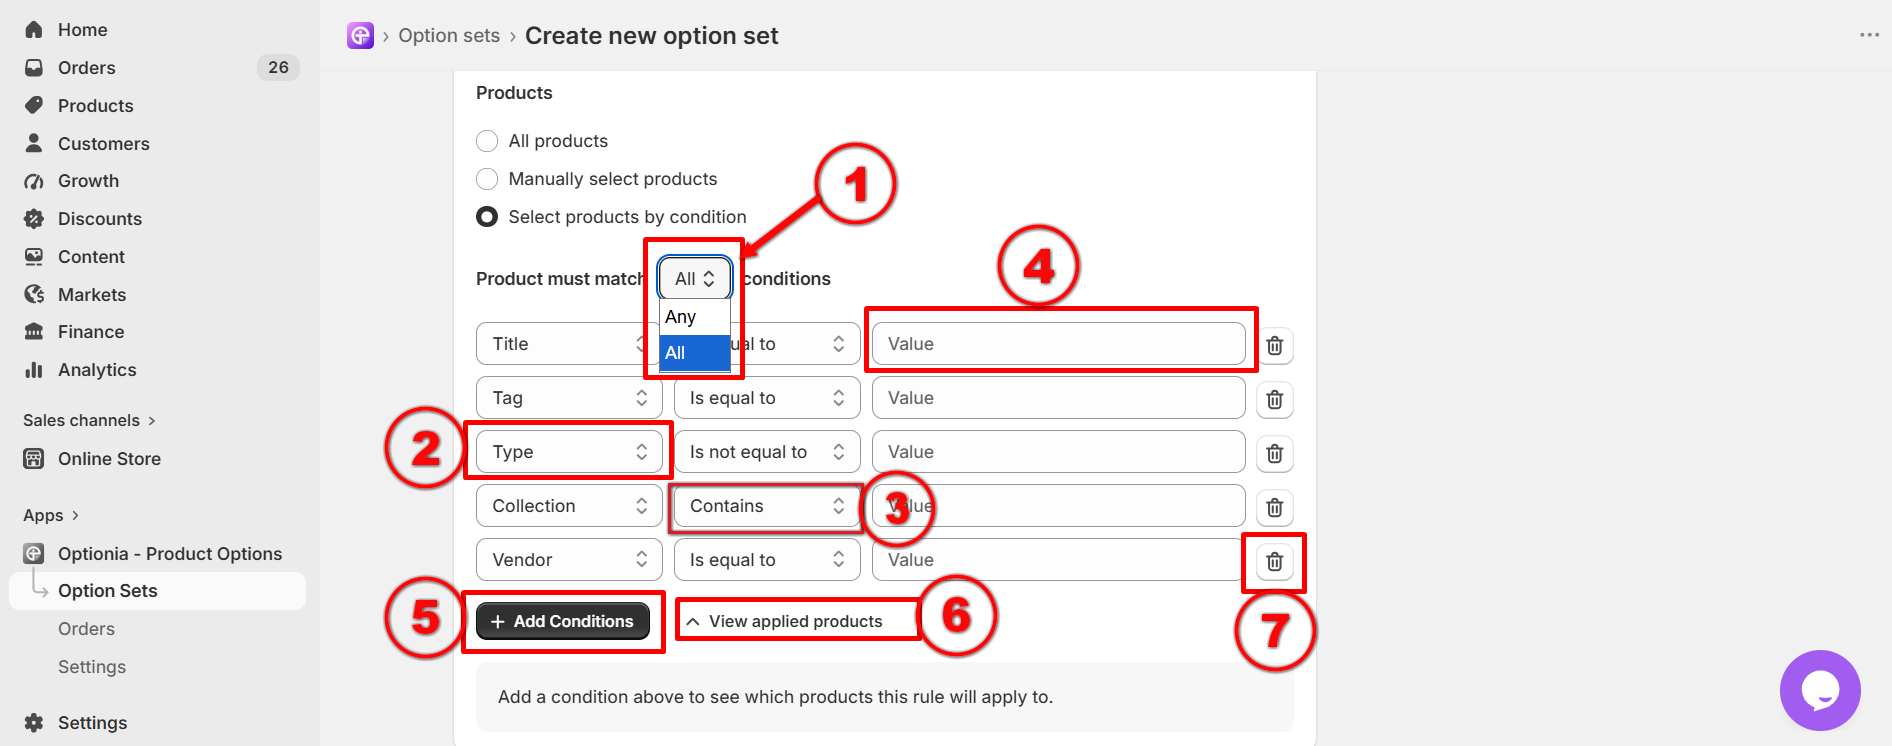
If you set multiple conditions, you can either match all the conditions or any one or two of them. Set the “products must match” option to All or Any.
(a)ALL: A product must satisfy every single condition listed in the rows below to get this option set.
(b)ANY: A product only needs to satisfy at least one condition from the list to get this option set.
This field is to select the product attribute type with which you want to filter the products. Available attribute types are Title, Tag, Type, Collection, and Vendor.
This field allows you to select the condition. Available conditions are Is equal to, Is not equal to, Contains, Doesn’t contain, Starts with & Ends with.
Value field will allow you to add a specific attribute name to match with your selected attribute type.
Example: If your condition is Tag is equal to, typing Bag in the Value box will target all products tagged with "Bag”.
Click on Add conditions to add a more conditions row.
Clicking View applied products will show a list of products in which the option is applied after setting the condition.
Click on the trash icon to delete any conditions.
To learn more about selecting products with conditions, check out this detailed help doc on assigning an option set to products with conditions.
If you have any questions or need assistance, we will be happy to help.
Live Chat for quick assistance.
Submit a Support Ticket for detailed questions or issues.
Email: support@optionia.com
 Getting Started
 Option Sets
 Orders
 Settings
 Configuration
 Live Preview
 Packages
 Help & Support
 Price Add-Ons
 Conditional Logic
 Design Theme Styling
 Uninstallation