Optionia offers flexible pricing plans designed to grow with your business. You can upgrade to a plan with more features as your business grows or downgrade to a plan that better fits your current requirements. This guide will walk you through the simple steps to upgrade or downgrade your Optionia pricing plan.
Upgrading or downgrading your Optionia plan is easy. Here is how you can upgrade or downgrade the Optionia Pricing Plan.
From your Shopify dashboard, navigate to Apps and select Optionia – Product Options to open the Optionia app dashboard.
Once you are inside the Optionia dashboard, look at the navigation menu and click Pricing Plans under the Optionia – Product Options section.
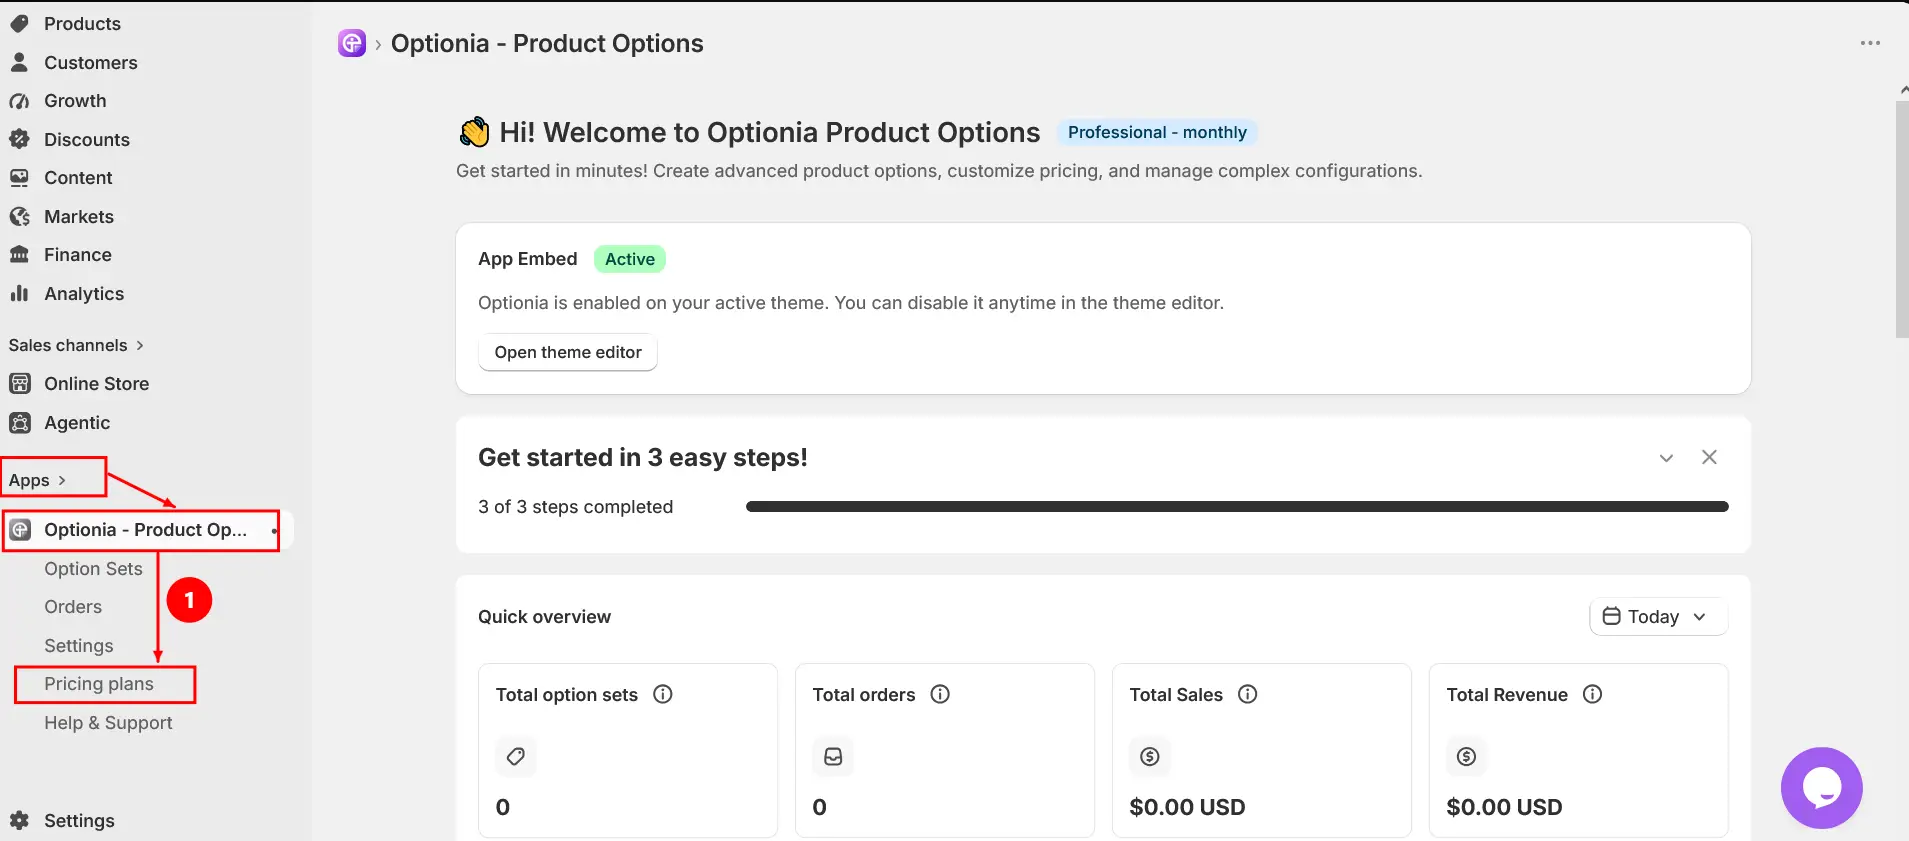
On the Pricing Plans page, you will see all the available pricing plans for Optionia – Product Options. Each plan displays its monthly or yearly price, included features, and an action button that allows you to change your current plan.
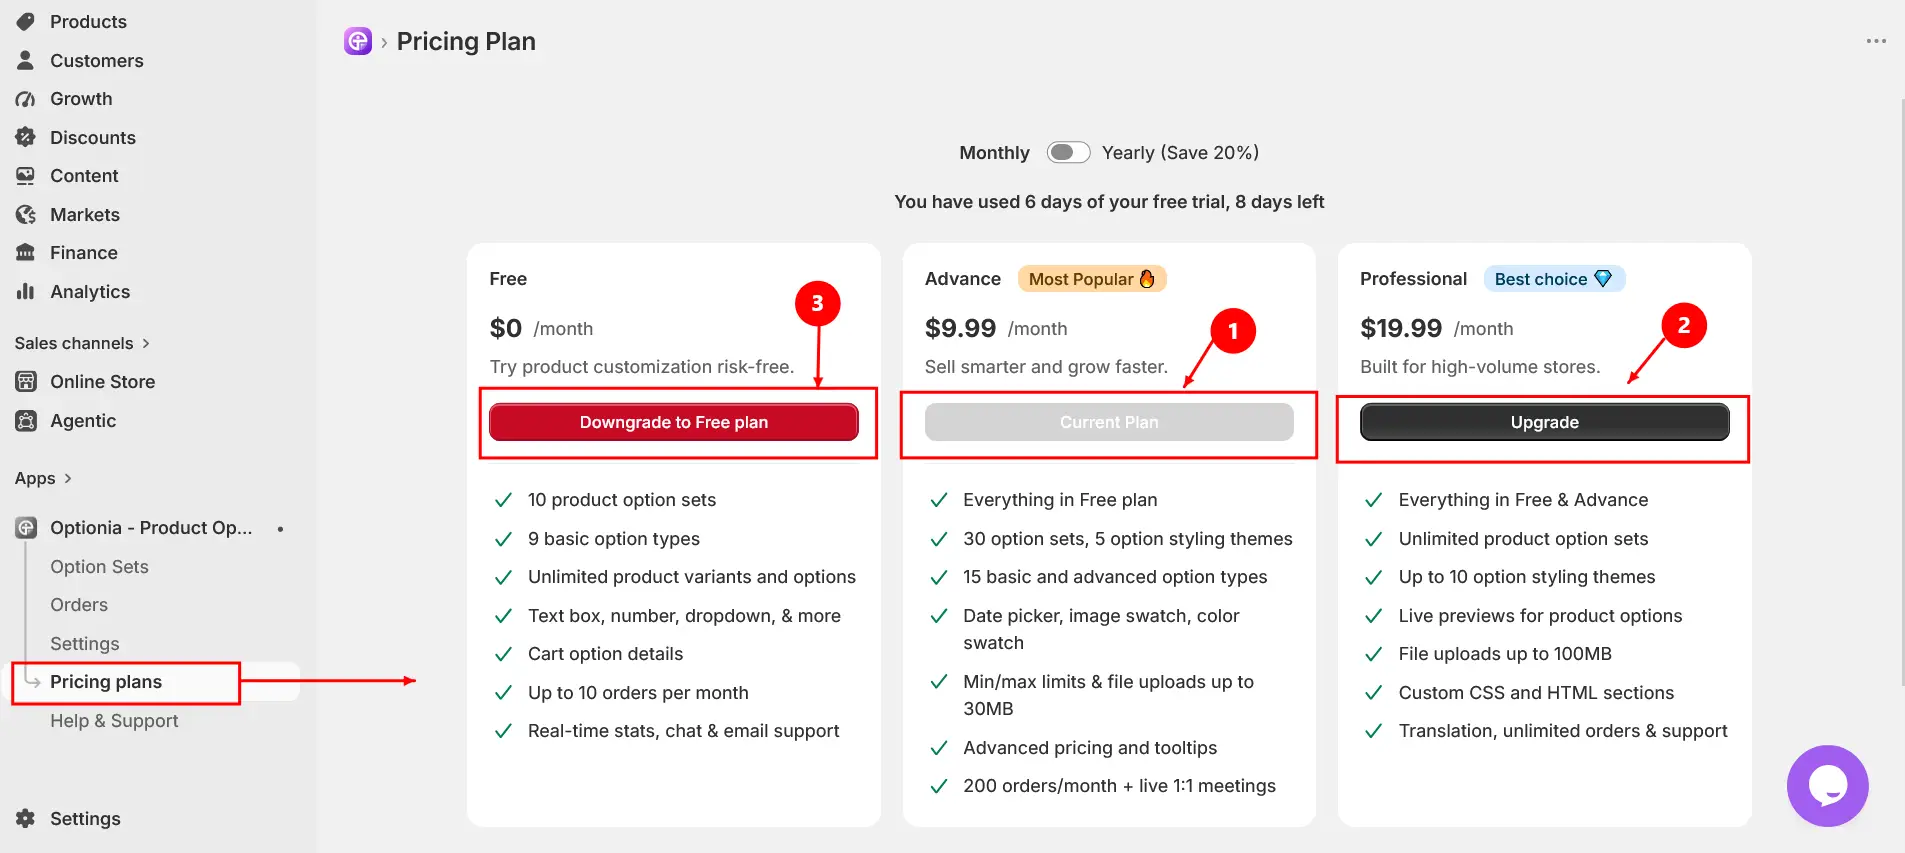
The action button for each plan will vary depending on your current subscription:
Current Plan: This button indicates the plan you are currently using. You do not need to select it unless you are simply reviewing your current plan. In the example, Advance is the current plan.
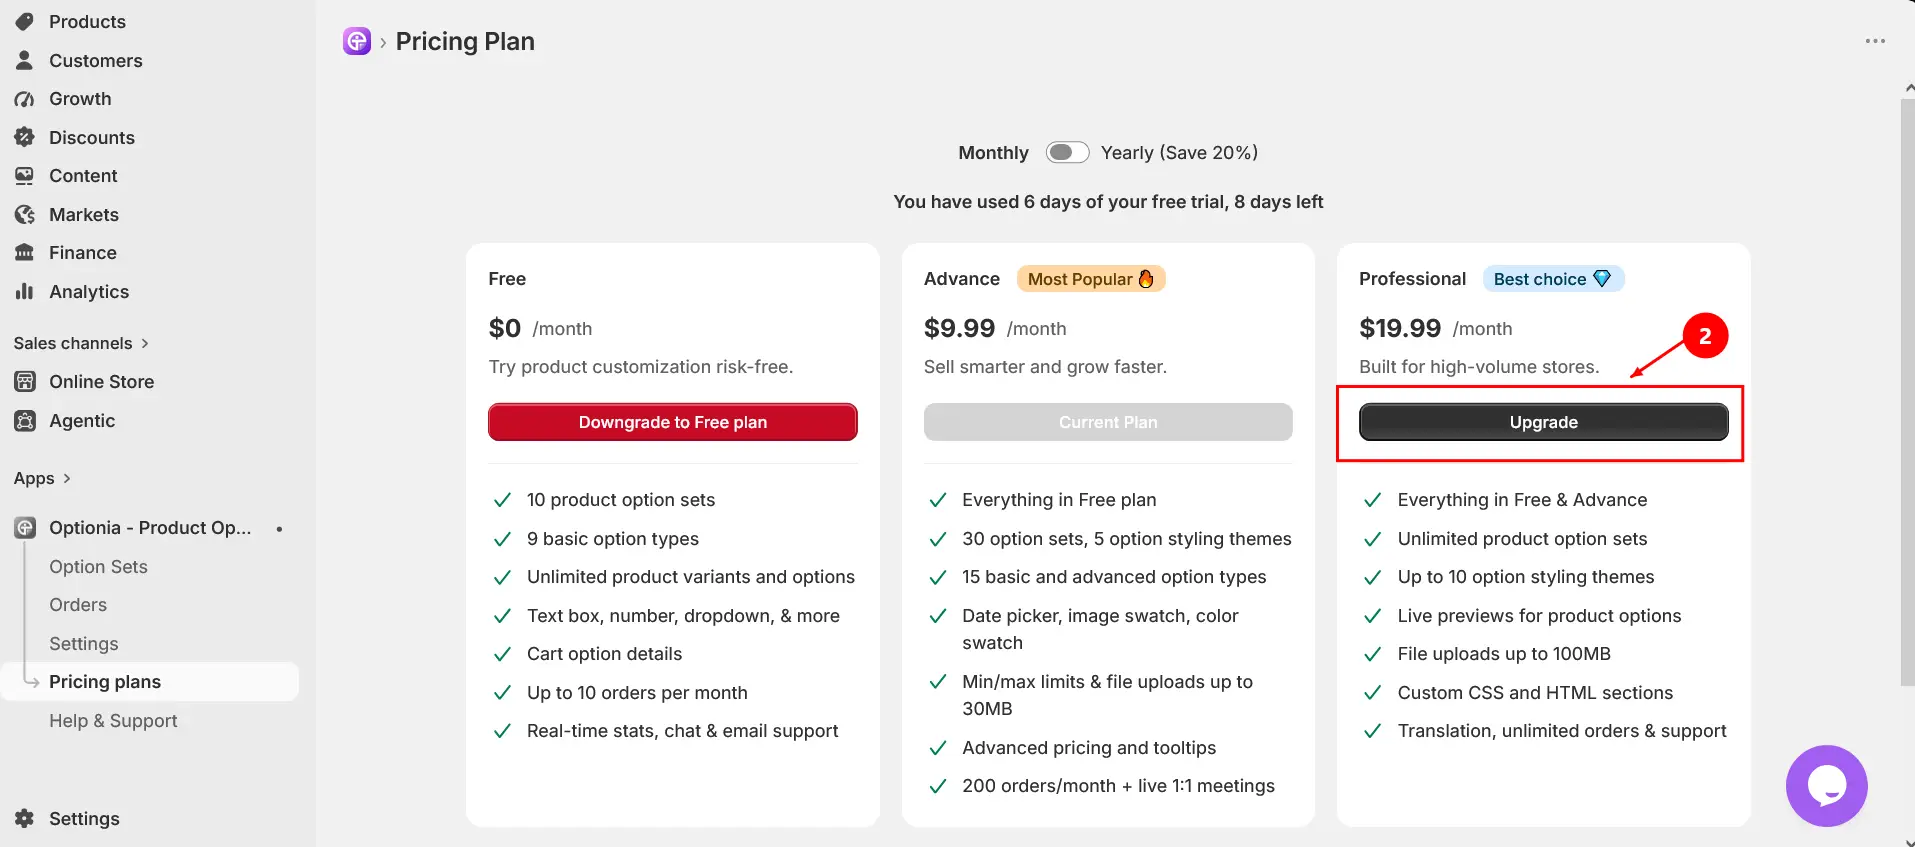
Upgrade: If you want to move from your current plan to a plan with more features and higher limits, click the “Upgrade” button on the desired higher-tier plan. In the example, the Professional plan has an “Upgrade” button because it offers more features than the current Advance plan.
Downgrade to Free Plan: If you want to move to a lower-tier plan with fewer features, click the “Downgrade to Free plan” button on the desired lower-tier plan. In the example, the Free plan has a “Downgrade to Free plan” button because it is below the current Advance plan.
Now that you can see all the pricing plans, select the one you want to upgrade to or downgrade from. Click on the Upgrade/Downgrade button to complete the process.
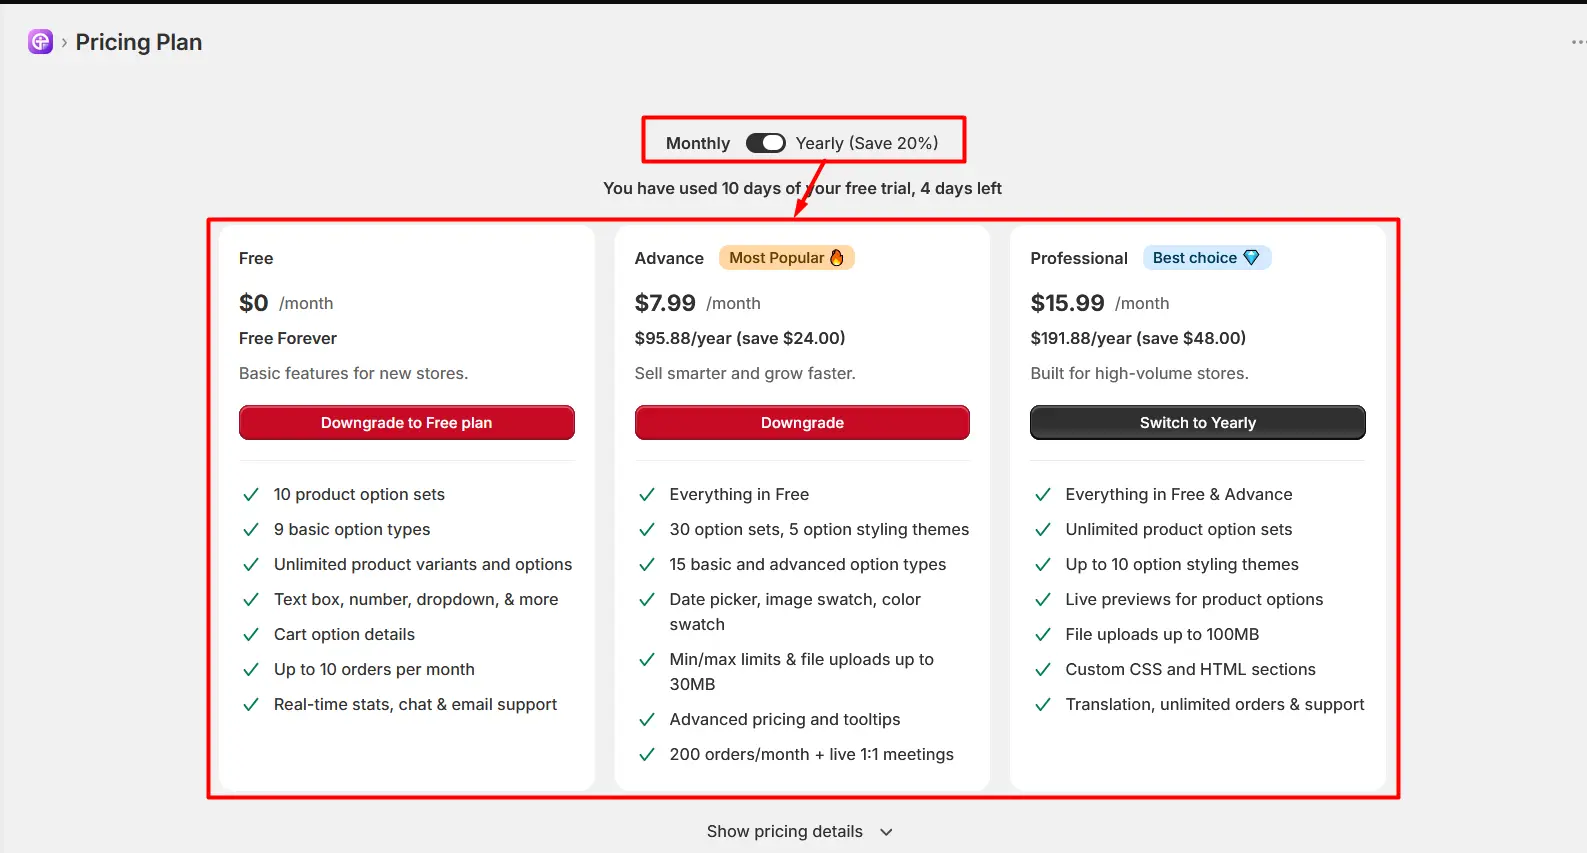
In addition to the Monthly billing option, you can also choose the Yearly plan. The yearly plan allows you to pay annually and save 20% compared to monthly billing.
Use the Monthly / Yearly toggle at the top of the Pricing Plan page to switch between the two billing options and view the available pricing.
After clicking Upgrade for your selected plan, you will be redirected to the Shopify subscription approval page. This page allows you to review the details of your new subscription before confirming the plan change.
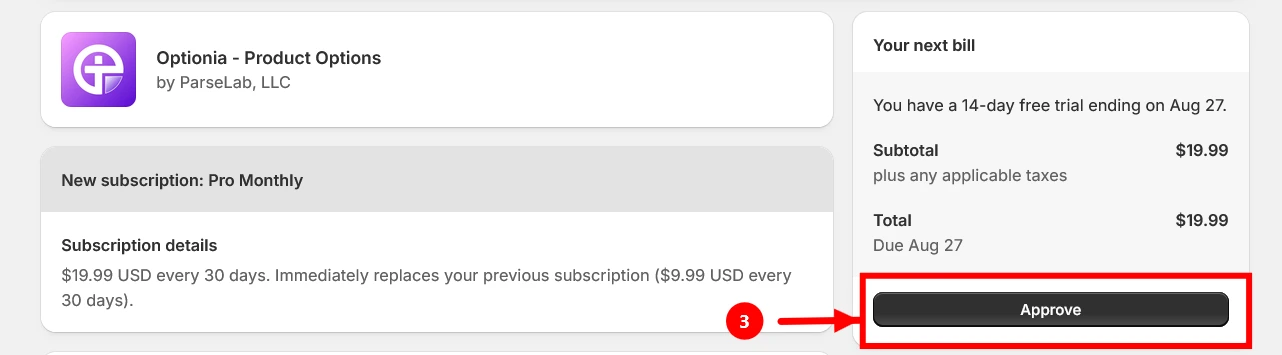
Review the New Subscription: At the top, you can see the name of the new subscription you selected. In the example, the new subscription is Professional Monthly.
Check the Subscription Details: The subscription details show the plan price and billing frequency. In this example, the plan costs $19.99 USD every 30 days and will immediately replace the previous $9.99 USD every 30 days subscription.
Your Next Bill: On the right side, you can see your next billing information, including the trial period, subtotal, applicable taxes, total amount, and the date the payment is due.
Approve the Plan: Once you have reviewed and confirmed that the subscription details are correct, click the “Approve” button to complete the upgrade.
After clicking Approve, your new Optionia plan will be activated according to the subscription terms shown on the approval page. Once you approve the subscription, your selected Optionia plan will be activated automatically. You can return to the Pricing Plans page at any time to review or change your subscription.
Need Help?
 Getting Started
 Option Sets
 Orders
 Settings
 Configuration
 Live Preview
 Packages
 Help & Support
 Price Add-Ons
 Conditional Logic
 Design Theme Styling
 Uninstallation